Adding online booking to WordPress takes seven steps: install WooCommerce, add a booking plugin, and configure your booking rules. The remaining steps set up payments, publish the form, and manage every reservation. Done right, customers reserve a slot and pay without emailing or calling you.
This guide walks the WooCommerce path end to end, using ARB as the featured plugin. Expect about 30 to 60 minutes for your first working form, no code required.
What Is Online Booking on WordPress?
Online booking on WordPress lets a visitor pick a date, time slot, or resource and pay through your site. There is no phone call or email required. WordPress has no booking system built in, so you add one with a plugin. By the end of this guide, you will have a live booking form that takes reservations and payment automatically.
That form looks different across businesses. A consultant needs one appointment slot, a guesthouse needs a nightly rate, and a class needs a per-person ticket. See these online booking system concepts for a sense of the range. Browse real booking website examples across different verticals before you start building your own.
What You Need Before You Start
The prerequisite most people miss is a WooCommerce install. A booking plugin extends WooCommerce, so you need the store layer running before you add booking rules or take a payment. Gather these five things before you start.
- A self-hosted WordPress site with admin access.
- Hosting and a domain already connected.
- A payment gateway account, such as Stripe or PayPal.
- Your services, pricing, and availability decided in advance.
- A WooCommerce booking plugin (the type this guide demonstrates).
Budget 30 to 60 minutes for your first form once WooCommerce is installed. Most of that time goes to setup, not decision-making, if your pricing and availability are already settled.
This guide demonstrates ARB as the featured WooCommerce-native booking plugin. Follow the adding booking to WooCommerce walkthrough if you want that setup covered on its own first. Read the broader guide to build a booking website if you are still planning the whole site.
Ways to Add Online Booking to WordPress
Three distinct methods add booking to a WordPress site, and they trade off differently on where payment happens. A hosted scheduling link keeps everything on a third-party platform. An embedded form pulls that same third-party booking widget onto your page. A native WooCommerce booking plugin runs the booking and the payment inside your own store.
| Method | Best for | Payments in your store? |
|---|---|---|
| Hosted scheduler link or button | A quick setup with no development work | No, processed on the scheduling service's own platform |
| Embedded third-party booking form | Basic date picking with some on-page branding | Usually no, the booking still completes on the provider's system |
| Native WordPress or WooCommerce booking plugin | Complex rules: per-person pricing, resources, capacity | Yes, runs through your store's existing checkout |
Free and simple plugins cover basic date picking well. A premium plugin earns its price when you need per-person or per-resource pricing, dynamic pricing rules, or hard capacity limits. This guide demonstrates ARB, a native WooCommerce booking plugin, because payments, taxes, and coupons need to live in one system once your rules get complex.
ARB itself carries a one-time license fee of around $55 on CodeCanyon, not a subscription, and it has no free tier. That is a deliberate trade-off, not a pitch. If your booking needs are simple, a free plugin is enough, and you should use one instead. See this list of best WooCommerce booking plugins to compare several native options side by side. Go straight to the ARB booking plugin product page if ARB already fits.
How to Add Online Booking to WordPress: Step-by-Step
Here is the full setup on the WooCommerce path, using ARB as the booking engine.
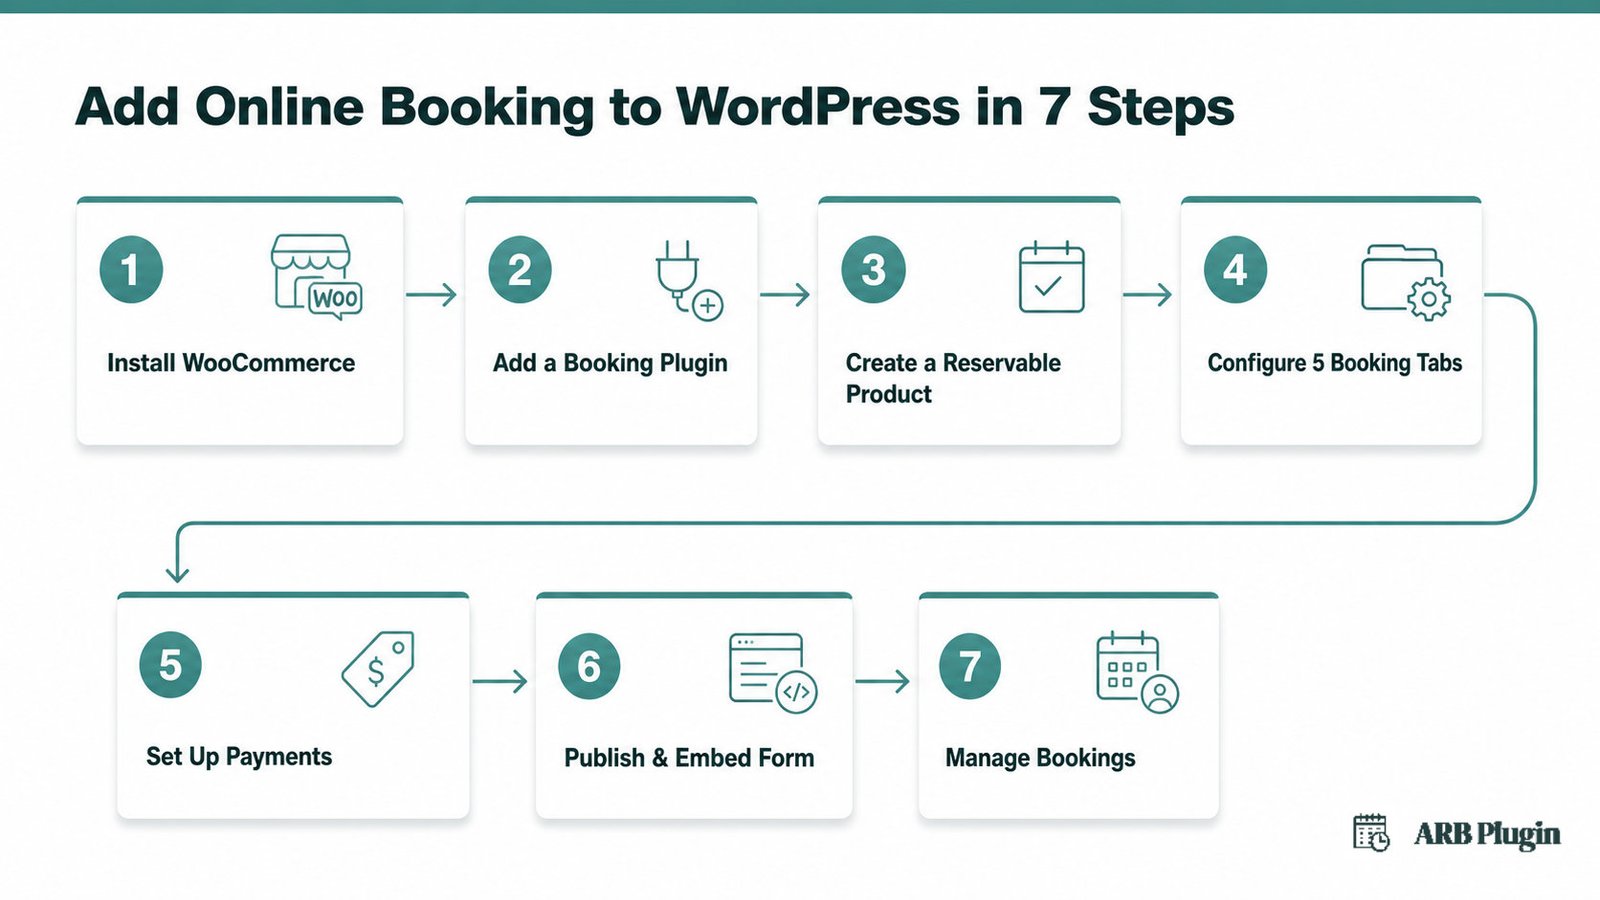
Step 1: Install and Set Up WooCommerce
A booking plugin extends WooCommerce, so install the store layer first. WooCommerce provides the cart, checkout, and payment gateway that every reservation runs through.
- In your WordPress dashboard, go to Plugins > Add New and search for WooCommerce.
- Click Install Now, then Activate.
- Run the setup wizard: confirm your store address, currency, and at least one payment method.
ARB requires an active WooCommerce installation and will not function without it. It adds a new WooCommerce product type, not a separate booking system. See WooCommerce's own installation documentation for platform-specific detail.
Done: WooCommerce is active, and the setup wizard shows your store address, currency, and a connected payment method.
Step 2: Install and Activate Your Booking Plugin
WordPress plugins install one of two ways, depending on where you got them. Install a free plugin from the WordPress plugin directory by searching for it under Plugins > Add New, then clicking Install Now and Activate.
The premium path, the one this guide demonstrates with ARB, uses a ZIP file instead.
- Download the plugin ZIP file from your CodeCanyon purchase, or upload it via FTP to
wp-content/plugins/. - In your WordPress dashboard, go to Plugins > Add New > Upload Plugin.
- Choose the ZIP file, click Install Now, then Activate.
- Open ARB Settings, paste the 9-digit Activation Token Number from your Envato purchase code, and click Save.
Once activated, ARB updates itself automatically through the Envato Market plugin, which connects to your Envato account with OAuth.
Done: ARB shows as active in your Plugins list, and ARB Settings confirms the Activation Token Number was accepted.
Step 3: Create a Reservable Product
Every ARB booking starts as a WooCommerce product with a special type applied. Go to Products > Add New, add a title and description, then open the Product Data dropdown and choose Reservable Product.
Selecting Reservable Product exposes booking fields across five tabs: General, Availability, Costs, Persons, and Resources. This product page is now the booking form itself, not a separate system bolted onto WooCommerce. Step 4 configures each of those five tabs.
For a deeper walkthrough of this single step, see create a Reservable Product.
Done: your product's Product Data type is set to Reservable Product, and the five configuration tabs are visible.
Step 4: Configure the Booking Rules Across the Five Tabs
The five tabs, General, Availability, Costs, Persons, and Resources, control duration, capacity, pricing, participant limits, and per-resource setup. Configure Availability early: it prevents double-booking, the single most damaging mistake in this whole setup.
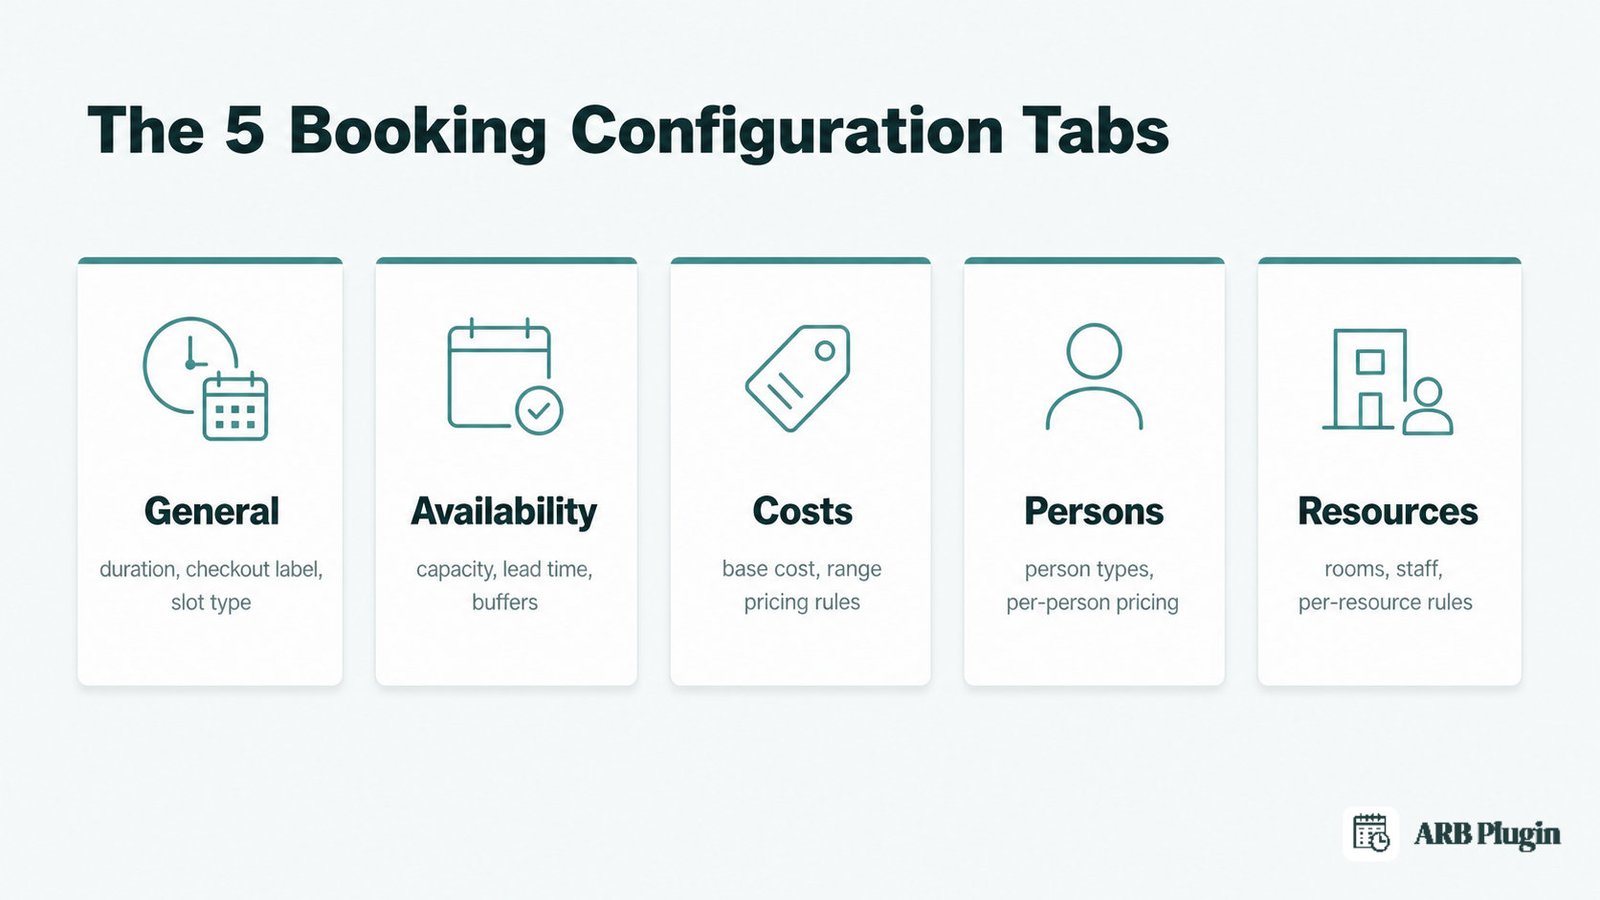
General. Set the Label field shown at checkout, such as "Duration" or "Ticket". Choose Reservation Duration: customer-defined slots, where the customer picks the count, or fixed slots. Duration units range from minutes to months. Turn on Count Duration as Item if the field should count as a quantity, like a number of meals. Each booking then counts as one, regardless of the quantity entered.
Availability. Set Max Reservations per Slot to cap how many bookings one slot can hold. This is the direct fix for "never worry about being double booked," ARB's own framing of its core promise. Also configure these fields.
- A minimum lead time before a slot becomes bookable.
- A booking horizon, the furthest date customers can book ahead.
- A vacant period, a required buffer between reservations for cleanup or travel time.
- Availability ranges by date, day, or time, including blocked-out windows.
For example, a 45-minute massage slot with a 15-minute vacant period keeps back-to-back bookings from running into each other. See set up booking availability and set buffer time between bookings for the full field-by-field detail.
Costs. Set a Base Cost and, optionally, a cosmetic Display Cost. Add Range pricing rules by slot count, person count, date, time, or day of week. The front end recalculates the total in real time as the customer changes their selection. A $20 weekend surcharge and a midweek discount are both single Add Range entries.
Persons. Turn on Enable Persons to add named person types, such as Adult and Child, each with its own minimum, maximum, and price. Turn on Count Persons as Items if five people booked should count as five reservations against your capacity. This tab is also how you offer group bookings with per-person pricing.
Resources. Turn on Enable resources to add bookable things customers choose from, such as a room, a staff member, or a car type. Each resource carries its own price and its own availability. A second staff member can work different hours than the first without any conflict.
Done: all five tabs are configured for at least one real scenario, and Max Reservations per Slot is set to a number greater than zero.
Step 5: Set Up Payments
Because bookings run through WooCommerce checkout, enable a payment gateway in WooCommerce > Settings > Payments. ARB does not run a separate payment system.
- Go to WooCommerce > Settings > Payments.
- Enable at least one gateway. Every WooCommerce-supported option works, including Stripe, PayPal, Square, and several others.
- Complete that gateway's connection details (API keys or an account login, depending on the provider).
Turning on "required confirmation" in ARB changes this flow. No payment method shows at checkout, and the customer pays afterward through their My Account page, once you approve the booking. Use Request for Quote (RFQ) mode instead when you need to set a custom price per booking.
See accept payments for appointments and accept Stripe for bookings for gateway-specific setup, and WooCommerce's own payment gateway documentation for platform detail.
Done: a payment gateway is enabled and connected, and you have decided whether required confirmation or instant payment fits your business.
Step 6: Publish and Embed the Booking Form
Every Reservable Product already has its own page, so publishing the product publishes the form. To place that same form somewhere else, such as a landing page, use the [product_page id="ID"] shortcode with your product's ID.
- Copy your Reservable Product's ID from its edit screen.
- Paste
[product_page id="ID"]into any page or post, or into the Elementor Shortcode widget if you build pages with Elementor. - WPBakery Page Builder places the same shortcode natively, with no extra widget needed.
- Adjust form colors and layout in ARB Settings if you need to match your site's design.
You can publish unlimited booking forms this way, one Reservable Product per service or resource type. See embed a booking form and Elementor booking form for page-builder specifics.
Done: the booking form is live on a public page, and a test booking runs through checkout successfully.
Step 7: Manage Bookings, Confirmations, and Reminders
Every booking lands in Reservations > All Reservations, where you filter, search, and open individual orders. From an order, add a private note, email the customer an invoice, or change its status to confirmed, rescheduled, or cancelled.
Send Notification handles reminders. Send a single reminder, or a bulk batch to everyone with an upcoming reservation for a product, using the {customer_name} dynamic tag to personalize the message. Each reminder can attach an iCalendar (.ics) file, so the customer's own calendar app picks up the appointment. The Daily Agenda view (added in ARB 8.0.0) gives you a single-day overview of everything booked.
For related admin workflows, see manage bookings in WooCommerce, send appointment reminders, and the ready-made appointment reminder email template and booking confirmation email template. To cut no-shows and handle cancellations cleanly, see reduce no-shows and manage booking cancellations.
Done: you can find any reservation from the list view. A test reminder email sends with the correct customer name and an attached .ics file.
Common Mistakes to Avoid When Adding Online Booking
The most damaging mistake is leaving capacity and confirmation settings misconfigured, so customers either double-book the same slot or cannot pay when they expect to. Five mistakes account for most of the setup problems people hit.
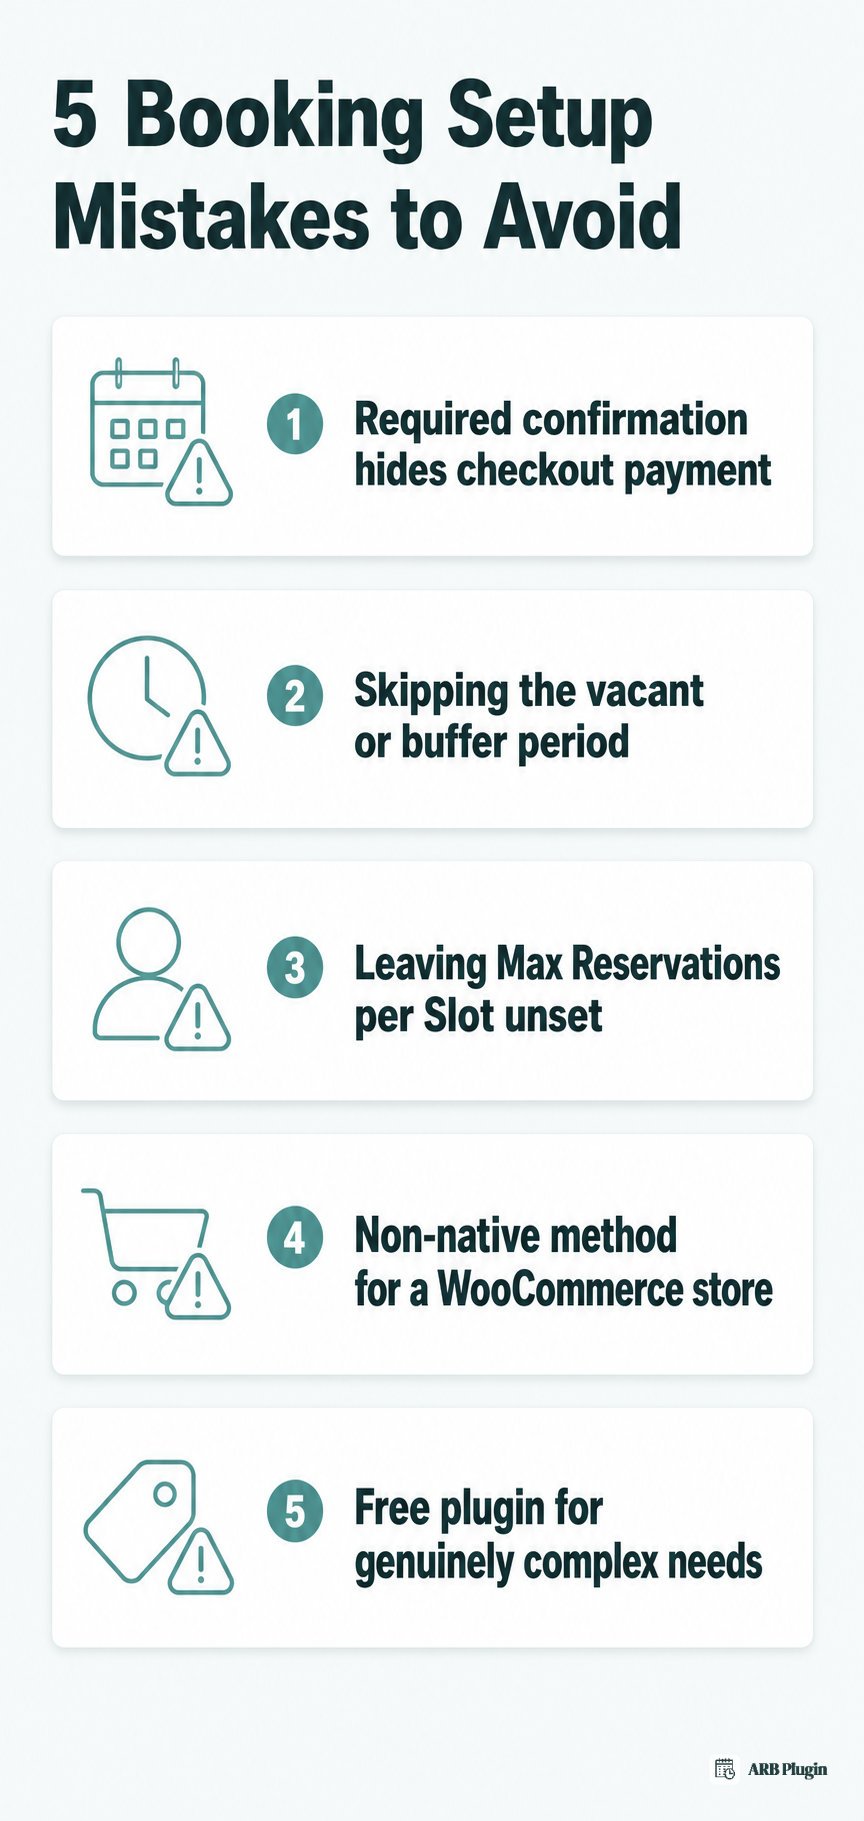
- Turning on required confirmation without realizing it hides payment at checkout. Customers expecting to pay immediately reach checkout and see no payment method. Fix: disable required confirmation for instant-pay bookings, or set clear expectations that payment happens after approval, via My Account. Pair this with a written cancellation policy template so customers know the cutoff for changes.
- Skipping the vacant or buffer period. Back-to-back bookings with zero gap leave no time for cleanup, travel, or setup between appointments. Fix: set a Requires a Vacant Period value that matches your real turnaround time.
- Leaving Max Reservations per Slot unset. An unset or misconfigured capacity limit is the direct cause of double-booking, the pain ARB's own "never worry about being double booked" promise targets. Fix: set a capacity per slot and, where relevant, per-resource availability too.
- Choosing a non-native booking method for a WooCommerce store. When payments, taxes, and coupons live in a separate system from your store, reconciling orders across two systems breaks down over time. Fix: use a WooCommerce-native plugin so checkout, tax, and every gateway work automatically.
- Picking a free or simple plugin for genuinely complex booking needs. Per-person pricing, per-resource availability, and dynamic pricing rules hit a hard wall in basic plugins, forcing a re-platform later. Fix: match plugin capability to your actual booking complexity before you build, not after.
FAQs
Does WordPress have built-in online booking?
No. WordPress ships with no booking or scheduling system by default. You add booking functionality with a plugin, either a free option for basic date picking or a premium WooCommerce-native plugin for complex rules.
What is the best booking plugin for WordPress?
It depends on your booking complexity. Basic date picking works with several free options. Stores needing per-person pricing, per-resource availability, or dynamic pricing need a WooCommerce-native plugin built for that depth instead.
Can I add online booking to WordPress for free?
Yes, for simple needs. Free plugins handle basic date and time picking well. Once you need per-person or per-resource pricing, capacity rules, or dynamic pricing, a premium plugin earns its price.
How do I make a booking link versus an embedded form?
A booking link sends customers to a hosted scheduling page on another platform, with no setup on your site beyond the link itself. An embedded form pulls that same booking widget onto your own page, though the booking usually still completes on the provider's system.
Do I need WooCommerce to take booking payments?
Yes, on the WooCommerce-native path this guide shows. WooCommerce provides the checkout, tax handling, and every payment gateway ARB uses; there is no separate payment system to configure.
How long does it take to set up online booking on WordPress?
About 30 to 60 minutes for a first working form, once WooCommerce is already installed. Most of that time goes to setup and testing, not design decisions, if your pricing and availability are already settled.
Can customers pay a deposit for a booking?
Not natively in ARB. There is no built-in deposit or partial-payment feature. The closest workaround is Request for Quote mode or a confirmation-first flow, where you set a custom price before the customer pays. See take a deposit for bookings for deposit approaches that work around this gap.
Can I sync bookings to Google Calendar?
Yes, two ways. Every booking exports as an iCalendar (.ics) file in the core plugin, importable into Google Calendar manually. Automated one-way sync needs the paid Google Calendar add-on. See sync bookings to Google Calendar for setup.
Can I take recurring or multi-day bookings?
Yes. Reservation Duration supports units from minutes to months, including weekly and monthly bookings. A single reservation can span multiple days. See recurring bookings for the exact setup of longer or repeating schedules.
Can I run booking for verticals like hotels or salons?
Yes. The same seven steps power a hotel booking website, a salon booking website, or a rental website. Only the resources, person types, and pricing rules change per vertical.
You now have the full WordPress booking setup, from installing WooCommerce to managing reservations and reminders. If you want the WooCommerce-native path with per-person and per-resource pricing and no double-booking, ARB handles it for a one-time price. Try the live ARB demo and run a booking yourself before you commit.