WooCommerce ships with no booking system, so adding one takes a dedicated plugin. Seven steps get you there: install the plugin, build a bookable product, and set availability and pricing. Then connect a gateway, display the form, test the flow, and manage bookings. This guide uses ARB, a WooCommerce-native plugin sold as a one-time purchase, for the walkthrough.
Below: choosing a plugin, setting up ARB step by step, and testing the finished booking flow.
Why WooCommerce needs a booking extension to take bookings
WooCommerce core ships five product types, simple, variable, grouped, virtual, and downloadable, and none of them handle calendars, time slots, or capacity limits. A booking extension adds a sixth type built for exactly that: a bookable product with its own availability rules and time-slot logic. WooCommerce has no native booking system, so a booking plugin is required, not optional.
The official WooCommerce Bookings extension describes its own job plainly: letting a store offer appointment-based bookings, rentals, reservations, and time-based services through its existing site. That is the category a booking plugin fills, whichever plugin you choose.
A booking extension typically adds:
- A bookable or reservable product type with its own admin fields
- A calendar or slot picker on the front end
- Availability rules (lead time, booking horizon, buffers)
- Capacity limits that block double-booking
- An admin screen to view, edit, and confirm bookings
Once the extension is active, the new product type slots into your existing catalog. You create it the same way you create any other WooCommerce product, then configure booking-specific fields under Product Data. If you are building on plain WordPress rather than WooCommerce, see the tool-agnostic guide to add online booking to WordPress first.
Choose a WooCommerce booking plugin (honest short comparison)
Four WooCommerce-native booking plugins cover most stores, and they split mainly on license model and price. WooCommerce Bookings is the official extension, ARB is the cheapest one-time option, and YITH and PluginHive sit between them on price and feature depth.
| Plugin | License | Price | WooCommerce-native | Standout |
|---|---|---|---|---|
| WooCommerce Bookings | Subscription | $249/year | Yes | First-party extension; native two-way Google Calendar sync |
| ARB (Fluent-Themes) | One-time | ~$55 | Yes | Range-based dynamic pricing; used in this guide |
| YITH Booking & Appointment | Subscription | $249.99/year | Yes | Large YITH plugin ecosystem |
| PluginHive Booking & Appointment | Subscription | $149/year | Yes | Minute-level scheduling, Zoom, Outlook and Apple calendars |
For the full evaluation across setup, pricing rules, and support, see the best WooCommerce booking plugin comparison.
Which booking plugin is right for you?
The right pick depends on budget and how much you value first-party calendar sync.
- Choose the official WooCommerce Bookings extension if you want a first-party plugin with built-in, two-way Google Calendar sync and a subscription budget is not a concern.
- Choose ARB if you want a one-time price, granular per-person and per-resource pricing, and a fully WooCommerce-native flow. ARB gates Google Calendar sync ($19 one-time add-on) and SMS ($15 one-time add-on) behind paid add-ons and has no deposit or partial-payment option, so check those against your needs first.
- Consider PluginHive if minute-level scheduling or a Zoom integration matters more than a one-time price.
The rest of this guide walks through the setup using ARB.
What you need before you begin
Four things need to be in place before Step 1. You need a working WooCommerce store, the ARB plugin and its activation token, at least one payment gateway, and access to your WordPress admin dashboard.
- A working WordPress site with WooCommerce installed and active. ARB is a WooCommerce extension, so it requires WooCommerce to run.
- ARB, purchased on CodeCanyon for a one-time price of about $55, plus the 9-digit activation token from your Envato item purchase code. ARB has no plan tiers: every core booking feature ships in the single license, and only Google Calendar sync ($19 one-time) and SMS notifications ($15 one-time) are separate paid add-ons. See ARB pricing for the full license breakdown.
- At least one WooCommerce payment gateway configured, such as Stripe or PayPal, if customers will pay at checkout.
- Your WordPress admin dashboard as the starting point for every step below.
How to add booking to WooCommerce with ARB: step by step
Seven steps take you from a bare WooCommerce store to a working booking flow. Install ARB, create a Reservable Product, and configure the five booking tabs. Then connect payments, display the form, test the flow, and manage bookings afterward.
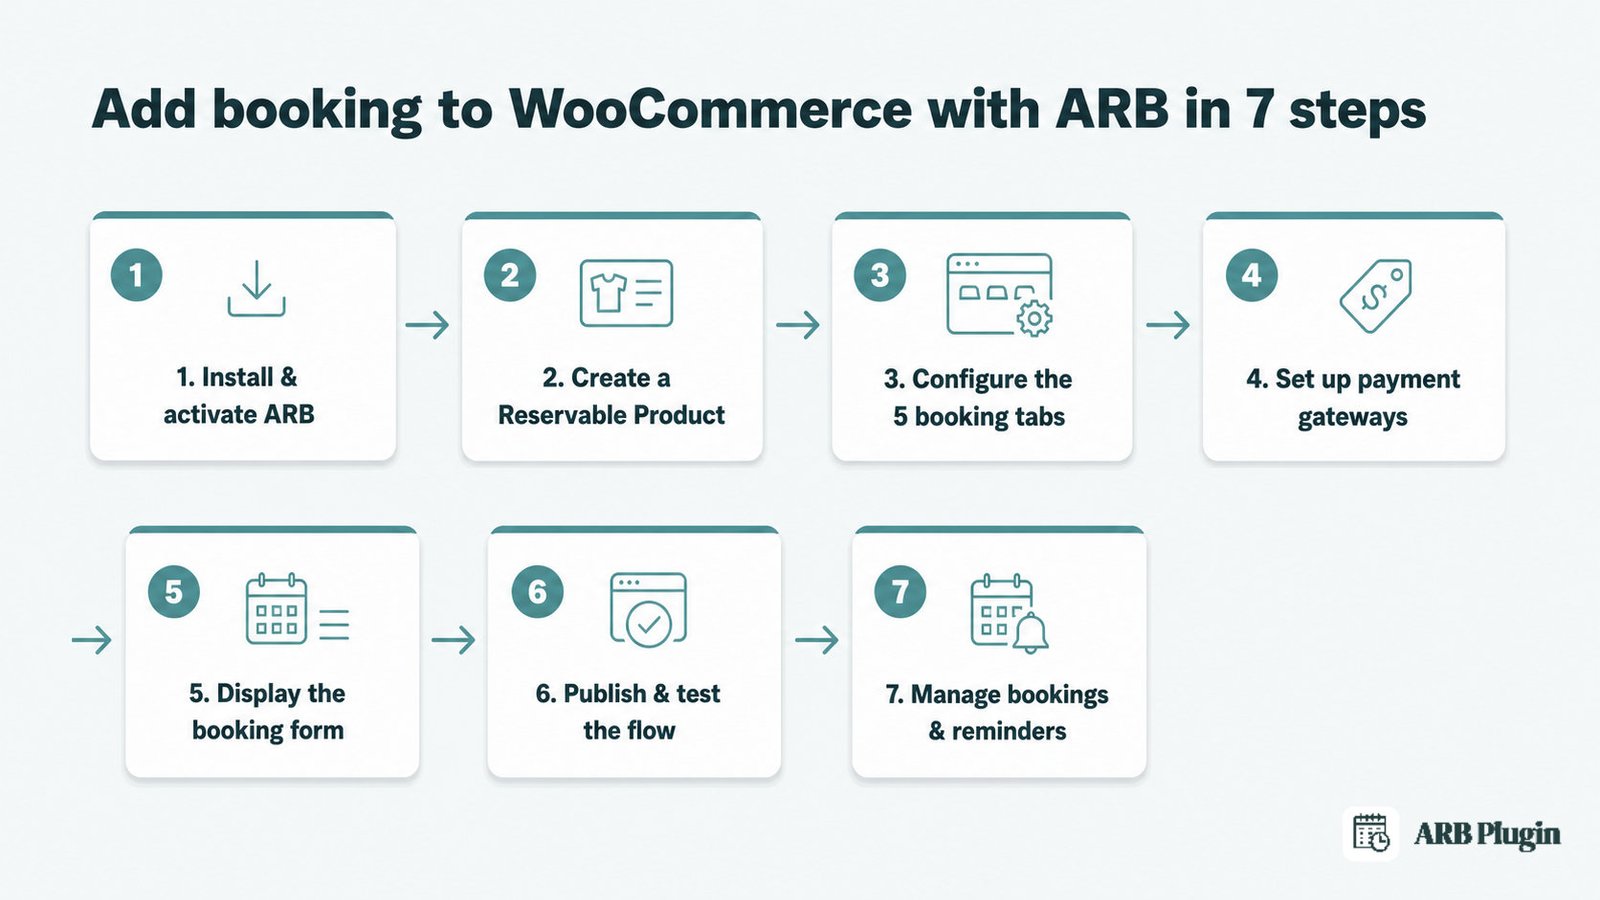
Step 1: Install and activate ARB
At the end of this step, ARB is installed, activated, and unlocked with your activation token.
Go to Plugins > Add New > Upload Plugin, choose the arb-reservations.zip file downloaded from CodeCanyon, then click Install Now and Activate. If you prefer FTP, upload the unzipped folder to wp-content/plugins/ instead, then activate it from the Plugins screen.
Next, open ARB Settings, paste your 9-digit Activation Token Number (found in your Envato item purchase code), and click Save Changes. For automatic future updates, connect the Envato Market plugin so WordPress can check for new ARB versions on its own.
[Screenshot needed: ARB Settings page with the Activation Token Number field] Alt: ARB Settings page showing the Activation Token Number input field and the Save Changes button.
���� Tip: keep your Envato purchase code handy. ARB will not accept bookings until the token is entered and saved.
Step 2: Create a Reservable Product
At the end of this step, you have a WooCommerce product whose type is Reservable Product, with a booking form on its product page.
Go to Products > Add New, add a title and description, then scroll to Product Data and select Reservable Product from the dropdown. Five booking tabs appear immediately: General, Availability, Costs, Persons, and Resources.
WooCommerce's own Bookings extension uses this same pattern: a bookable type chosen from the same Product Data dropdown. ARB registers its own Reservable Product type instead. For the full field-by-field walkthrough, see how to create a reservable product.
[Screenshot needed: Product Data dropdown with "Reservable Product" selected] Alt: WooCommerce Product Data dropdown open, with Reservable Product selected from the product type list.
Step 3: Configure the five booking tabs (availability, pricing, persons, resources)
At the end of this step, availability and pricing are set. Any resources or person types are configured too, so the form calculates the right price and blocks double-bookings.
Each tab controls one part of the booking. Tabs cover what the reservation is called, when it can happen, what it costs, who is booking, and what they are booking.
- General sets the field Label (shown as "Duration" or "Ticket" on the cart and checkout), the Reservation Duration (customer-defined or fixed, in minutes, hours, days, or months), and whether the booking can be cancelled.
- Availability sets Max Reservations per Slot (the double-booking guard), the minimum lead time, the booking horizon, and Add Range windows by date, time, or day. Requires a vacant period adds a buffer between bookings.
- Costs sets a Base Cost plus Add Range rules by slot count, person count, date, time, or day, for example a $20 weekend surcharge.
- Persons (enable with Enable Persons) adds named Person Types, each with its own price and min/max, plus Count Persons as Items to count each booker toward capacity.
- Resources (enable with Enable resources) adds bookable resources, such as a room or staff member, each with its own price and its own availability rules.
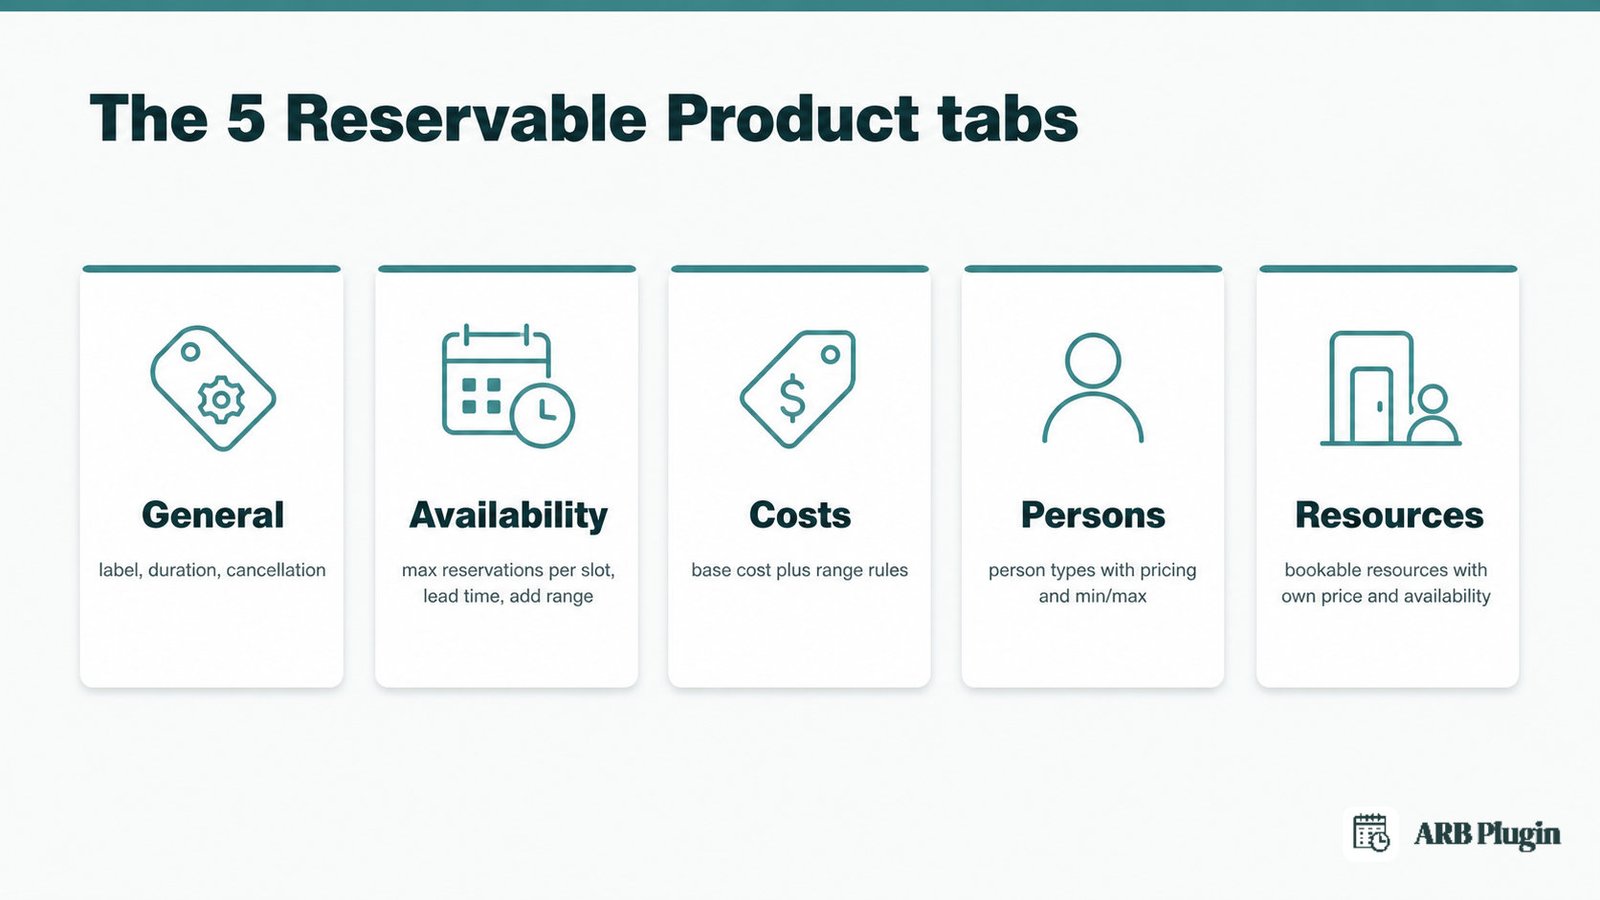
For range and buffer logic in more depth, see how to set up booking availability.
[Screenshot needed: the Availability tab with an Add Range row] Alt: ARB Availability tab showing the Max Reservations per Slot field and an Add Range row set to a date range.
[Screenshot needed: the Costs tab with a range-based pricing rule] Alt: ARB Costs tab showing Base Cost and an Add Range pricing rule applied to a weekend date range.
���� Tip: use Requires a vacant period for cleanup or prep buffers between appointments. Set Max Reservations per Slot to cap capacity and stop double-booking outright.
Step 4: Set up payment gateways and checkout
At the end of this step, customers can pay for a booking through your normal WooCommerce checkout.
ARB inherits every WooCommerce payment gateway: Stripe, PayPal, Square, Amazon Pay, and more, plus Cheque Payments, Bank Transfer, and Cash on Delivery. Configure the gateway you want under WooCommerce > Settings > Payments. Taxes and coupons apply automatically through WooCommerce's own settings.
If you enable confirmation-required bookings, no payment method appears at checkout until you approve the reservation. The customer pays afterward from their My Account page once you confirm. For a Stripe-specific walkthrough, see accept Stripe payments for bookings.
Step 5: Display the booking form on your site
At the end of this step, the booking form is live on the product page, and anywhere else you choose to place it.
A Reservable Product's own product page shows the booking form automatically. To display it elsewhere, use the shortcode [product_page id="YOUR_PRODUCT_ID"], paste that shortcode into Elementor's Shortcode widget, or add it through WPBakery. Adjust form colors and styling in ARB Settings.
[Screenshot needed: the front-end booking form on a product page] Alt: Front-end WooCommerce product page showing the ARB booking form with a calendar and a resource dropdown.
Step 6: Publish and test the booking flow
At the end of this step, a test booking has added to cart, reached checkout, and created a reservation order. Pricing, availability, and payment all work.
Publish the product, then open it as a customer would. Pick a date and slot, choose a resource or person type if enabled, and watch the price update in real time through ARB's AJAX calculation. Add the booking to cart and complete checkout. This is where add-to-cart issues most often surface in WooCommerce booking setups, so confirm the reservation actually appears in your admin before you launch.
���� Tip: test one instant-payment booking and one quote or confirmation-required booking, so both paths are proven before customers see the form.
Step 7: Manage bookings and automate reminders
At the end of this step, you can view, edit, confirm, and reschedule reservations, and send reminders so customers show up.
Go to WP-Admin > Reservations > All Reservations to filter and search orders. Open an order to add a private note, email the invoice, or change its status. Setting the status to Confirmed triggers a payment link for any unpaid order. The Daily Agenda view gives you a single day's bookings at a glance.
Send reminders from WP-Admin > Reservations > Send Notification. This sends in bulk, supports dynamic tags such as {customer_name}, and can attach an iCalendar (.ics) file to each email. ARB does not include a WooCommerce-Bookings-style "create booking from scratch" screen. Admins here manage and edit reservations customers already made, not build new ones by hand. For the full admin workflow, see manage bookings in WooCommerce, and for reminder timing and copy, see send appointment reminders.
[Screenshot needed: the All Reservations admin list with filters] Alt: WP-Admin All Reservations screen showing a filtered list of bookings with status, date, and search controls.
See the whole flow working in the ARB live demo, from booking form to confirmed reservation.
ARB features that make WooCommerce bookings easier
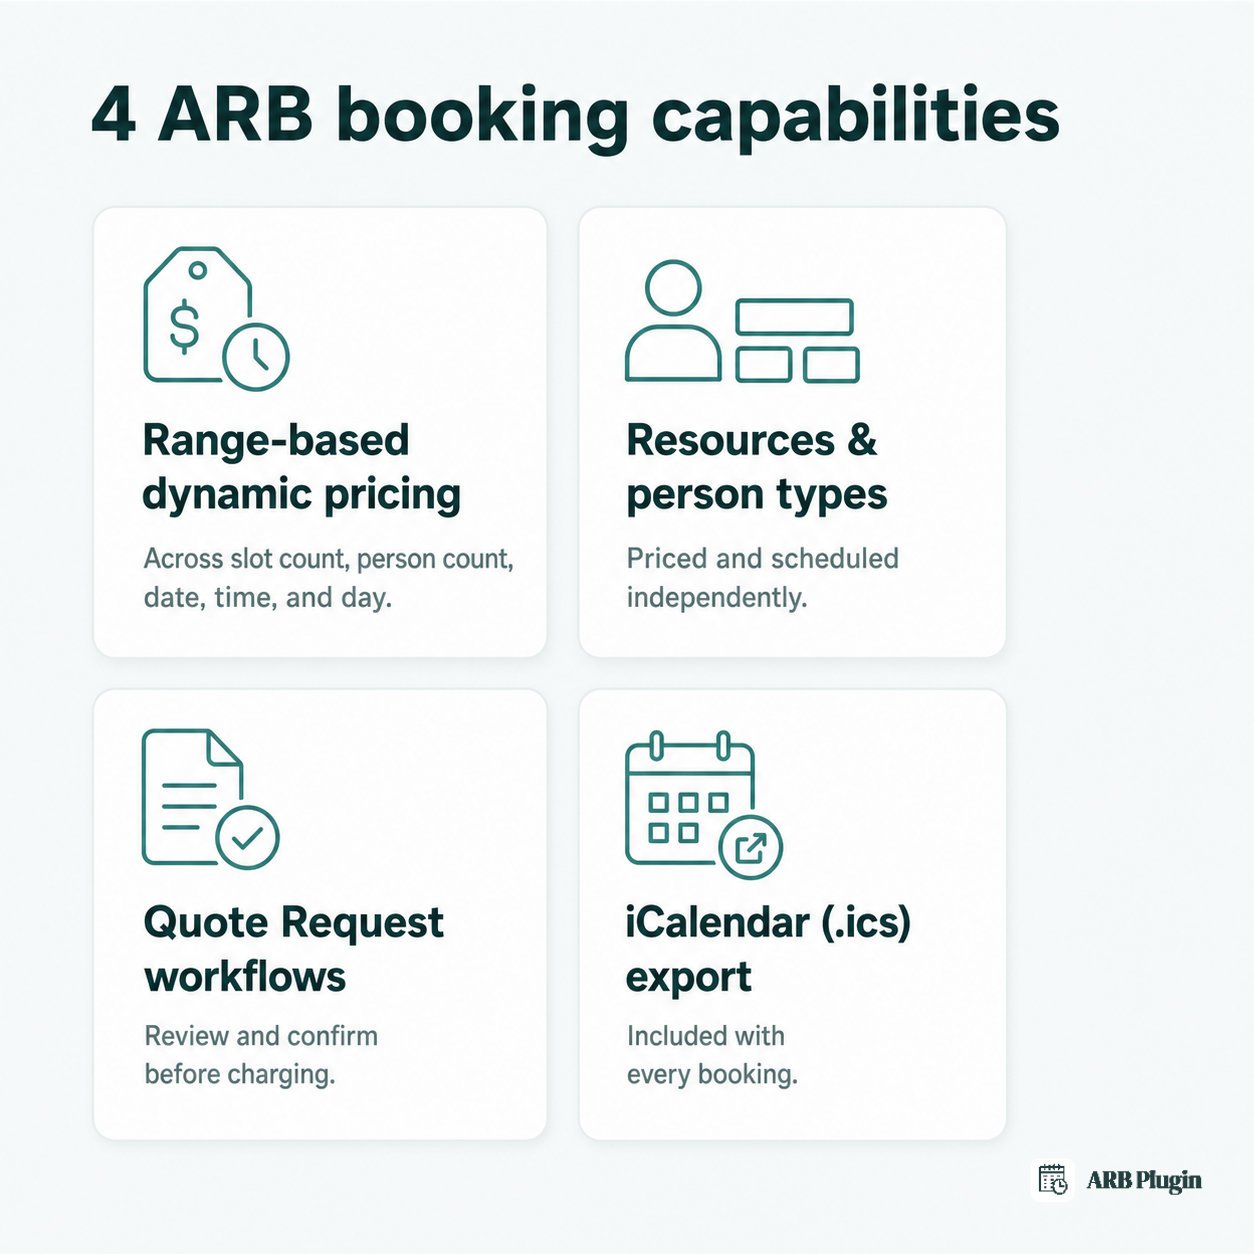
The seven setup steps cover the basics. ARB also adds four capabilities a plain date-picker plugin does not: multi-axis dynamic pricing, per-resource and per-person configuration, quote-first workflows, and calendar export.
Range-based dynamic pricing
ARB prices a booking by slot count, person count, date, time, and day of week, all at once. It recalculates the total live through AJAX as the customer changes their selection. A weekend surcharge, an off-peak discount, and a length-of-stay discount can all apply to the same product at the same time. See dynamic pricing for worked pricing-rule examples.
Resources and person types
Resources and person types price and schedule independently of each other. A school could set Lecturer A available Tuesday and Thursday, and Lecturer B available Friday and Saturday, each at a different rate. Person types price an adult ticket differently from a child ticket on the same booking.
Quote Request and approval-first bookings
Turn any Reservable Product into a quote-request form by enabling ARB Quote Request under WooCommerce > Settings > ARB Settings, then switching it On per product. Alternatively, require admin confirmation before payment on any product, useful for service businesses that need to review a request before charging a card.
Calendar sync and notifications
ARB exports an iCalendar (.ics) file with every booking notification, importable into Google Calendar or any calendar app. Automated, ongoing sync to Google Calendar requires the separate paid ARB Google Calendar add-on ($19 one-time). That sync also runs one way, from ARB to Google Calendar, not both directions. This is a real gap against WooCommerce Bookings, YITH, and PluginHive. All three advertise native two-way Google Calendar sync, and ARB does not match that out of the box. For the add-on setup itself, see sync ARB bookings with Google Calendar.
Tips for running WooCommerce bookings in ARB
Four ARB-specific settings extend past the basic setup and prevent the most common booking mistakes.
- Add a flat fee with Base Cost. Use the Costs tab's Base Cost field for a delivery or booking fee added on top of every resource or person price, rather than folding it into each resource's price individually.
- Enable Count Persons as Items for group capacity. With this on, a 5-person booking consumes 5 slots of capacity instead of 1, which stops a single large group from silently overbooking a limited-capacity event.
- Block specific windows with Date Range with time. Use this Availability range type to close a specific date and time window, for a holiday or maintenance period, without editing every other availability rule.
- Hide the calendar for resource-first bookings. For appointment-style products where the customer picks a person or resource rather than a date, hide the calendar and keep at least one dropdown, resource or persons, so the AJAX price calculation still triggers.
FAQs
Does WooCommerce have a built-in booking system?
No. WooCommerce core has no native booking or bookable product type. You add one with a booking extension such as WooCommerce Bookings or ARB.
Is there a free WooCommerce booking plugin?
Some limited free or lite booking plugins exist on WordPress.org, but the official WooCommerce Bookings extension and ARB are both premium. ARB is a one-time license of about $55 with no free tier, so evaluate it through the live demo before buying.
How much does it cost to add booking to WooCommerce?
WooCommerce Bookings costs $249 per year. ARB is a one-time license of about $55. PluginHive runs about $149 per year, and YITH runs about $249.99 per year.
Can I turn an existing WooCommerce product into a bookable product?
Yes. Edit the product, open the Product Data box, change its type to Reservable Product, then configure the five tabs, General, Availability, Costs, Persons, and Resources.
How do I manually manage or edit a booking from the admin?
Go to WP-Admin > Reservations > All Reservations, open the order, then edit the resource, dates, persons, or cost. From there you can also add a note, email the invoice, or set the status to Confirmed.
Which payment gateways work with WooCommerce bookings?
ARB inherits every WooCommerce gateway, including Stripe, PayPal, Square, and Amazon Pay, plus Cheque Payments, Bank Transfer, and Cash on Delivery.
Can I sync WooCommerce bookings with Google Calendar, and is it free?
ARB exports an iCalendar (.ics) file in the core plugin at no extra cost. Automated Google Calendar sync requires the separate paid ARB Google Calendar add-on ($19 one-time), and that sync runs one way, not two.
Does ARB support deposits or partial payments?
No. ARB does not offer deposits or partial payments. The closest workflows are Request for Quote and confirmation-required bookings, where the customer pays in full after you approve the reservation.
Adding booking to WooCommerce comes down to installing a booking plugin and building a bookable product around your actual availability and pricing rules. ARB handles that setup for a one-time price instead of a yearly subscription, with range-based pricing built into the core license. Try the live demo above to see the booking flow yourself, or weigh it against the other plugins in the comparison table before you commit.