A rental website is a WordPress and WooCommerce site where customers check availability and pay for a rental period. Eight steps take you from a blank domain to a live rental site. You register a domain, install WordPress and WooCommerce, and pick a theme. Then you add a booking plugin, set up payments, build your pages, and test before launch.
This guide covers WordPress plus WooCommerce with a booking plugin, the setup that gives you availability, per-unit inventory, and flexible pricing. It works whether you rent equipment, gear, vehicles, or vacation properties.
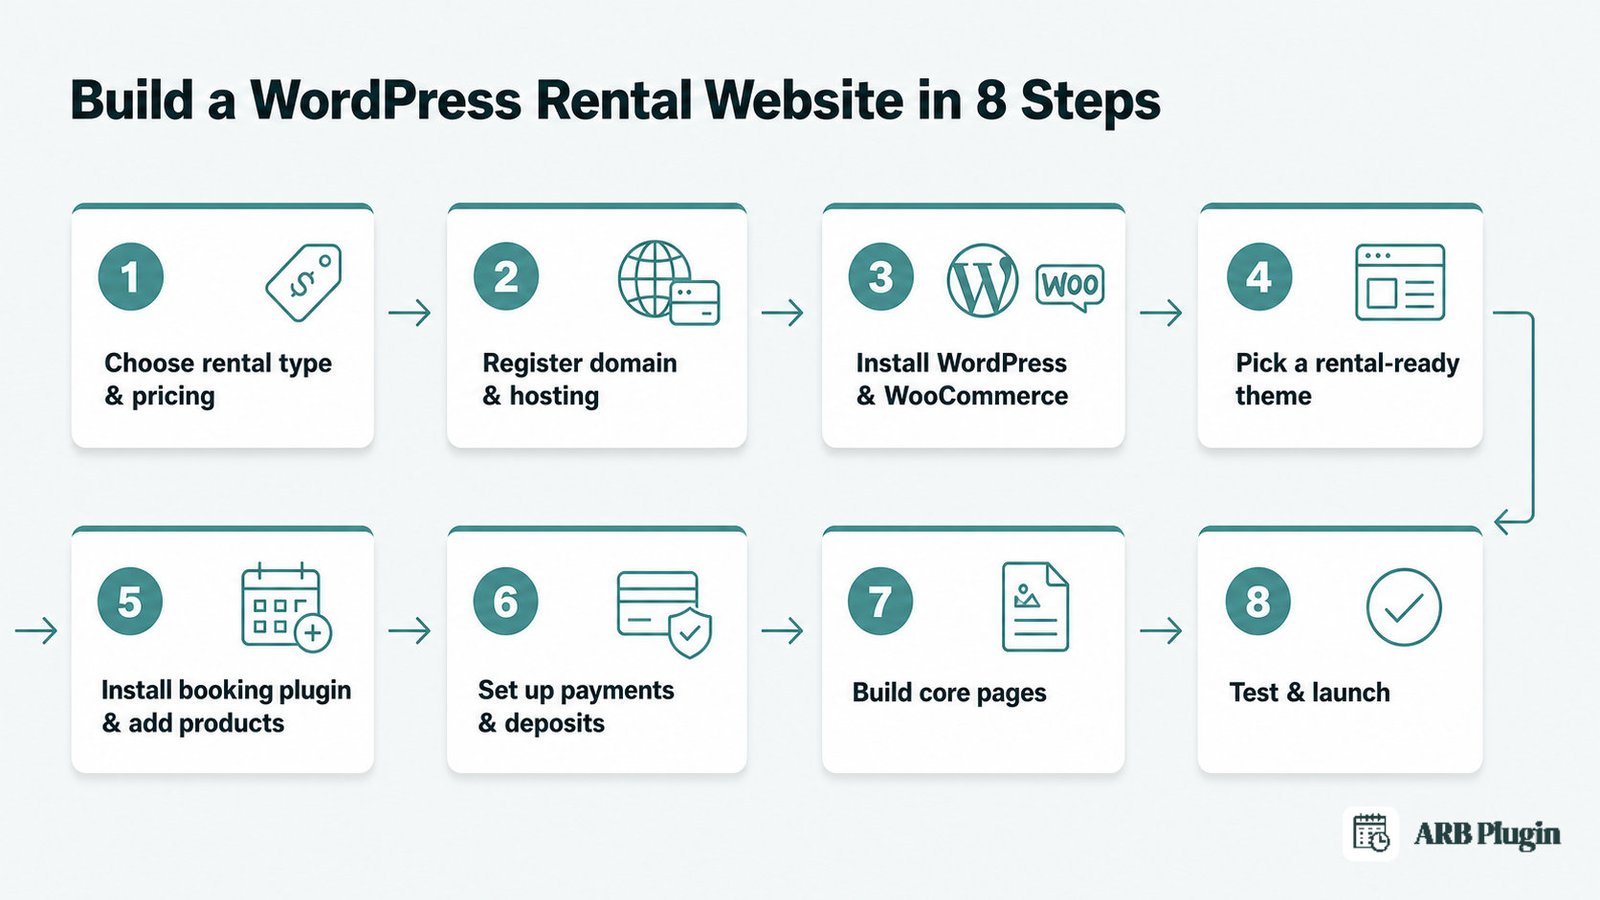
What Is a Rental Website?
A rental website lists the items or spaces you rent out and shows real-time availability. It takes a booking and payment for a defined period, whether that period is an hour, a day, or a month. A customer picks dates or a unit, sees the price, and pays without a phone call or email.
You build one once you have something specific to rent, whether that is equipment, sports gear, a vehicle, or a vacation property. You build it because you want customers to book directly instead of calling or emailing you. The site includes an availability calendar for each rental item. Its booking form captures the rental period, the unit chosen, and the price.
On WordPress, that booking form runs on top of WooCommerce through a booking plugin. Neither WordPress nor plain WooCommerce products handle date ranges or per-unit availability on their own.
What You Need Before You Start
The prerequisite most people skip is writing down exactly what you rent and how many units of each you have. Without that inventory list, you cannot configure availability or pricing correctly later. Gather these before you start.
- Your rental inventory, every item or space you rent, and how many units of each.
- A domain name and WordPress hosting.
- Your rental prices, including any seasonal or per-period rates.
- A payment gateway account, such as Stripe, PayPal, or Square.
- Your rental terms and policies, including any deposit or cancellation rules.
Budget an afternoon for a working rental site built from a blank domain. The booking-engine configuration itself, once WordPress and WooCommerce are running, takes about an hour for a first working setup. Most of that hour goes into pricing and availability decisions, not clicking through screens.
This build sits inside the broader task of adding online booking to WordPress. Read that guide first if you want the general booking setup explained on its own.
Step 1: Choose Your Rental Type and Pricing Model
Your rental type decides your duration unit and what a single rental unit represents. Settle this before you touch the site, since getting it wrong means rebuilding your booking setup later.
| Rental type | Typical duration unit | What one "unit" is | Pricing pattern |
|---|---|---|---|
| Equipment / tools | Day or half-day | One physical item | Day rate, discounted for multi-day rentals |
| Gear & sports | Day or hour | One piece of gear | Day or hourly rate, package deals for groups |
| Vehicles / cars | Day | One vehicle | Day rate, with weekly and monthly discounts |
| Vacation / property (short-term) | Night | One listing or unit | Nightly rate, higher on weekends and peak season |
| Party & event gear | Day or event | One item or set | Flat rate per event, higher for peak dates |
| Space / venue | Hour or day | One room or venue | Hourly or day rate, deposit often required |
General booking-plugin setups fit equipment, gear, vehicle, and short-stay rentals well. All four rent by day, night, or hour against a fixed inventory. Very long-term property leasing, month to month or longer, usually needs dedicated property-management tooling instead of a booking plugin.
If your rentals are vehicles or equipment specifically, see the WooCommerce car and equipment rental setup for the details specific to that use case.
Step 2: Register a Domain and Set Up Hosting
Your domain and hosting come before any WordPress installation. Most WordPress hosts bundle domain registration, so you can often buy both in one purchase.
- Choose and register a domain name that matches your rental brand.
- Buy a WordPress hosting plan from a host that supports WooCommerce.
- Point your domain's nameservers to your hosting account.
- Enable a free SSL certificate through your host, so your site loads over HTTPS.
WordPress itself is free and open source. You only pay for hosting and your domain.
Step 3: Install WordPress and WooCommerce
Most hosts install WordPress with one click from the hosting dashboard. Install WooCommerce next, since your booking plugin runs on top of it.
- From your host's dashboard, run the one-click WordPress installer, or install it manually if your host requires that.
- In your WordPress dashboard, go to Plugins > Add New, search for WooCommerce, and click Install Now, then Activate.
- Run the WooCommerce setup wizard, confirming your store address, currency, tax settings, and at least one payment method.
A rental booking plugin extends WooCommerce rather than replacing it. This step is the required foundation the rest of the build sits on. See WooCommerce's own setup documentation for host-specific detail.
Done: WooCommerce is active, and the setup wizard shows your store address, currency, and a connected payment method.
Step 4: Pick a Rental-Ready Theme
Any WooCommerce-compatible theme works for a rental site, including WordPress's own default block themes. Prioritize clean product pages and mobile speed over a theme labeled specifically for rentals.
A booking plugin adds the rental logic, availability, durations, and pricing. It does that independently of which theme you choose, so you are not locked into one specific theme to make a rental site work. Check for these before you commit to a theme.
- Fast page-load speed, since slow product pages cost you bookings.
- A clean, uncluttered product page layout for your rental listings.
- Full WooCommerce compatibility, confirmed on the theme's own listing page.
- Mobile-responsive design, since most rental research happens on a phone.
Step 5: Install a Booking Plugin and Create Your Rental Products
A booking plugin is what turns a plain WooCommerce store into a rental site. Ordinary WooCommerce products have no concept of a rental period, per-unit inventory, or an availability calendar. This guide demonstrates the ARB booking plugin, a WooCommerce-native booking plugin sold as a one-time license, to show exactly how that configuration works.
Before you build, know ARB's real scope. It models bookable stock through resources and capacity limits well enough for straightforward availability and booking. It is not a full rental-inventory or fleet-management system. It does not track individual asset maintenance logs, serial numbers, or check-in and check-out condition records. Simple rental businesses fit comfortably; heavy fleet operations with per-asset maintenance tracking will outgrow it.
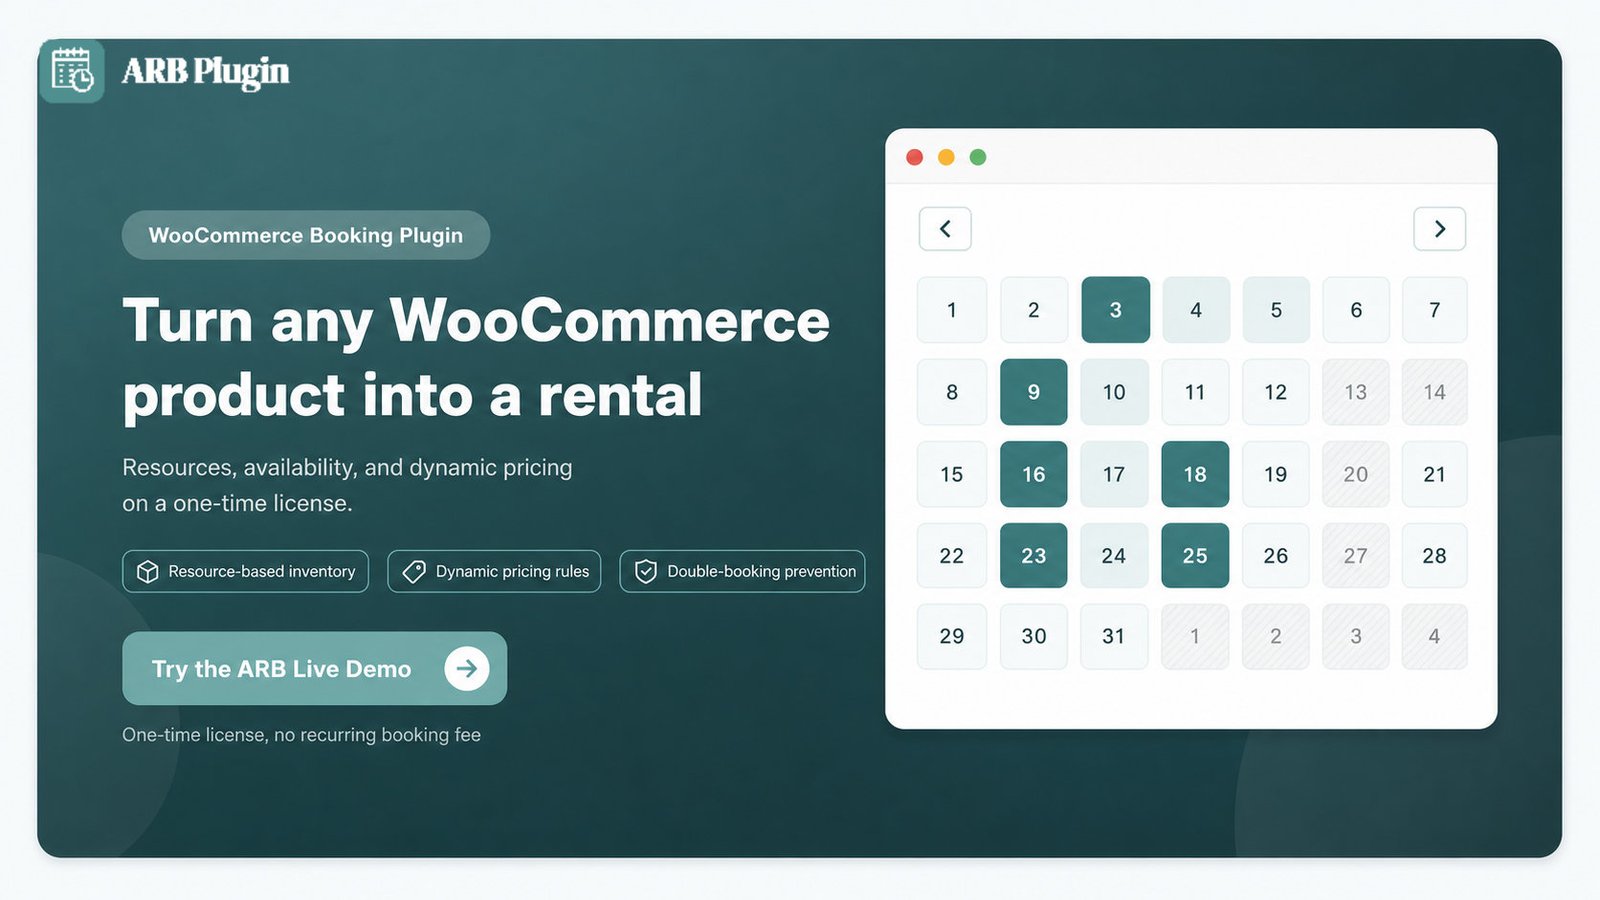
Turn each rental into a reservable product
Every rental listing becomes one WooCommerce product with a special type applied. Go to Products > Add New, add a title and description for your rental, then open the Product Data dropdown and choose Reservable Product.
Selecting Reservable Product exposes booking fields across five tabs: General, Availability, Costs, Persons, and Resources. Each rental you offer, whether a specific car, a kayak, or a vacation unit, gets its own Reservable Product. For the field-by-field detail of this single step, see create a Reservable Product.
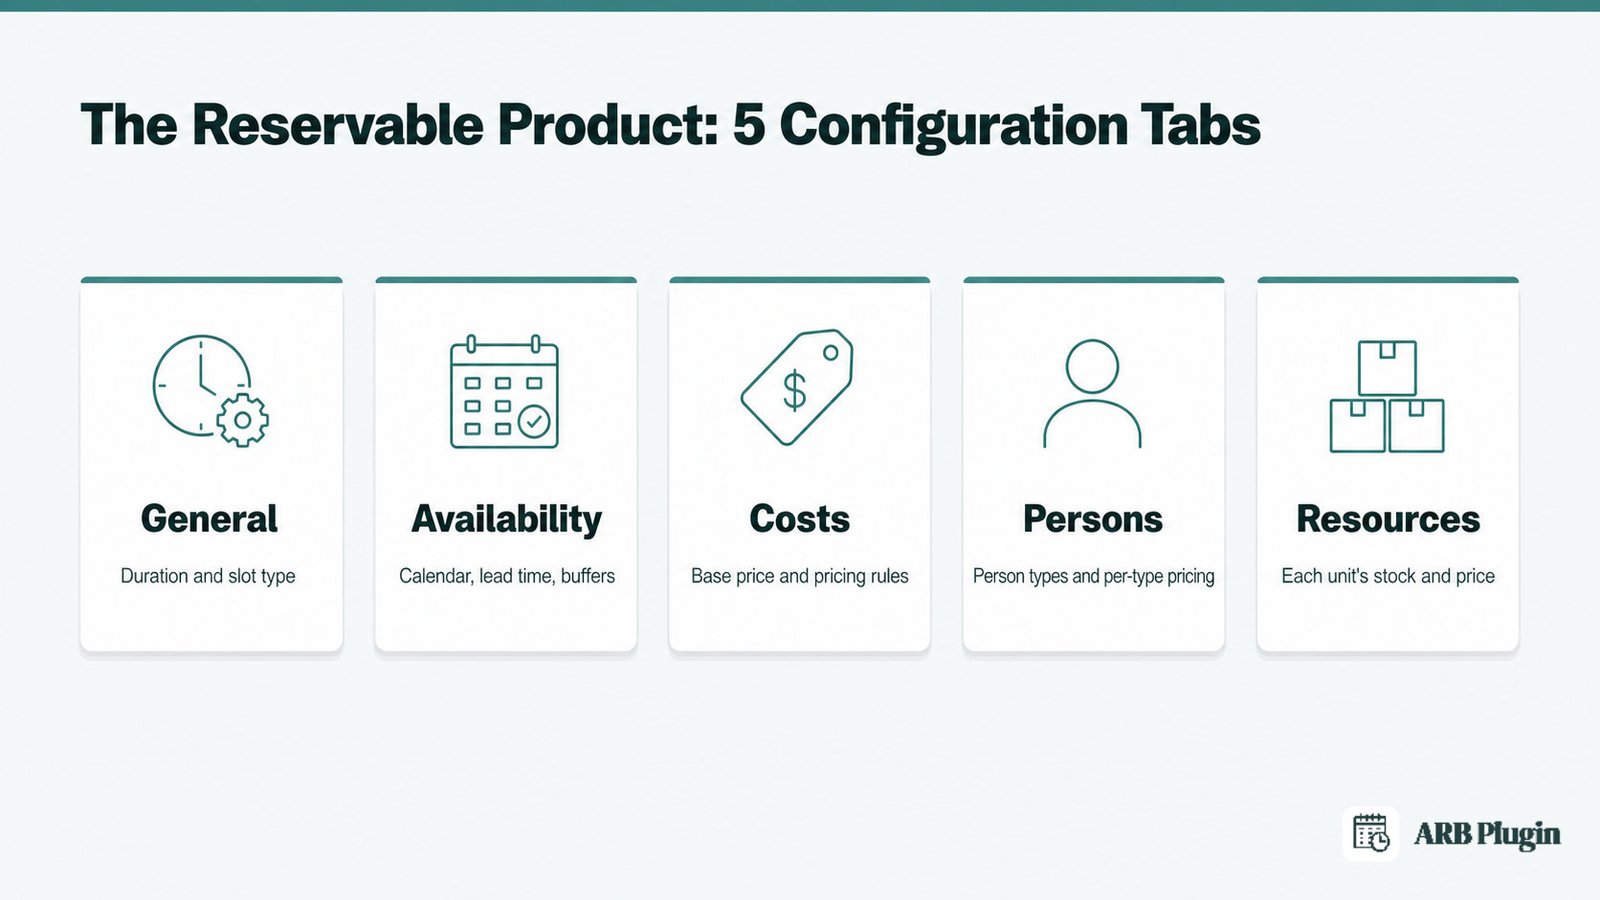
Done: your rental's Product Data type is set to Reservable Product, and the five configuration tabs are visible.
Set the rental duration (by the day, night, or hour)
Set the Reservation Duration field in the General tab to match how you actually rent. Customer-defined slots let the renter pick how many days, nights, or hours they need. Fixed slots lock the duration to a preset length instead.
Duration units run from minutes and hours up through days and months, with weekly and monthly options for longer stays. A vacation rental usually uses nights. Equipment usually uses days. An hourly venue uses hours. See set up booking availability for the full availability and time-slot configuration.
Done: your Reservation Duration matches your real rental period, and a test booking shows the correct unit at checkout.
Add each unit as a resource so stock and availability are tracked
Turn on Enable Resources in the Resources tab. Then use Add/link Resource to create one resource for each physical unit you rent, such as each car, each kayak, or each apartment. This is how you model real inventory instead of one listing standing in for your whole stock.
Set each resource's Available Quantity and, through Edit resource, its own availability calendar and price. A second unit can carry a different price or a different blocked-out date range from the first, with no conflict between them. See booking resources for the complete resource-configuration walkthrough.
Done: every physical unit has its own resource, its own Available Quantity, and its own availability calendar.
Set per-period and seasonal pricing
Open the Costs tab and use Add Range to layer pricing rules on top of your base rate. A Date Range rule adds a weekend or peak-season surcharge, such as an extra $20 for a Saturday-to-Sunday booking. A Slot Count rule discounts longer rentals, such as any booking over four days.
Combine both rule types on the same rental, since they apply independently at checkout. See dynamic pricing for every available range type and how the front end recalculates the total live.
Done: at least one seasonal or peak-period rule and one length-of-rental discount are active, and the checkout price updates when you change the dates.
Stop double-bookings with capacity and buffer rules
This step stops two customers from booking the same unit on your own site on the same day. It is a different problem from syncing calendars across multiple listing platforms. If you only sell through this one WooCommerce site, this single setting is the whole fix.
Set Max Reservations per Slot to match each resource's Available Quantity. The slot closes once every unit for that period is booked. Turn on Requires a Vacant Period and set a gap long enough to clean, inspect, or return the unit between rentals. See booking availability rules for lead time, booking horizon, and blackout-date settings.
Done: Max Reservations per Slot is set per resource, a vacant period is active, and a second test booking correctly cannot take an already-booked unit.
Step 6: Set Up Payments and Deposits
Because every rental booking runs through WooCommerce checkout, you take payment with any WooCommerce-supported gateway. No separate payment system is needed.
- Go to WooCommerce > Settings > Payments.
- Enable at least one gateway. Options include Stripe, PayPal, Square, and several others, alongside Cheque Payments, Bank Transfer, and Cash on Delivery.
- Complete that gateway's connection details, whether that is API keys or an account login.
- Decide whether you want required confirmation, where the customer pays only after you approve the booking, or instant payment at checkout instead.
ARB has no built-in security deposit, damage deposit, or partial-payment feature. You may need to hold a refundable deposit. You may need to collect part of the rental now and the balance later. Either way, add a separate WooCommerce deposit or partial-payment extension alongside ARB. This is a real gap, not a workaround dressed up as a feature. Plan for it before you launch, not after your first damaged return. See accept payments for bookings for gateway-specific setup and take a deposit for bookings for deposit approaches that close this gap.
Done: a payment gateway is connected, and you have made a decision on deposits before you accept your first real booking.
Step 7: Build Your Core Pages
A rental site needs a small, fixed set of pages beyond the booking form itself. Build these before you consider the site ready to launch.
- A homepage that states what you rent and links straight to your rentals.
- A rentals catalog page listing every item or space you offer.
- An individual page per rental, each showing that rental's own booking form.
- A rental terms and policy page covering cancellations, damage, and any deposit rules.
- A contact page, even if the booking form handles most inquiries on its own.
Every Reservable Product already has its own page, so publishing the product publishes its booking form. To place that same form on a different page, such as a custom landing page, use the [product_page id=""] shortcode with the product's ID. The Elementor Shortcode widget places it too, and WPBakery Page Builder places it natively with no extra widget needed.
Step 8: Test the Booking Flow and Launch
Run one real test booking end to end before you consider the site live. This catches configuration mistakes a settings screen alone will not show you.
- Pick dates or a unit on a live rental product page, and confirm the price updates as you change your selection.
- Complete checkout through your connected payment gateway with a real, or fully refundable test-mode, payment.
- Confirm the booked slot or resource now shows as unavailable for that same period.
- Confirm the booking confirmation email sends correctly to the customer address you used.
- Publish your site and remove any "coming soon" or maintenance mode.
Before you launch, compare your setup against a working example of a finished rental booking flow. Turn on booking confirmation and reminder emails too. See send booking reminders for the exact setup, since reminders measurably cut no-shows.
Done: a full test booking completes successfully, the unit correctly shows as unavailable afterward, and the confirmation email arrives.
Common Mistakes to Avoid When Building a Rental Website
The most damaging mistake is using a standard WooCommerce product instead of a real booking product. That leaves no availability calendar, and nothing stops two customers renting the same unit on the same day. Five mistakes account for most of the problems rental sites hit after launch.
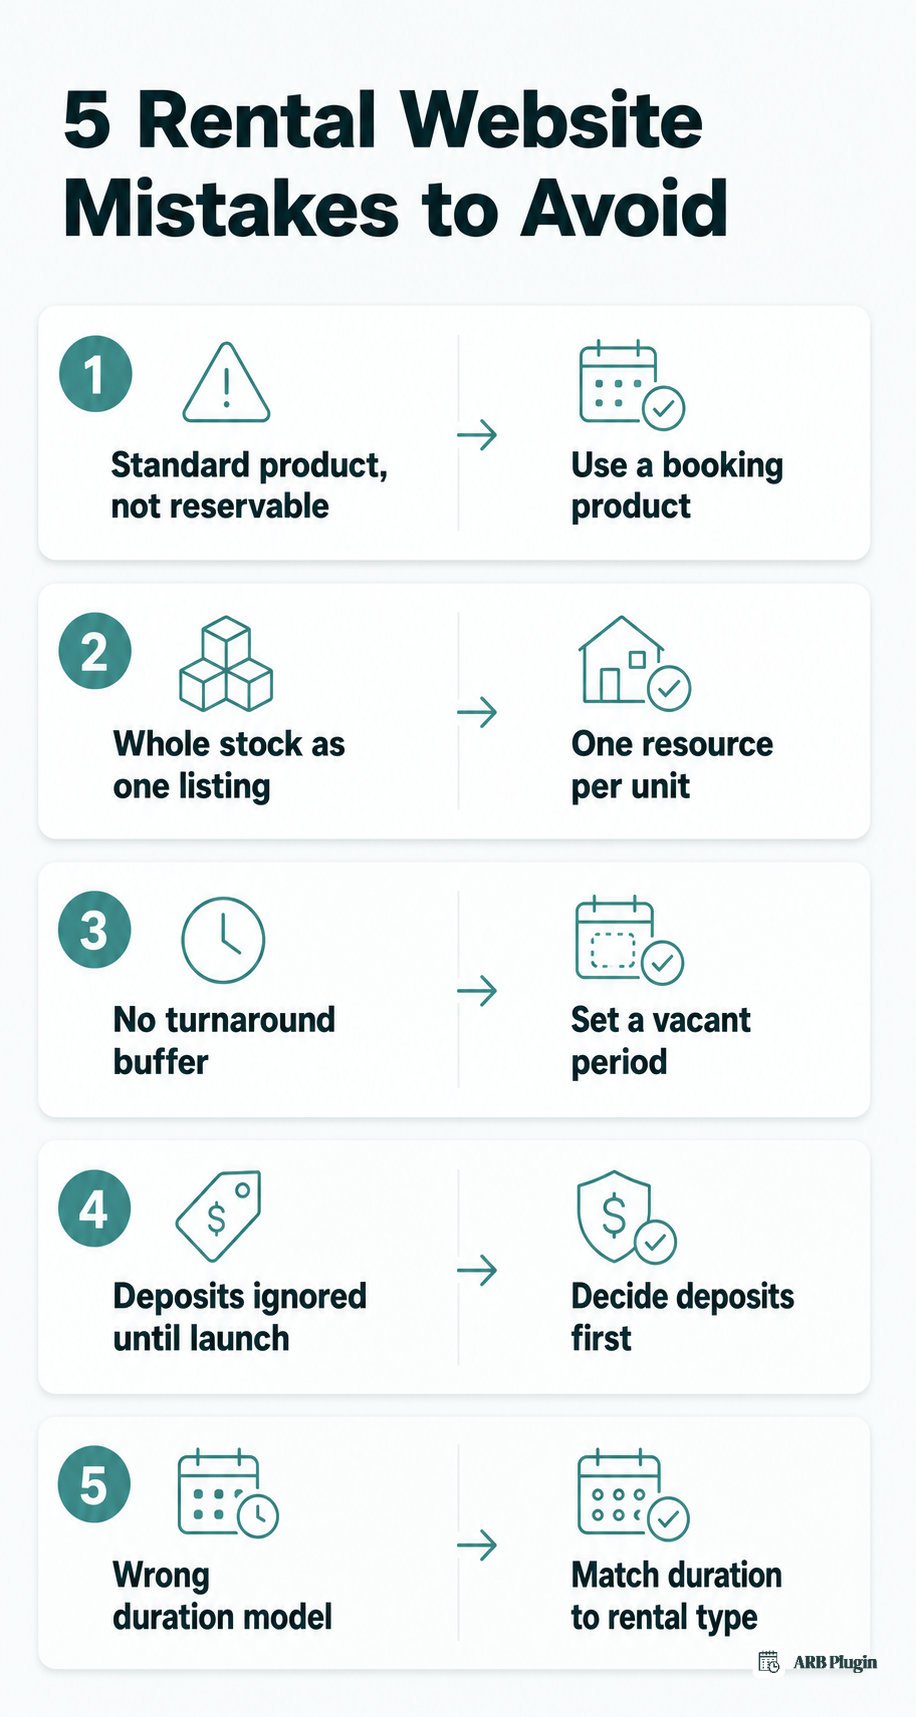
- Using a standard WooCommerce product instead of a reservable one. A plain product has no availability calendar, so the same unit can sell to two customers for the same dates. Fix: use a booking plugin so every rental is a real, calendar-backed booking product.
- Treating your whole stock as one listing instead of giving each unit its own resource. One listing standing in for five identical kayaks oversells the same physical item. Fix: give each unit its own resource with its own Available Quantity.
- Skipping the turnaround or buffer time between rentals. Units booked back-to-back leave no time to clean, inspect, or return the item before the next renter arrives. Fix: set a vacant period between reservations that matches your real turnaround time.
- Ignoring deposits until launch day. Waiting until after your first damaged return to figure out how to collect a deposit leaves you with no recourse. Fix: decide on a deposit extension or policy before you open bookings, not after.
- Choosing a duration model that does not fit your rental type. Forcing a short appointment-style slot onto a long-term property rental, or the reverse, causes rework once real bookings start. Fix: match your duration model to your rental type in Step 1 before you build anything else.
FAQs
How much does it cost to build a rental website in WordPress?
Expect the cost of a domain, WordPress hosting, and a premium booking plugin. WordPress and WooCommerce are both free. A one-time booking plugin like ARB runs around $55, with no recurring booking fee.
Can I build a rental website for free?
WordPress and WooCommerce cost nothing to run. A free booking plugin can get a simple date-picker working, but rental-grade availability, per-unit inventory, and flexible pricing usually need a premium plugin.
How long does it take to build a rental website?
Budget an afternoon for a complete rental site built from a blank domain. The booking-engine configuration alone, once WordPress and WooCommerce are already running, takes about an hour for a first working setup.
Can WooCommerce handle daily and hourly rentals?
Yes, with a booking plugin added on top. WooCommerce products alone have no concept of a rental duration. A booking plugin adds durations from minutes and hours up through days and months.
How do I add an availability calendar to my rental site?
A booking plugin adds the availability calendar. Configure availability ranges, lead time, and a booking horizon in the plugin's Availability settings, and the calendar on your rental's product page updates automatically.
Can I rent out multiple units of the same item?
Yes. Add each physical unit as its own resource with its own Available Quantity. The site then tracks and sells each unit separately instead of overselling one listing across several identical items.
How do I stop double-bookings on a rental website?
Set a capacity limit per booking slot, matched to your Available Quantity per resource, and add a vacant period between reservations. That combination stops two customers booking the same unit on the same date.
How do I take a security or damage deposit for rentals?
Most booking plugins, including ARB, have no native deposit feature. Add a separate WooCommerce deposit or partial-payment extension alongside your booking plugin if you need to hold a refundable deposit.
Do I need WooCommerce to build a rental website this way?
Yes. A native WooCommerce booking plugin is a WooCommerce extension, so it requires an active WooCommerce store to run. It adds a new product type rather than replacing your store.
You now have the full path from a blank domain to a live rental site. Real availability, per-unit inventory, and flexible pricing sit at the center of it. ARB turns any WooCommerce product into a bookable rental this way, for a one-time price with no recurring booking fee. Try the ARB live demo and run a test rental booking before you buy.