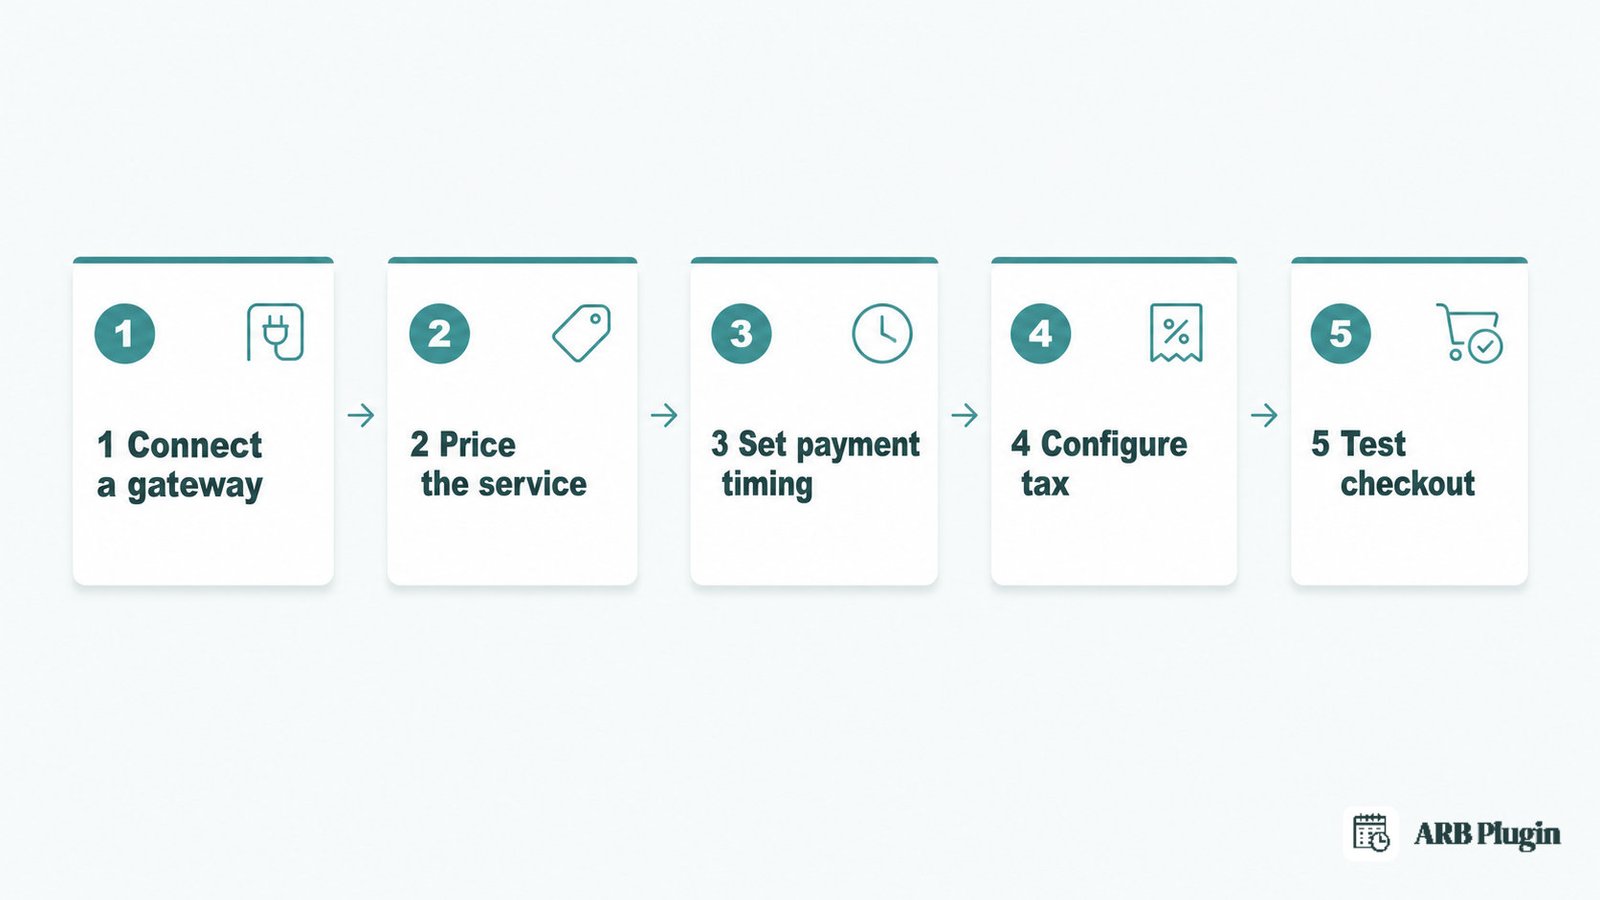
Setting up payment collection for appointments takes five steps. Connect a payment gateway, price your bookable service, decide when payment is collected, apply tax, and test the checkout flow. Done right, every booking arrives already paid, or already approved and invoiced, with no manual follow-up.
This guide covers the three payment-timing models and the WooCommerce setup a WordPress booking site uses. It also covers the one mistake that breaks checkout for most first-time setups.
How Accepting Payments for Appointments Works
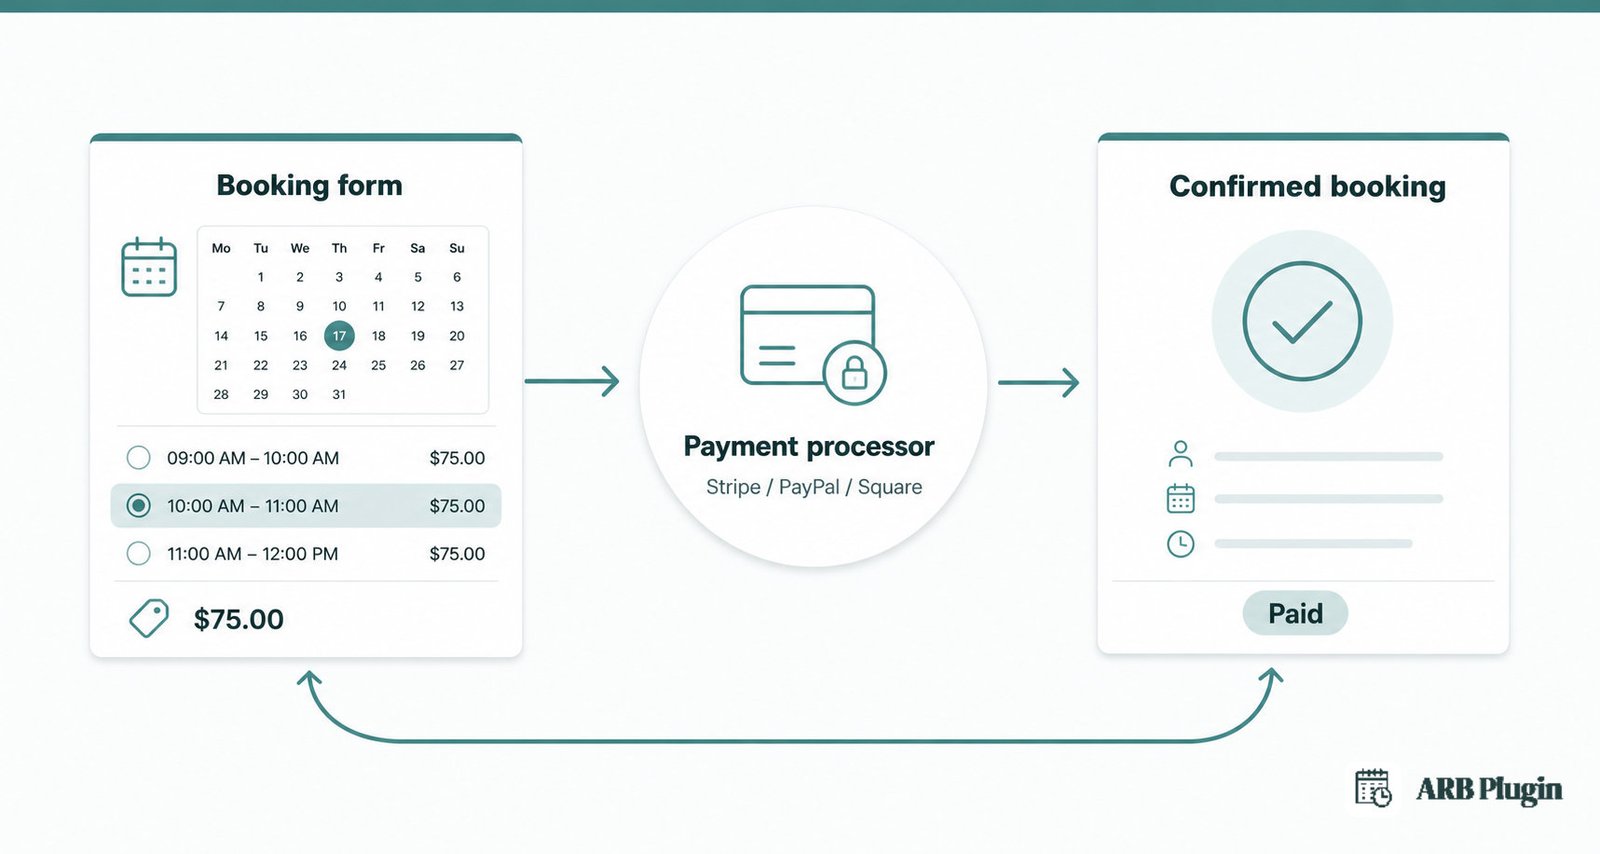
Accepting payments for appointments means collecting money, in full, as a deposit, or after the appointment, through a payment processor connected to your booking form. The processor and the booking system talk to each other, so the slot and the payment get captured together. No booking counts as confirmed until payment, or approval, clears.
The payment processor, whether that is Stripe, PayPal, Square, or another gateway, handles the actual charge. The booking system decides when that charge happens: at the moment of booking, as a smaller deposit, or only after you approve the request. Getting that timing decision right matters more than which processor you pick, and it is the next decision to make.
Choose When to Collect Payment: Prepay, Deposit, or Pay-After-Approval
Three payment-timing models cover almost every appointment business. Compare them before you touch any settings.
| Model | Best for | Trade-off |
|---|---|---|
| Full prepayment | High no-show-risk services and low-cost items | Strongest cash-flow certainty, but some customers hesitate to pay before service |
| Deposit or partial payment | Higher-ticket services and custom or resource-heavy work | Balances customer commitment against upfront cost, but needs a deposit-capable tool |
| Pay after approval or service | Quote-first, custom, or high-trust bookings | Lowest booking friction, but payment risk stays with you until it clears |
ARB, the WooCommerce booking plugin used for the setup steps in this guide, supports two of these three models natively. Full prepayment completes automatically once payment succeeds. Pay-after-approval, ARB's confirmation-first mode, collects payment through the customer's My Account page after you confirm the booking. ARB has no built-in deposit or partial-payment feature. A true percentage or fixed deposit needs a separate WooCommerce Deposits extension added on top, covered in the deposit section below.
What You Need Before You Start
The prerequisite most people skip is a live, approved payment processor account, not just a booking tool. An account still in test mode blocks every step that follows.
- A booking or scheduling tool, or a website plugin, that lets you attach a price to a service.
- A payment processor account, such as Stripe, PayPal, or Square, approved for live charges, not sandbox mode.
- A business bank account connected to that processor.
- A decision on your payment-timing model, from the table above, before you touch checkout settings.
- Your service prices and tax rules decided in advance.
Step 1: Set Up a Payment Gateway (Stripe, PayPal, or Square)
Connecting a payment gateway is the first setup step, whatever booking system you use.
- Create or verify your processor account (Stripe, PayPal, or Square) and confirm it can accept live charges, not test payments only.
- Connect that account to your booking system's payment settings.
- Enable at least one live gateway before you take a real booking.
In a WooCommerce-based setup, you enable a gateway once, under WooCommerce > Settings > Payments, and every bookable product inherits it automatically. ARB does not run a separate payment system of its own. It uses whatever gateways your WooCommerce store already has enabled: PayPal, Stripe, Square, Amazon Pay, PayFast, and eWay. Offline options like Cheque Payments, Bank Transfer, and Cash on Delivery work the same way. For a full walkthrough, see how to accept Stripe payments for bookings.
You do not wire a processor into a separate booking app this way. The gateway lives in your store, and every bookable product inherits it the moment you enable it. Your store's existing payment gateway integrations carry over to every bookable service without any extra setup. Some appointment platforms limit you to a narrower set of processors on their own checkout. A setup built directly into your store's cart inherits every gateway your store supports instead. You are not stuck with whichever two or three the booking tool picked for you.
Done: at least one live payment gateway is enabled and connected, and a real charge succeeds through it.
Step 2: Create Your Bookable Service and Set Its Price
Every bookable service needs a price attached before customers can pay for it. Three generic steps apply, whatever booking system you use.
- Create the bookable service or product inside your booking system.
- Attach a price to it, whether flat, per-person, or variable by date or duration.
- Decide whether that price changes by day, group size, or duration, or stays flat.
In ARB, this happens on a Reservable Product: go to Products > Add New, then set Product Data to Reservable Product. Set the price on the Costs tab. A Base Cost covers the flat rate, and Add Range rules cover weekend surcharges, group discounts, or per-slot and per-duration pricing. Use Person Types when you need per-ticket or per-attendee pricing instead of one flat price per booking. For the full WooCommerce path this guide demonstrates, see the WooCommerce appointment booking setup. The price recalculates in real time as the customer changes their selection, before they ever reach checkout.
Done: your bookable service has a price attached, and it updates instantly when the customer changes date, duration, or person count.
Step 3: Decide Whether Payment Is Automatic or Confirmation-First
This decision controls exactly when the customer pays, and it causes more confusion than any other setting in this guide.
- Instant payment (auto-confirm). Leave "requires confirmation" off. The customer pays at checkout with the gateway you enabled in Step 1, and the order completes automatically the moment payment succeeds.
- Approval-first (confirmation-first). Turn "requires confirmation" on. No payment method appears at checkout, by design, not because anything is broken. Once you review and confirm the reservation, the customer gets an email with a link to their My Account page, where they complete payment.
These two paths map directly to the full-prepayment and pay-after-approval rows in the timing-model table above. Most guides for booking software skip this exact mechanic. A confirmation-first checkout with no payment method showing is easy to mistake for a bug, rather than the setting working as intended.
Done: you have picked one path, and you know whether customers pay at checkout or only after you approve their request.
Step 4: Configure Taxes for Your Bookings
Set tax once at the store level, and every bookable service inherits it automatically, with no per-product tax setup required.
In WooCommerce, go to WooCommerce > Settings > Tax and set rates per country, state, or city. Every ARB booking applies those rules automatically at checkout. Confirm whether your listed prices already include tax, or need it added at checkout, before you go live. See WooCommerce's own tax setup documentation for platform-specific detail.
Done: at least one tax rate is configured, and a test booking shows the correct tax amount at checkout.
Step 5: Take the Payment at Checkout and Test the Flow
Run one real test through checkout before you announce your booking form to customers.
- Place a test booking the way a real customer would, using a live or test card.
- Confirm the order status matches what you expect: paid immediately, or moved to Confirmed once you approve it.
- Check that the confirmation email arrives with the correct booking details.
- Repeat the test for every payment-timing model you plan to offer.
Every ARB booking runs through the normal WooCommerce cart and checkout, not a separate payment flow. Order status then depends on the product type. A reservable product that is virtual and downloadable completes automatically once payment succeeds. A physical or non-downloadable one moves to Processing instead, so you can manage fulfilment before marking it complete.
Done: a test booking completes, the order status matches your payment-timing model, and the confirmation email reaches the test customer.
Can You Take a Deposit or Partial Payment?
Most native booking setups collect the full price at booking, or nothing until you approve the request. A true percentage or fixed deposit usually needs a dedicated deposit feature or add-on, not a default setting.
ARB does not have a built-in deposit or partial-payment feature. Your two native options are full payment, collected at checkout with auto-confirm, or pay-after-approval, collected through My Account once you confirm the booking. For an actual percentage or fixed deposit, add a WooCommerce Deposits extension on top of ARB. See how to take a deposit for bookings for that setup end to end.
Some booking platforms market a "deposit" setting that actually charges the full service price under a different label, not a true partial amount. Confirm exactly what any deposit feature collects before you build a cancellation policy or pricing plan around it.
Common Mistakes to Avoid When Charging for Appointments
The single most common trap is turning on confirmation-required while still expecting customers to pay instantly at checkout.
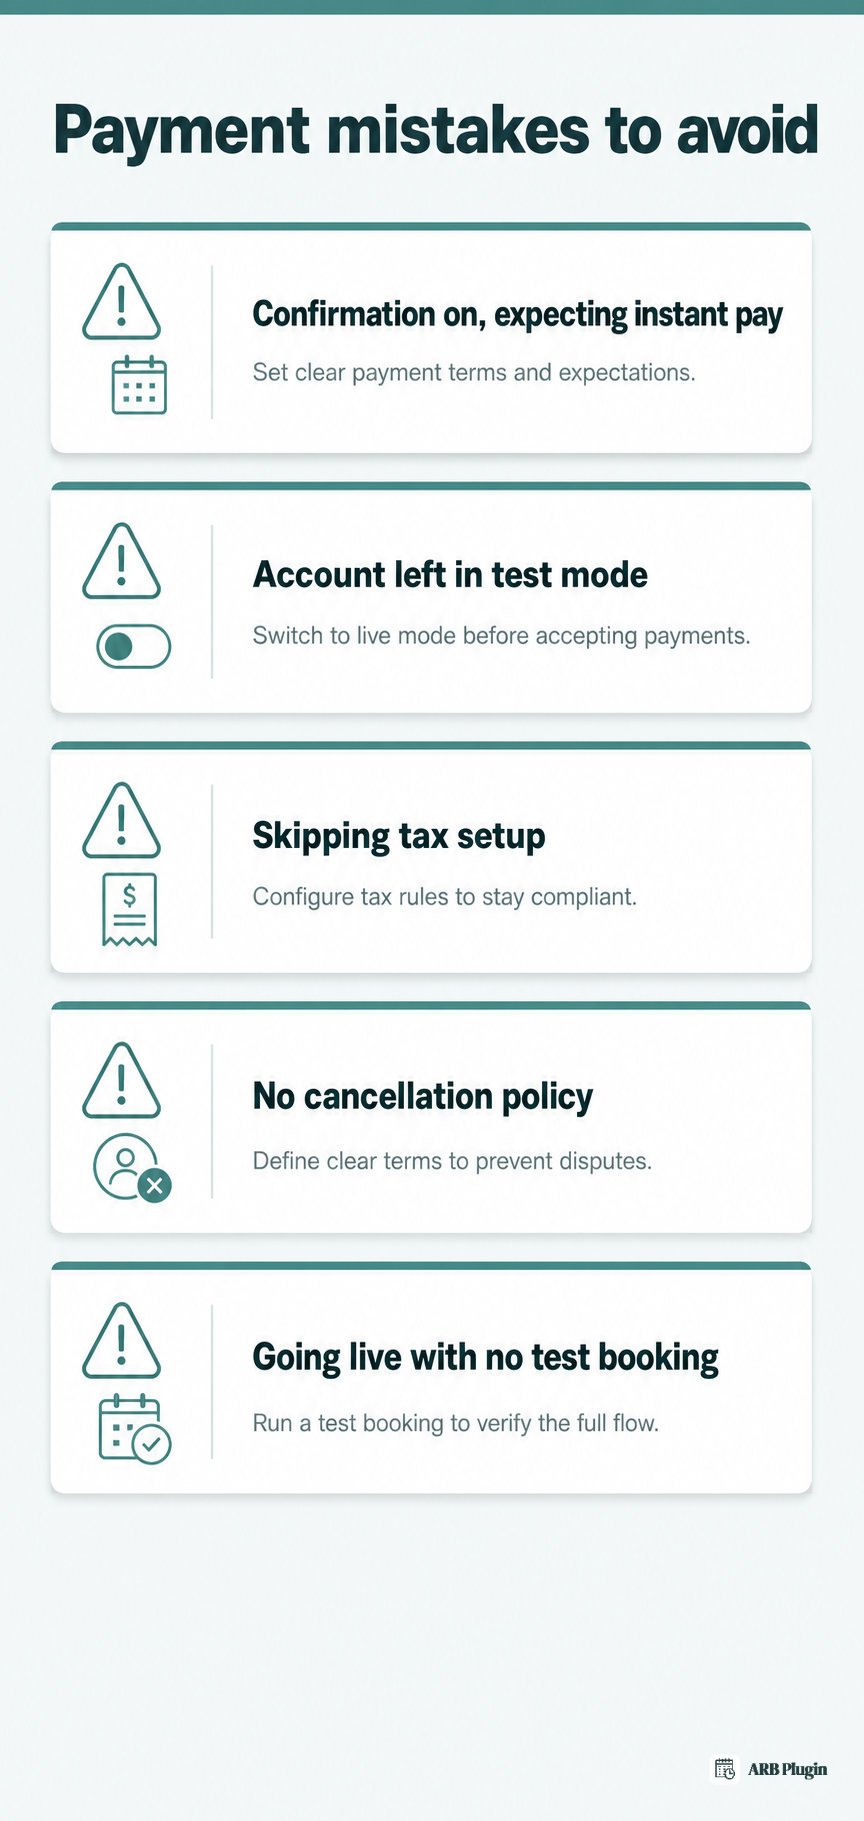
- Requiring confirmation but expecting instant checkout payment. No payment method appears, and customers assume checkout is broken. This is not a broken gateway, it is confirmation-first working exactly as designed: no payment method until you approve the booking. Remedy: use auto-confirm for instant pay, or tell customers upfront that payment happens through a link after approval.
- Leaving the account in test mode, or enabling only offline options. Live bookings arrive with no real payment collected. Remedy: enable and verify at least one live card gateway before launch, not just Cash on Delivery or Bank Transfer.
- Skipping tax setup. You under-charge or over-charge customers, creating accounting and compliance headaches later. Remedy: configure tax rates first, and decide whether your prices are tax-inclusive or tax-exclusive before you launch.
- Charging full price with no cancellation policy on high-value slots. Refund disputes and no-shows quietly eat into revenue. Remedy: set a clear cancellation policy, and add a deposit extension if a slot is valuable enough to protect.
- Going live without one real end-to-end test booking. Broken checkout or tax settings reach real customers first. Remedy: place a real test booking and pay it before you announce the form publicly.
FAQs
What is the best way to accept payments for appointments?
It depends on your payment-timing model. A card processor connected directly to your booking form, using auto-confirm for instant pay or confirmation-first for approval-based bookings, is the standard setup either way.
How do I enable payments at booking?
Connect a live payment gateway to your booking system, then leave "requires confirmation" off. With confirmation off, the customer pays at checkout and the order completes automatically.
Which payment methods can I accept for bookings?
On a WooCommerce-based setup, you can accept Stripe, PayPal, Square, Amazon Pay, PayFast, and eWay. Offline methods, including Cheque Payments, Bank Transfer, and Cash on Delivery, work the same way.
Do I need a separate payment processor account?
Yes. You need a Stripe, PayPal, or Square account (or another supported gateway) that is approved for live charges, connected to your booking system's payment settings.
Why don't payment methods show at my booking checkout?
The "requires confirmation" setting hides every payment method by design. Once you approve the booking, the customer gets an email with a My Account link to complete payment.
How do I accept payment for an event with multiple tickets?
Use per-type pricing, such as ARB's Person Types, so each ticket category carries its own price. Count each ticket as one item toward the total and toward your capacity limit.
Can I take a deposit for an appointment?
Not natively in most booking setups, including ARB. Your two default options are full payment or pay-after-approval. A true partial deposit needs a dedicated deposit feature or a separate extension.
How are taxes handled on booking payments?
Configure tax once at the store level, and it applies automatically to every booking. In WooCommerce, this means setting rates per country, state, or city under Settings > Tax.
How long does it take to set this up?
With a live processor account already approved, the plugin-side setup, gateway connection, pricing, payment timing, tax, and one test booking, takes well under an hour.
If you run bookings on WordPress, ARB collects payment through the WooCommerce checkout you already use. Stripe, PayPal, Square, and every other gateway your store supports all work the same way. It ships as a one-time price rather than a recurring plan. This payment setup does not add a second subscription on top of your processor fees. Set your price, choose instant payment or approval-first, and see a working booking-and-payment flow in the live ARB demo before you build your own.
