Migrating a WordPress site moves its files, database, and configuration to a new host while keeping every page, post, and setting intact. Three methods handle it: a migration plugin, a host-provided free service, or a manual FTP and database transfer. Done correctly, the site loses no data and no search ranking.
This guide walks through all three methods. It then covers backup, file and database transfer, wp-config.php and URL updates, pre-DNS testing, DNS cutover, SSL reinstallation, and the post-migration checks.
Migrating a WordPress Site at a Glance
Migrating a WordPress site moves its files, database, and configuration from an old host to a new one without changing what visitors see. The process runs through four stages: backing up, transferring, reconfiguring wp-config.php and the site URLs, and switching DNS. Most single-site migrations finish in one to four hours, plus up to 48 hours for DNS propagation to complete worldwide.
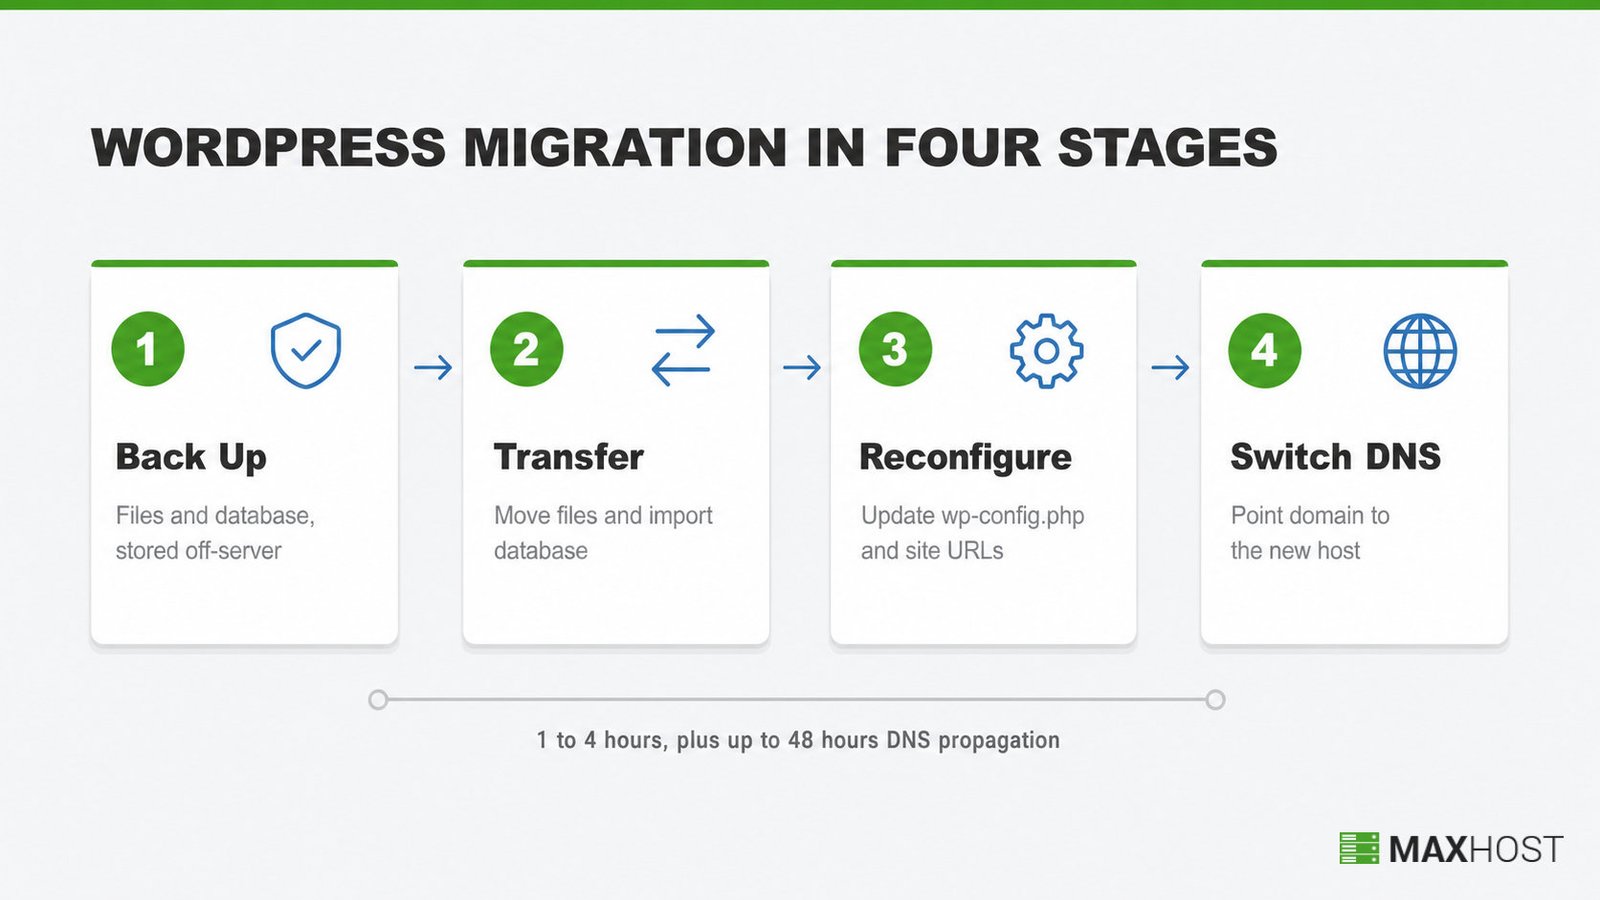
Three methods complete that transfer:
- A migration plugin (Duplicator, All-in-One WP Migration, or Migrate Guru) packages files and the database into one archive and automates the move.
- A host-provided free migration service moves the site for you, typically within one to three business days.
- A manual migration moves files over FTP or SFTP and the database through phpMyAdmin, by hand.
Moving between WordPress hosting providers only changes where the same site runs, not what it does. The steps below apply whichever method you choose, since a plugin or host service automates the same underlying file and database transfer.
What You Need Before You Start
The single most skipped step is a verified backup you can actually restore, not just a file you assume works. Confirm the backup opens correctly before you touch anything else.
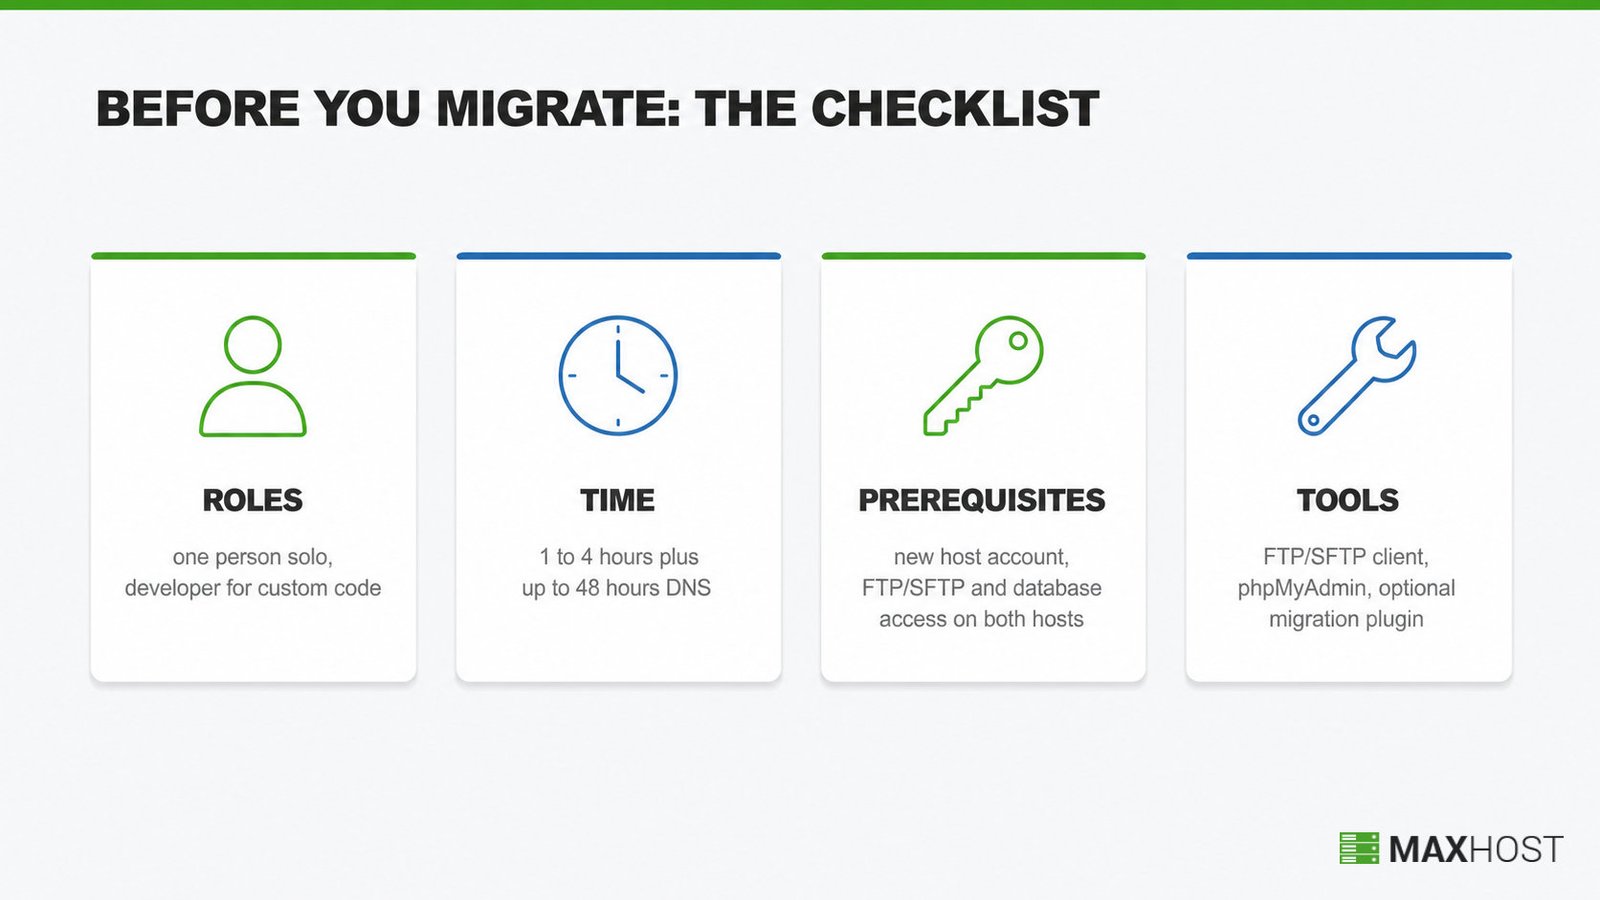
- Roles: one person can run a typical single-site migration solo. Bring in a developer if the site runs custom code or spans multiple environments.
- Time: 1 to 4 hours for a typical single site, plus up to 48 hours of DNS propagation after cutover.
- Prerequisites: a new hosting account already provisioned, FTP or SFTP credentials for both hosts, and database access (phpMyAdmin or equivalent) on both ends.
- Tools: an FTP or SFTP client, a database tool such as phpMyAdmin, and a migration plugin if you choose that method.
If you have not chosen your new host yet, see how to choose a web host before you move anything.
Migrating vs. Building a New Hosting Site: Which Guide Do You Need?
This guide covers moving an EXISTING WordPress site to a new host, not building a site from scratch. Three related situations point to a different guide.
If you are starting a hosting company site from zero, see how to make a web hosting website guide instead. For a general business site rather than a hosting company, see how to make a business website with wordpress guide. If you just want a fresh theme on your CURRENT host, not a new host, see how to install a WordPress theme guide.
Step 1: Choose Your Migration Method
Three methods move a WordPress site to a new host: a migration plugin, a host-provided free service, or a manual FTP and database transfer. Pick based on how much control you want over the process.
| Method | Effort | Control | Best for |
|---|---|---|---|
| Migration plugin (Duplicator, All-in-One WP Migration, Migrate Guru) | Low | Medium | Most single-site migrations within the plugin's export size limit |
| Host-provided free migration service | Lowest | Low | Sites moving to a host that offers the service |
| Manual (FTP and phpMyAdmin) | High | High | Large sites, custom setups, or hosts without plugin access |
A migration plugin packages the files and database into one exportable archive, then unpacks it on the new host. Duplicator, All-in-One WP Migration, and Migrate Guru each work this way, with size limits varying by plan.
A host-provided free migration service hands the job to the new host's team. You submit your current login details, and the host copies the site over, typically within one to three business days.
A manual migration gives full control over every file and table. You move files over FTP or SFTP and export and import the database through phpMyAdmin, then reconfigure wp-config.php by hand. Steps 2 through 5 below walk through this method, and the same file and database transfer underlies the other two methods as well.
Done: you have picked one method and confirmed you hold the credentials it requires for both hosts.
Step 2: Back Up Your Current Site
Back up both the WordPress files and the database before you touch anything, and store the backup off the current server. Three routes create that backup, from easiest to most manual.
- Backup plugin (easiest): All-in-One WP Migration, UpdraftPlus, or Duplicator packages your files and database into one archive to download or send to cloud storage.
- One-click host backup: cPanel's Backup Wizard offers a "Download a Full Website Backup" that bundles files and the database in a single archive, with no plugin.
- Manual (most control): download the files over FTP and export the database from phpMyAdmin by hand, as the numbered steps below describe.
The manual route runs in five steps.
- Download every file in the WordPress root (wp-content, wp-admin, wp-includes, wp-config.php, and the hidden .htaccess) over FTP or SFTP.
- Export the database from phpMyAdmin: open the database, click Export, choose Quick and SQL format, then download the .sql file.
- Compress exports over 100 MB before downloading, since most hosts cap upload size on the receiving end.
- Save both the files and the database export to a local drive or cloud storage, not another folder on the current host.
- Confirm the .sql file opens in a text editor and is not empty or truncated.
As one practitioner put it on a WordPress.org support forum, "it is always recommended to keep multiple backups of database and files with you". One copy is not a backup strategy.
Done: you hold a complete files backup and a verified, non-empty database export, both stored off the current server.
Step 3: Move Your Files and Export the Database
Moving files and the database has two parts: transferring the WordPress files and preparing a fresh database export for import. Reuse the backup from Step 2 if it is still current.
- Connect to the current host over FTP or SFTP and open the web root, commonly public_html, www, or htdocs. Download wp-content, wp-admin, wp-includes, and every root file, including wp-config.php and the hidden .htaccess.
- If both hosts support SSH, transfer files directly server to server with rsync or scp, which is faster than downloading and re-uploading for large sites.
- In phpMyAdmin, select the WordPress database, open Export, choose SQL format, and download the file.
- Compress the export with gzip if it exceeds 100 MB, since most hosts reject large plain SQL uploads.
- Note the table prefix (commonly wp_) from the export. The new host's database needs the same prefix, or wp-config.php must be updated to match.
Done: your files are downloaded or transferred, and you hold a fresh SQL export with its table prefix noted.
Step 4: Set Up the New Host and Import the Database
Setting up the new host means creating a fresh database and importing the export before any WordPress file touches it.
- In the new host's control panel, create a new MySQL database and a database user with full privileges on it.
- Record the new database name, username, password, and host value exactly as created. Step 5 needs all four.
- Open phpMyAdmin on the new host, select the new empty database, and use Import to upload the SQL file from Step 3.
- Wait for the import to finish, then confirm the table list matches the original site instead of an empty database.
- Upload the WordPress files from Step 3 into the new host's public web directory, commonly public_html or a subfolder.
Done: the new database holds every imported table, and the files sit in the new host's web root.
Step 5: Update wp-config.php and the Site URLs
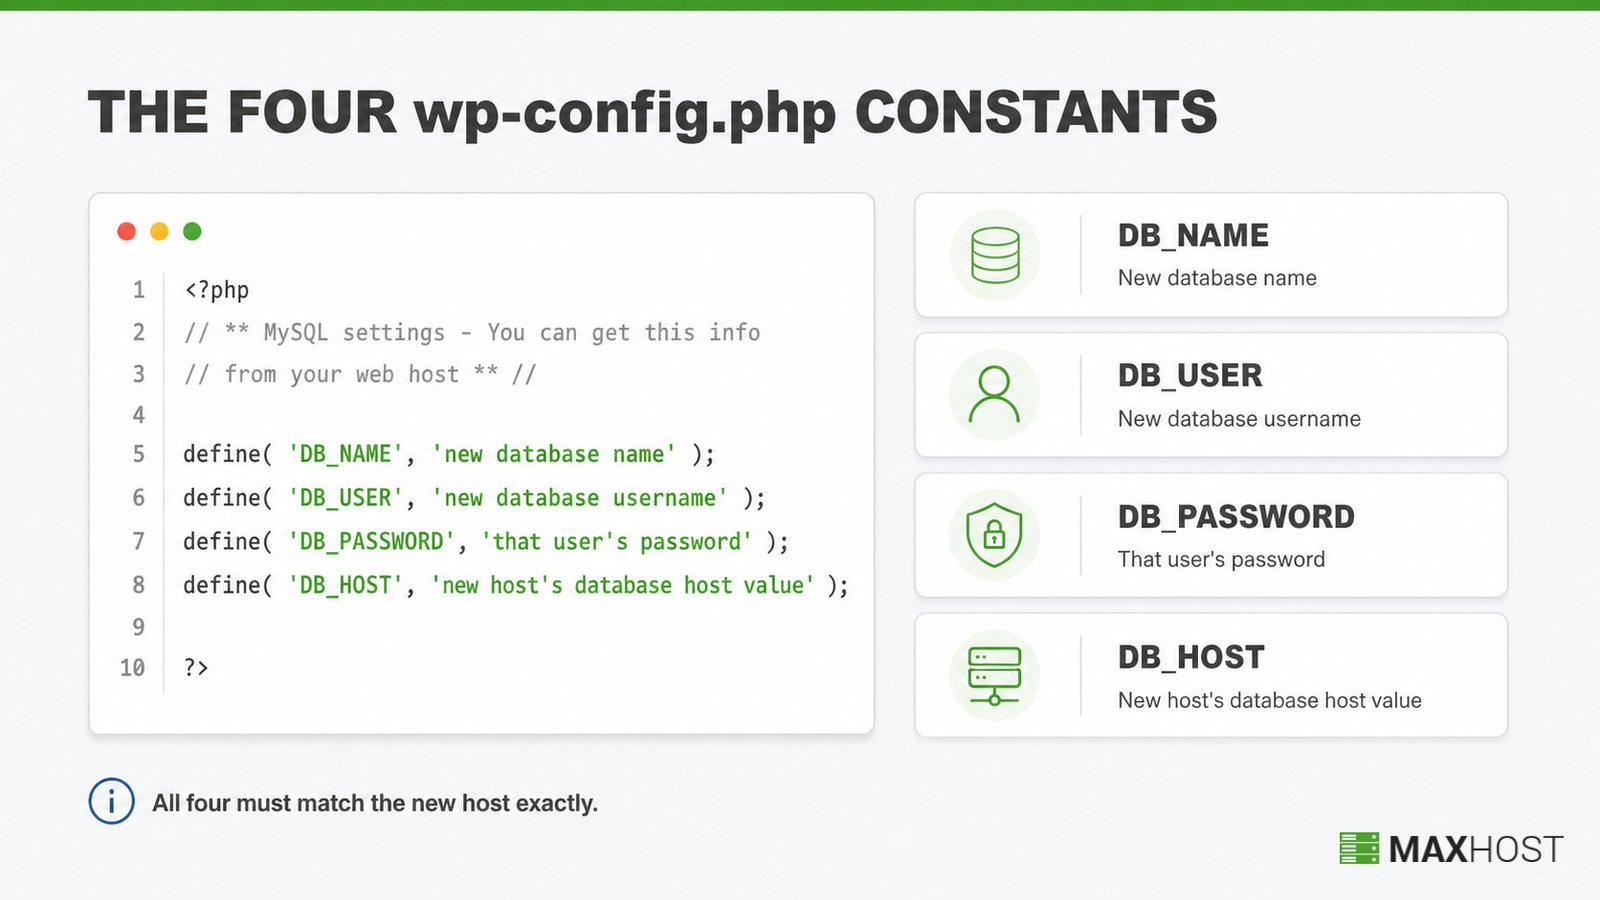
wp-config.php connects WordPress to its database, so four constants must match the new host exactly, per WordPress's own developer documentation.
- Open wp-config.php in a text editor and update DB_NAME, DB_USER, DB_PASSWORD, and DB_HOST to the values recorded in Step 4.
- Save the file and confirm the site loads, even with broken links, which confirms the database connection works before you touch URLs.
- If a URL mismatch locks you out of wp-admin, hardcode the URLs to restore access. Add define('WP_HOME','https://your-domain.com'); and define('WP_SITEURL','https://your-domain.com'); just above the "stop editing" line in wp-config.php.
- Update the site URLs with WP-CLI's search-replace command using the --precise flag, or a purpose-built plugin such as Better Search Replace or Velvet Blues Update URLs. Never run a raw SQL query for this.
- Set the new URLs before moving on to DNS, either through Settings > General in wp-admin or the search-replace command, so every stored URL is correct before the site goes live.
- Never edit the GUID field in wp_posts. WordPress uses it for feed identity, and changing it makes feed readers treat every existing post as new.
A raw SQL search-replace on the database corrupts serialized data. WordPress stores widget settings, theme options, and some plugin data as serialized PHP strings, each with a character count built into the string. Changing a URL's length without updating that count breaks the structure, and widgets or settings can silently disappear. Run wp search-replace 'https://old-domain.com' 'https://new-domain.com' --all-tables --precise instead, or use a plugin built for exactly this.
Done: wp-config.php points to the new database, and every stored URL matches the new domain without corrupted serialized data.
Step 6: Test the Migrated Site Before You Switch DNS
Test the migrated site under its real domain name before any visitor sees it. Edit your computer's hosts file to point only your machine at the new server.
- Add an entry to your hosts file (C:WindowsSystem32driversetchosts on Windows, /etc/hosts on macOS and Linux) mapping your domain to the new host's IP address.
- Flush your local DNS cache if the change does not take effect immediately.
- Load the homepage and confirm text, images, and menus render correctly.
- Submit a contact form or test order to confirm form handlers work on the new server.
- Log in to wp-admin and check that the dashboard, plugins, and theme settings all load.
- Click through internal links to confirm none point back at the old host.
- Alternatively, if your new host offers a temporary preview URL, test through it instead of editing the hosts file.
- Remove the hosts file entry once testing is complete, right before or right after the DNS change.
Done: the site works correctly under its real domain from your machine, with no broken links, forms, or admin access.
Step 7: Point DNS to the New Host and Reinstall SSL
Pointing DNS to the new host happens at the domain registrar, not the hosting control panel, unless the registrar and host are the same company. Before you touch your nameservers, it helps to understand how DNS works. A wrong record here is the most common cause of a migration going dark.
- Log in to the domain registrar and update the nameservers to the new host's nameservers, or update the A record to the new host's IP address if you are keeping the existing nameservers.
- Lower the DNS TTL to 300 seconds a day before the switch, if possible, so the change propagates faster.
- Wait for propagation, which typically completes within 24 to 48 hours worldwide, though most visitors see the new site within an hour.
- Reinstall the SSL certificate on the new server. A certificate is issued per server, not per domain, so it does not carry over automatically.
- Confirm the padlock and HTTPS load correctly once DNS has propagated and the certificate is active.
Done: DNS resolves to the new host worldwide, and a valid SSL certificate secures the new server.
Step 8: Confirm the Live Site and Clean Up
Confirming the live site means watching it closely for the first 24 to 48 hours, not walking away once DNS switches.
- Monitor uptime and load times for 24 to 48 hours after cutover, since propagation is not instant for every visitor.
- Check for broken links and missing images, then purge any caching or CDN layer so visitors load the migrated files, not stale copies.
- Check Google Search Console for crawl errors on the new setup.
- If the domain itself changed, not just the host, submit Google's Change of Address tool so Google forwards ranking signals to the new domain over the following 180 days.
- Keep the old host active until you have confirmed at least 48 hours of stable traffic and no lingering requests still hitting it.
- Cancel the old hosting plan only after this confirmation window closes.
A migration like this is sometimes step one toward relaunching as a hosting company. This cleanup window is also the moment to rebuild your plan pages: see how to add hosting pricing tables in wordpress. Readers choosing a new theme at the same time can compare options in best wordpress hosting themes.
Done: the new site has run stable for at least 48 hours, and the old host is canceled or downgraded.
Common WordPress Migration Mistakes to Avoid
The most damaging WordPress migration mistake is skipping a verified backup. Every other mistake below is recoverable if a working backup exists, and unrecoverable if it does not.
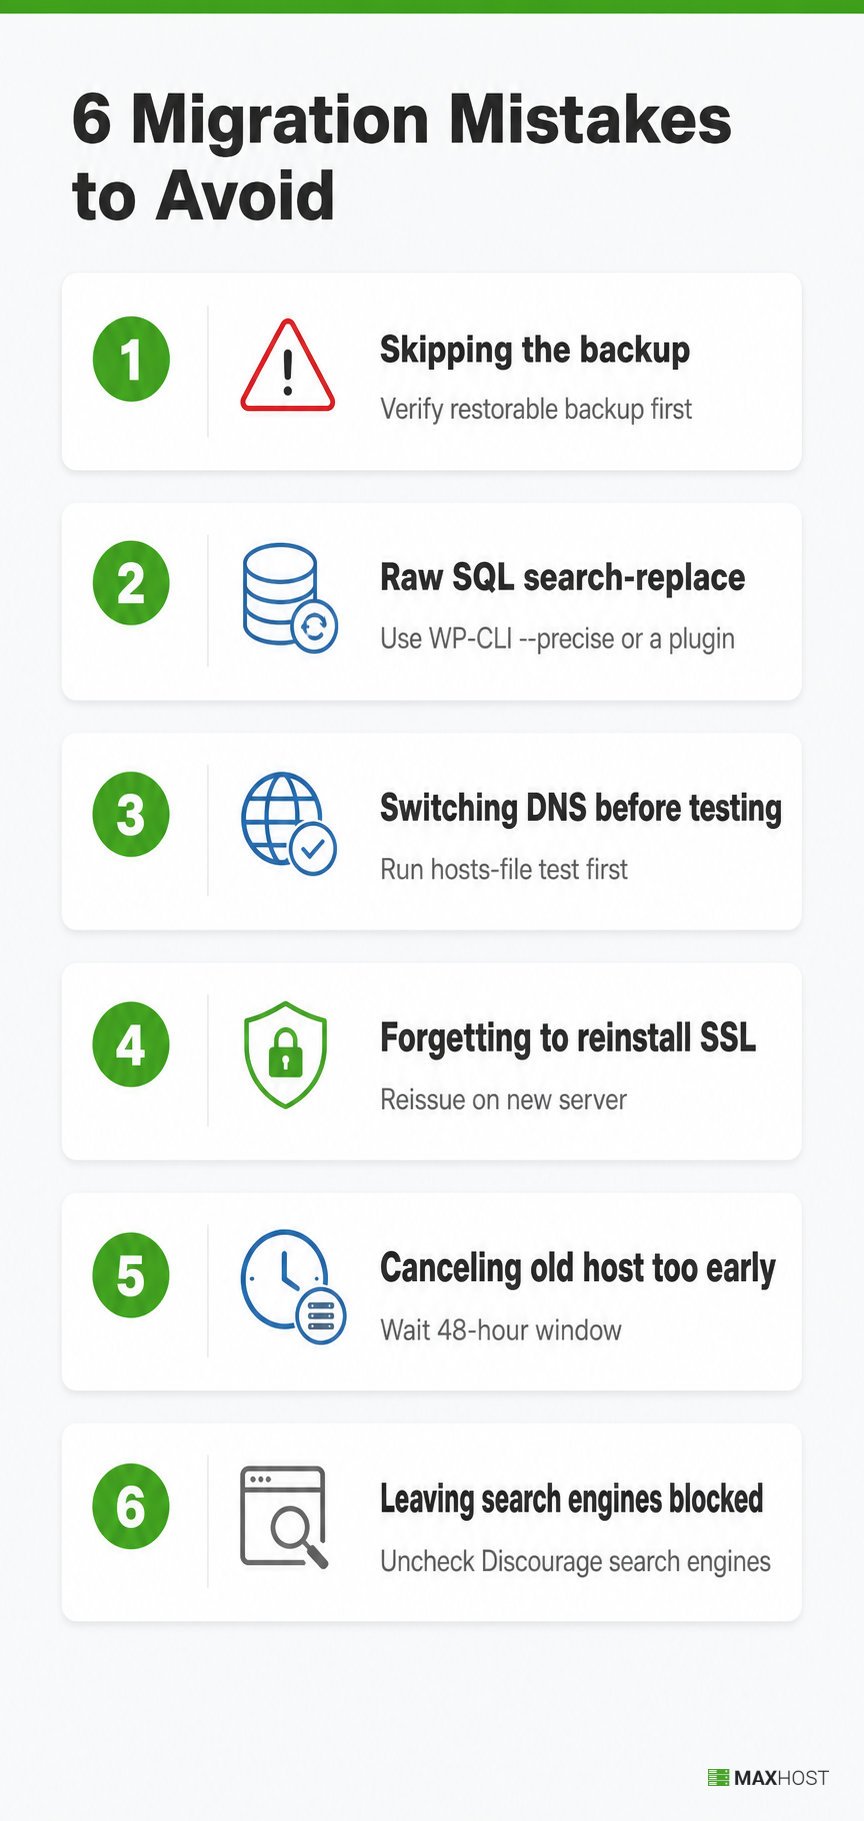
- Skipping the backup. Migrating without a verified, restorable backup leaves a failed import with no fallback. Fix: complete Step 2 in full, and confirm the backup opens before deleting anything on the old host.
- Running a raw SQL search-replace on URLs. This corrupts serialized data in widgets, theme settings, and some plugin tables, causing silent breakage. Fix: use WP-CLI's search-replace with --precise, or a dedicated plugin, never a raw database query.
- Switching DNS before testing. Pointing DNS at the new host before confirming it works sends live traffic to a broken site. Fix: complete Step 6's hosts-file test first, every time.
- Forgetting to reinstall SSL. A certificate does not follow a domain to a new server automatically, so skipping this step leaves the new site insecure or unreachable over HTTPS. Fix: reinstall the certificate as part of Step 7, before announcing the switch.
- Canceling the old host too early. DNS propagation is not instant, so some visitors and crawlers still hit the old host for up to 48 hours. Fix: wait out the confirmation window in Step 8 before canceling anything.
- Leaving search engines blocked after launch. A new or staging site often keeps Settings > Reading > "Discourage search engines" checked, which adds a noindex tag and hides you from search. Fix: uncheck it right after cutover, then confirm the live pages are indexable.
A migration is also not the moment to switch page builders. Switching from Elementor to WPBakery, or back, at the same time doubles the risk of both changes. Compare them first in our Elementor vs WPBakery guide, then run that change separately from the host move.
FAQs
How long does WordPress migration take?
A typical single-site WordPress migration takes 1 to 4 hours with a plugin or host-provided service. DNS propagation adds up to 24 to 48 hours before every visitor sees the new site, though most see it within an hour.
Will migrating hurt my SEO rankings?
Migrating to a new host without changing your domain does not hurt SEO when done correctly. Changing the domain itself can cause a temporary ranking dip. Full stabilization takes 3 to 6 months, even with proper 301 redirects.
Can I migrate with zero downtime?
Near-zero downtime is achievable by testing the new site through a hosts-file edit before switching DNS. Cut over only once everything works. The old site stays live and unaffected until the DNS change completes.
Do I need to reinstall my SSL certificate?
Yes. An SSL certificate is issued for a specific server, not a domain, so it does not transfer automatically. Reinstall or reissue the certificate on the new host as part of Step 7.
What's the difference between plugin and manual migration?
A migration plugin packages files and the database into one archive and automates the transfer. Manual migration moves files over FTP and the database through phpMyAdmin by hand, trading speed for more control.
Will my new host migrate my site for free?
Many hosts offer a free migration service for new customers, typically completed within one to three business days. Check your specific host's migration policy before starting a manual or plugin-based move yourself.
What happens if wp-config.php is wrong?
Incorrect DB_NAME, DB_USER, DB_PASSWORD, or DB_HOST values in wp-config.php produce a database connection error. The site will not load at all. Double-check all four values against the new host's database settings.
How do I test my site before switching DNS?
Edit your computer's hosts file to point your domain at the new server's IP address, then browse the site normally. Only your machine sees the change, so testing does not affect live visitors.
Do I change DNS at the registrar or the host?
DNS changes happen at the domain registrar, unless the registrar and hosting provider are the same company. Update nameservers or the A record there, not only in the new host's control panel.
Does this work for WordPress Multisite?
WordPress Multisite must migrate as one complete network, not site by site within it. The same backup, transfer, and wp-config steps apply. A multisite-specific plugin handles the network table structure more reliably than a manual move.
A clean migration is often step one toward something bigger: relaunching as a hosting company yourself. MaxHost pairs nine hosting marketing demos with 20 WHMCS client-area templates that match from day one, with no bridge plugin required. See the hosting company wordpress theme at MaxHost, or view the MaxHost demo to explore the WHMCS-ready layouts firsthand.