Installing a WordPress theme means getting its files onto your site, activating it, then importing its demo content until your live site matches the preview. Three real methods exist: the WordPress.org directory, a zip upload, and FTP.
This guide covers all three, plus the required plugins step, the demo import, and the errors that stop most installs cold.
Installing a WordPress Theme at a Glance
Installing a theme means uploading its files to WordPress, switching it on, and optionally importing its sample content. A finished install shows your live site matching the theme's demo, spacing, images, and menus included.
Three methods get a theme's files onto your site. Each fits a different situation, summarized below.
| Method | Best for | What you need | Difficulty |
|---|---|---|---|
| WordPress.org directory | Free themes only | Nothing extra; built into the dashboard | Easiest |
| Zip upload | Premium or downloaded themes | The theme's .zip file | Easy |
| FTP or File Manager | Hosts that block dashboard uploads | An FTP client or your host's File Manager | Moderate |
Activation and demo import work the same way regardless of which method you used to install the theme.
What You Need Before You Start
The prerequisite most people miss is having the actual theme .zip file ready, not a bookmark to its download page. Everything else on this list is quick to confirm.
- Who's involved: just you, whoever manages the WordPress dashboard.
- Time: 15 to 45 minutes for install and activation. Demo import adds 5 to 15 minutes, and installing required plugins adds another 5 to 10 minutes.
- Inputs: a WordPress site with admin access, the theme's .zip file already downloaded, and the theme's list of required plugins if it has one.
- Tools: an FTP client or your host's File Manager, only if your host blocks theme uploads from the dashboard.
Start with how to make a web hosting website instead when your actual project is a full hosting company site, not a single theme swap. Compare options in a best WordPress hosting themes roundup first, when you have not picked a theme yet.
How to Install a WordPress Theme: Step-by-Step
Eight steps take a theme from download to a fully customized, live site.
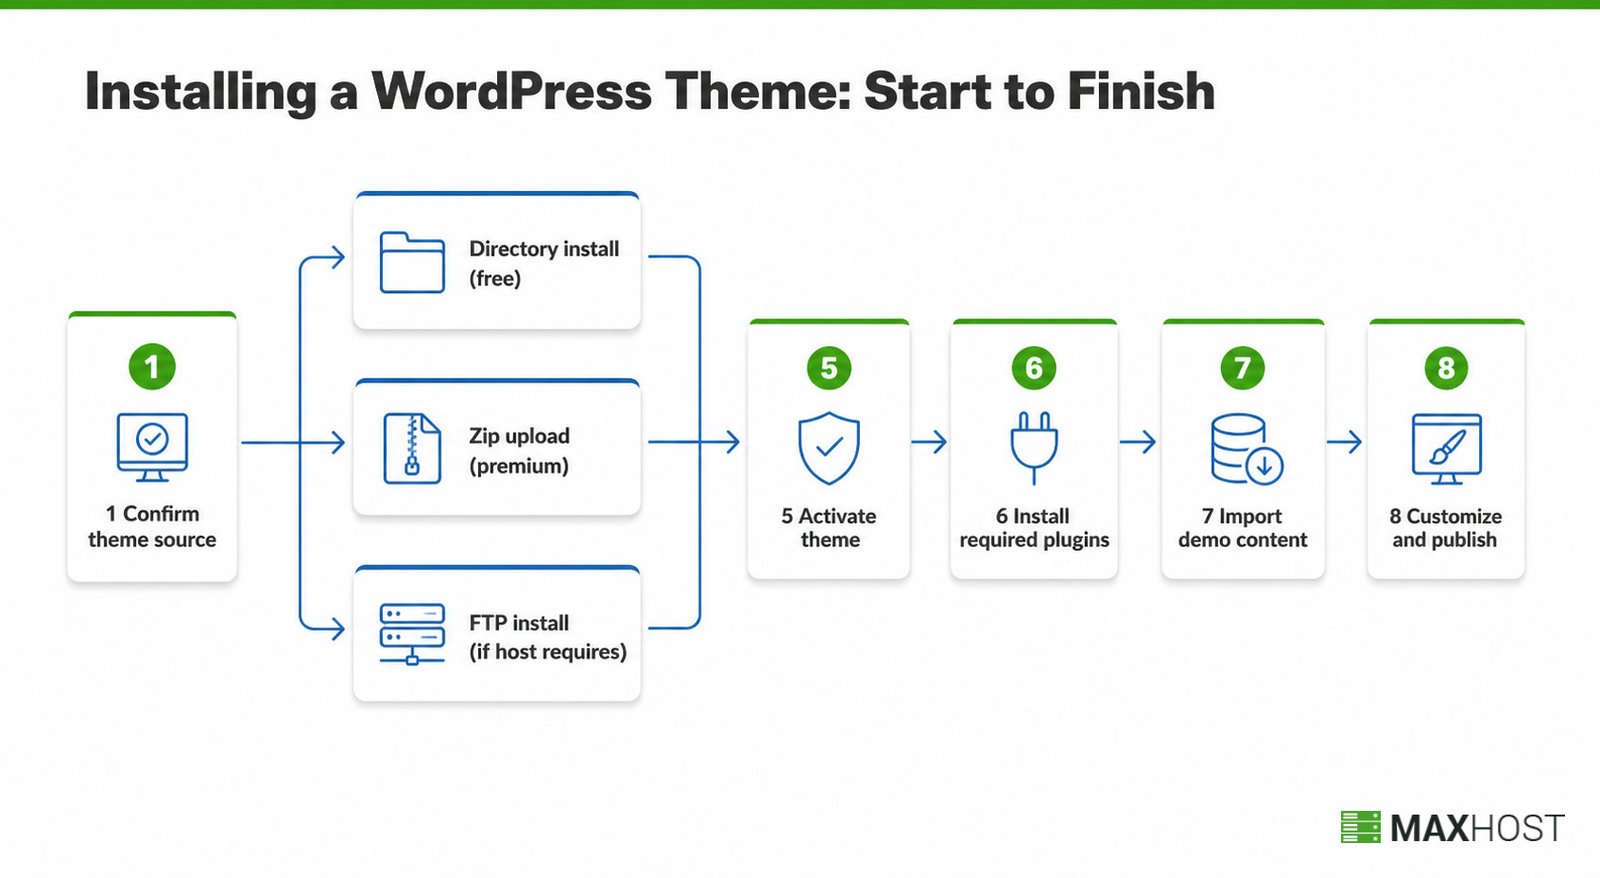
Step 1: Confirm Where Your Theme Comes From
Where your theme comes from decides which install method you need. Free themes from the WordPress.org directory install straight from your dashboard.
A theme you bought or downloaded as a zip file needs the upload or FTP method instead. Check your download page or purchase email for a .zip file when you are unsure.
Step 2: Install a Theme From the WordPress.org Directory
Free directory themes install in four clicks, directly from the dashboard.
- Go to Appearance, then Themes, then Add New Theme.
- Search for the theme by name, or filter by layout, subject, or feature.
- Click Install on the theme you want.
- Click Activate once installation finishes.
Done: the theme shows as active under Appearance, then Themes.
Step 3: Upload a Premium or Downloaded Theme's Zip File
A theme you downloaded or bought uploads through the same Themes screen, using the Upload Theme button.
- Go to Appearance, then Themes, then Add New Theme.
- Click Upload Theme near the top of the page.
- Click Choose File and select the theme's .zip file.
- Click Install Now, then click Activate.
A premium web hosting WordPress theme like MaxHost, sold on ThemeForest, installs exactly this way. ThemeForest wraps the actual theme .zip inside a larger download that also includes documentation and license files.
The file you upload here has to be the inner theme .zip, not the whole ThemeForest download. Uploading the outer package triggers the missing stylesheet error covered later in this guide.
Done: the theme is installed and active, with an Active label under Appearance, then Themes.
Step 4: Install a Theme via FTP (If Your Host Requires It)
Some hosts block dashboard uploads above a certain file size, so FTP or cPanel's File Manager becomes the fallback.
- Unzip the theme's .zip file on your computer, if it is not unzipped already.
- Connect to your server with an FTP client or your host's File Manager.
- Upload the unzipped theme folder to /wp-content/themes/.
- Go to Appearance, then Themes, in your dashboard, and click Activate.
This works the same way for any theme, including MaxHost's package, when a host locks down dashboard uploads.
Done: the theme folder appears under Appearance, then Themes, ready to activate.
Step 5: Activate the Theme
Activation is the fastest step in the whole process. From Appearance, then Themes, hover over the installed theme and click Activate.
WordPress switches your live site to the new theme immediately, no matter which method installed it.
Step 6: Install the Theme's Required Plugins
Most premium themes show a notice for required and recommended plugins right after activation.
This notice lists every plugin the theme needs to render its demo layouts correctly. Click Begin installing plugins, then install and activate everything on the list before customizing anything else.
MaxHost's notice, for example, lists three plugins:
- WPBakery Page Builder
- Elementor
- Slider Revolution
Skipping any of them breaks the layout the theme's demo shows.
Step 7: Import the Demo Content
Demo import copies the theme's sample pages, images, and settings onto your site.
Most themes use the free One Click Demo Import plugin, active on more than 1 million WordPress sites. Go to Appearance, then Import Demo Data, choose a demo if the theme offers more than one, and click Import. The process finishes in 60 seconds to 5 minutes, depending on server speed.
Some themes show no one-click importer at all. In that case, click Switch to manual import inside One Click Demo Import. You can also go to Tools, then Import, and upload the theme's demo .xml file.
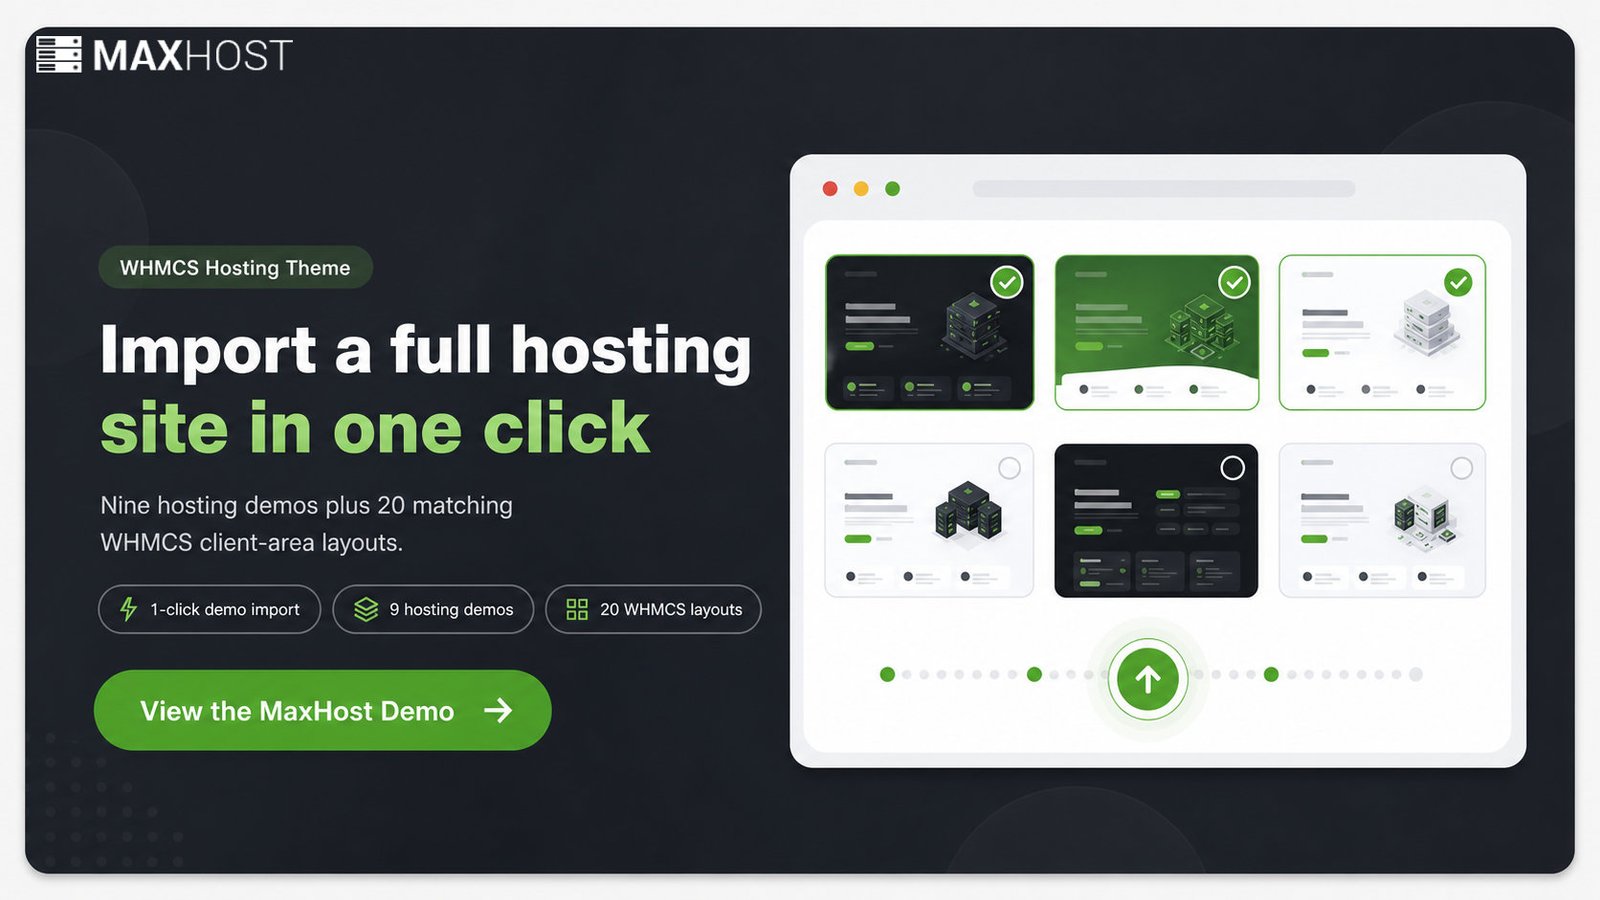
MaxHost calls this step "1 Click Installation": choose a template, import it, and start customizing. Buyers also get a second import most generic hosting themes skip, a WHMCS client area template. MaxHost ships 20 of these layouts, so the billing portal matches the WordPress site instead of running WHMCS's stock design.
Done: your front end matches the theme's demo, spacing, images, and menus included.
Step 8: Customize and Publish
Once the demo matches, customize it in your page builder: swap the logo, replace demo text and images, and update the navigation menu.
MaxHost supports both Elementor and WPBakery, so builder choice depends on which one your team already knows. See Elementor vs WPBakery for the tradeoffs between the two.
Publish when every page reflects your actual business, not the demo's placeholder content.
Common WordPress Theme Installation Mistakes to Avoid
The costliest mistake is uploading a marketplace's whole download instead of the inner theme .zip. That triggers the missing stylesheet error and stops the install before it starts.
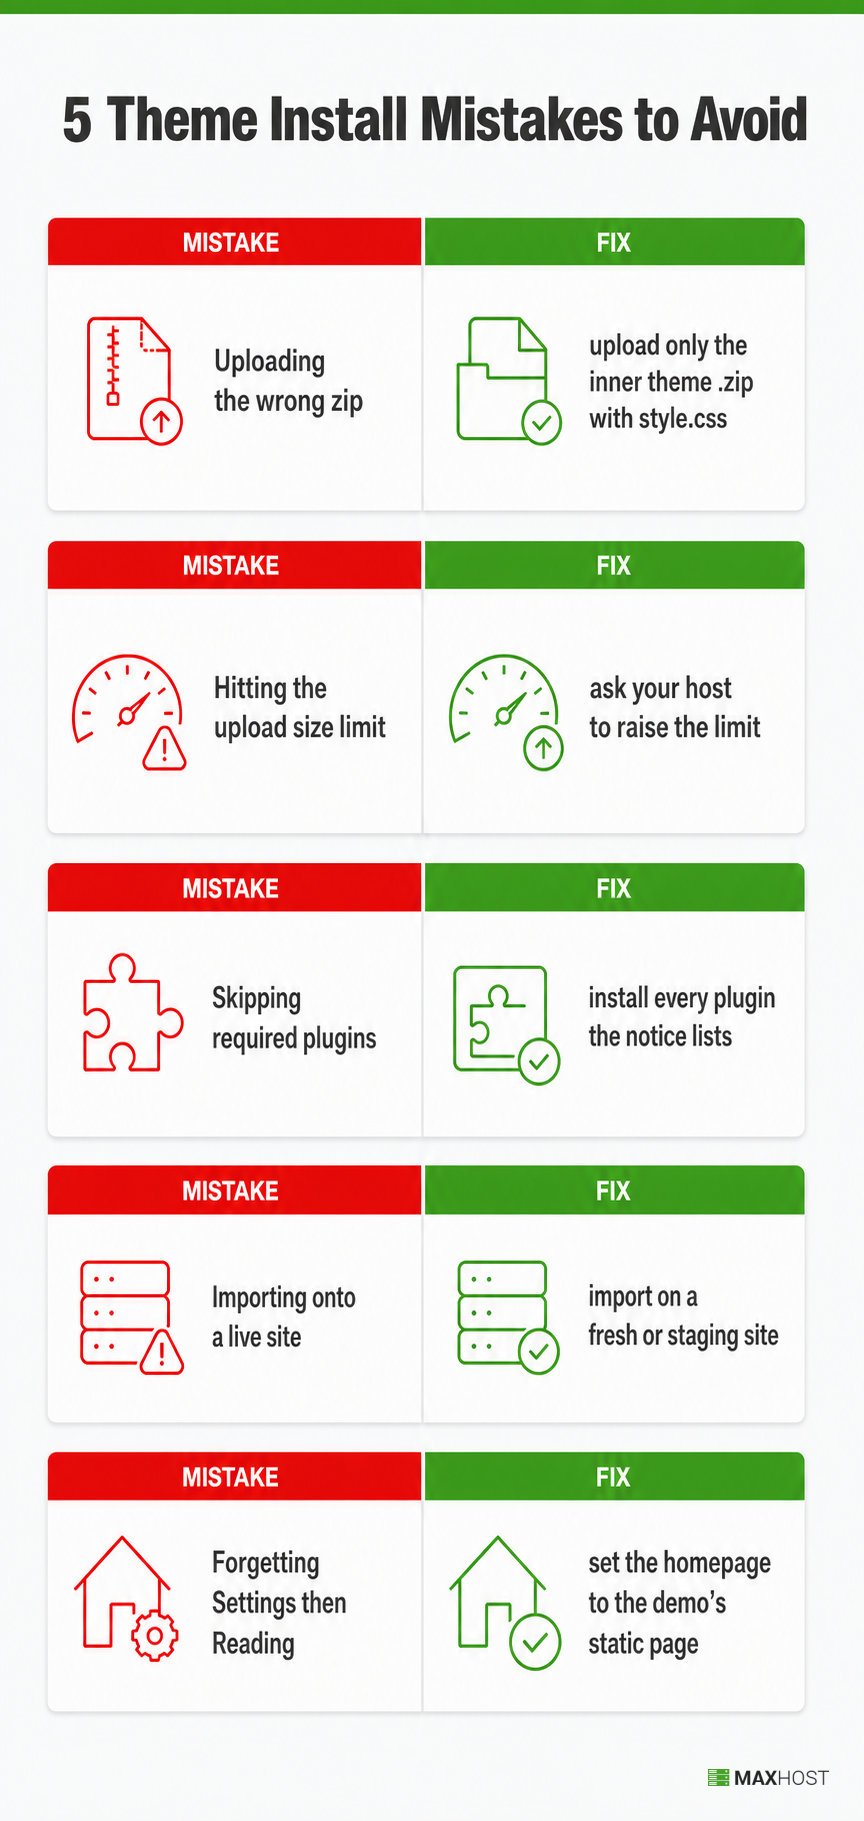
- Uploading the wrong zip file: ThemeForest and similar marketplaces wrap the theme .zip inside a larger download with documentation and license files. Uploading that outer package triggers "the package could not be installed, the theme is missing the style.css stylesheet" (Kinsta). Unzip the download first, and upload only the inner theme .zip that contains style.css at its root.
- Hitting the upload size limit: Premium theme packages, heavy with demo content and sliders, often exceed your host's
upload_max_filesizesetting (Themeisle). The upload fails partway with no clear on-screen reason. Ask your host to raise the limit; that beats editing php.ini or .htaccess yourself if you are not comfortable with server configuration. - Skipping the required plugins notice: The theme activates, but its layout looks broken: missing sliders, malformed pricing tables, or a blank homepage. This happens when the "Install Required Plugins" notice gets dismissed instead of actioned. Return to Appearance, then Install Plugins, and activate every plugin the theme lists.
- Importing demo content onto a site with existing posts or pages: Demo import assumes a clean, fresh WordPress install. Importing onto a live site duplicates menus, pages, and categories instead of replacing them. Import demo content on a fresh install or a staging site, then migrate your real content afterward.
- Forgetting Settings, then Reading, after import: The homepage shows a blog feed instead of the imported design, even though the import itself finished successfully. Go to Settings, then Reading, and set "Your homepage displays" to the static page the demo created.
FAQs
Can I install a WordPress theme without FTP?
Yes. Most installs never need FTP: the WordPress.org directory method and the zip upload method both run entirely from the dashboard. FTP only becomes necessary when a host blocks dashboard uploads or blocks large files.
How long does installing a WordPress theme take?
Installing and activating a theme takes 15 to 45 minutes for most sites. Demo import adds 5 to 15 minutes, and installing required plugins adds another 5 to 10 minutes, depending on how many the theme bundles.
Do I need web hosting before I install a theme?
Yes. A theme installs onto an existing WordPress site, so WordPress hosting and a working WordPress install come first. Set up hosting, install WordPress, then install the theme.
Can I preview a theme before installing it?
Yes. The WordPress.org directory shows a Preview link on every theme before you install it. Premium themes usually publish a live demo site instead, so you see the full design before you buy or download it.
Can I install a WordPress theme on a local site?
Yes. A local WordPress install on tools like LocalWP or XAMPP installs themes the same way, through Appearance, then Themes. Local sites suit testing a theme before it goes live on your host.
How many WordPress themes can I have installed at once?
WordPress lets you install as many themes as your server storage allows, but only one theme can be active at a time. Installed but inactive themes sit under Appearance, then Themes, ready to switch to later.
What's different about installing a premium theme versus a free one?
Premium themes install through the zip upload or FTP method, often bundle required plugins, and frequently need a license key entered after activation. Free directory themes install with one click, need no license key, and rarely bundle plugins.
Is installing a theme the same as building a full WordPress website?
No. Installing a theme is one step in a larger build that also covers hosting, plugins, content, and site structure. See how to make a business website with WordPress for the full process.
What if I'm installing a new theme while moving my site to a new host?
Handle the migration first. Move your site, confirm it works on the new host, then install the theme. See how to migrate a WordPress site for the full migration steps.
Once theme installation is second nature, picking the right theme becomes the next decision. MaxHost is a WHMCS ready hosting and corporate business WordPress theme sold on ThemeForest, with 1-click demo import across nine hosting layouts. View the MaxHost demo to check whether its bundled WHMCS templates fit your hosting business.