Connecting WHMCS billing to a WordPress hosting site takes one of three routes. Choose a separate install, a Bridge plugin, or a matching WHMCS template installed with no bridge at all. Each trades setup effort against long-term fragility and design match.
This guide compares all three, then walks through MaxHost's no-bridge method step by step. You will install the theme, upload the matching WHMCS template, and match your branding across both systems.
What Does Integrating WHMCS with WordPress Mean?
Integrating WHMCS with WordPress means making WHMCS's cart, checkout, and client area look and function like part of your WordPress site. The two systems still run separately behind that shared design. WordPress handles your public marketing pages, while WHMCS handles billing, provisioning, and the logged-in client area behind them.
If you are still getting oriented on what WHMCS is and how it works, start there before wiring it to WordPress. The two systems never merge into one codebase.
Instead, integration closes the visual and functional gap so a customer does not notice the handoff at checkout. In practice it means one or more of three things:
- Visual continuity: matching the header, footer, colors, and navigation across both systems.
- Single sign-on: a WordPress login carrying straight through into the WHMCS client area.
- Shared functionality: embedding domain search, cart, or support ticket forms into WordPress pages.
One caveat on the term. This guide covers unifying the design and experience of the two systems. It does not cover WHMCS provisioning WordPress hosting for customers through WP Toolkit, which is a separate billing task.
There are three real ways to unify them. Here is how they compare, and how MaxHost does it without a Bridge plugin.
3 Ways to Integrate WHMCS with WordPress
Every WHMCS-to-WordPress setup boils down to one of three methods, summarized below.
| Method | How It Works | Ongoing Cost or Risk | Best For |
|---|---|---|---|
| Separate install | WordPress runs at the root domain; WHMCS runs in a /clients or /billing subfolder, or on its own subdomain | Low upfront cost, but the two sites look visually disconnected unless you style each separately | Hosts who need WHMCS live fast and will handle design matching later |
| Bridge plugin (WHMPress and similar) | A WordPress plugin embeds WHMCS's cart, pricing, and client area inside WordPress pages using shortcodes | Recurring per-module annual licensing, plus a maintenance dependency that can break on a WordPress, theme, or WHMCS update | Sites that already run a non-hosting WordPress theme and want a lighter connector |
| Matching WHMCS templates, no bridge (MaxHost) | A themed WHMCS client-area template installs directly into WHMCS, skinning it to match the WordPress site, with no connector plugin | One-time template cost, no recurring connector fee, and no live sync layer to break | Hosts building the WordPress site and the WHMCS client area together from the start |
Method 1: Separate Install (WHMCS in a Subfolder or Subdomain)
A separate install puts WordPress at your root domain and WHMCS in its own subfolder, such as /clients or /billing, or on a dedicated subdomain. This needs no special plugin or template, but the two sites stay visually disconnected unless you style each one by hand.
The subfolder-versus-subdomain choice mostly comes down to SSL and isolation, per general WHMCS.Community practice. A subfolder shares one SSL certificate across your site, WHMCS, and any live-chat add-on. A subdomain isolates the billing system more cleanly but needs its own certificate, either a dedicated SSL or a wildcard or multi-domain certificate covering both. That isolation is also a security call. WordPress and its many plugins are the more common breach target. A subfolder install puts your billing behind that same attack surface, per WHMCS.Community.
Method 2: Bridge Plugin (WHMPress and Similar Tools)
A Bridge plugin pulls live WHMCS data into WordPress through shortcodes, rendering the cart, pricing tables, and client area as native-looking WordPress pages. The link runs on your WHMCS API credentials, which the plugin uses to read live products, pricing, and client data. WHMPress ships a WP-WHMCS Toolkit built from live-data sale pages, a one-page checkout, and a full client-area portal inside WordPress. It works with Elementor, WPBakery, Avada, and Gutenberg, and it supports WHMCS 8.x and 9.x.
The honest tradeoff is cost and fragility. WHMPress licenses its bridge modules per year, not once. Each module carries its own recurring annual fee, so the connector stays a standing cost rather than a one-time purchase. Every module license includes the module, free updates, and multi-level technical support, per WHMPress's own site.
That recurring cost sits on top of a real maintenance dependency. The category's leading free connector, i-Plugins WHMCS Bridge, had its WordPress.org listing closed on July 6, 2026, after roughly four years without an update. Its own reviews describe a cart URL returning a 404 error and checkout redirection breaking after a WHMCS update. Threads on Reddit's r/WHMCS reach the same verdict, that the free bridge no longer works and its checkout page fails.
A WHMCS Bridge sits between two systems that each update on their own schedule. Any bridge plugin inherits that same update-lag risk, not only the two named products above. It also widens your attack surface, since a WordPress plugin or theme vulnerability can now reach the billing data rendered inside WordPress.
Method 3: Matching WHMCS Templates, No Bridge (MaxHost's Approach)
Matching WHMCS templates skip the connector plugin entirely. A themed WHMCS client-area template installs directly into your WHMCS instance. WHMCS then renders in your brand's design, with no live sync layer pulling data into WordPress.
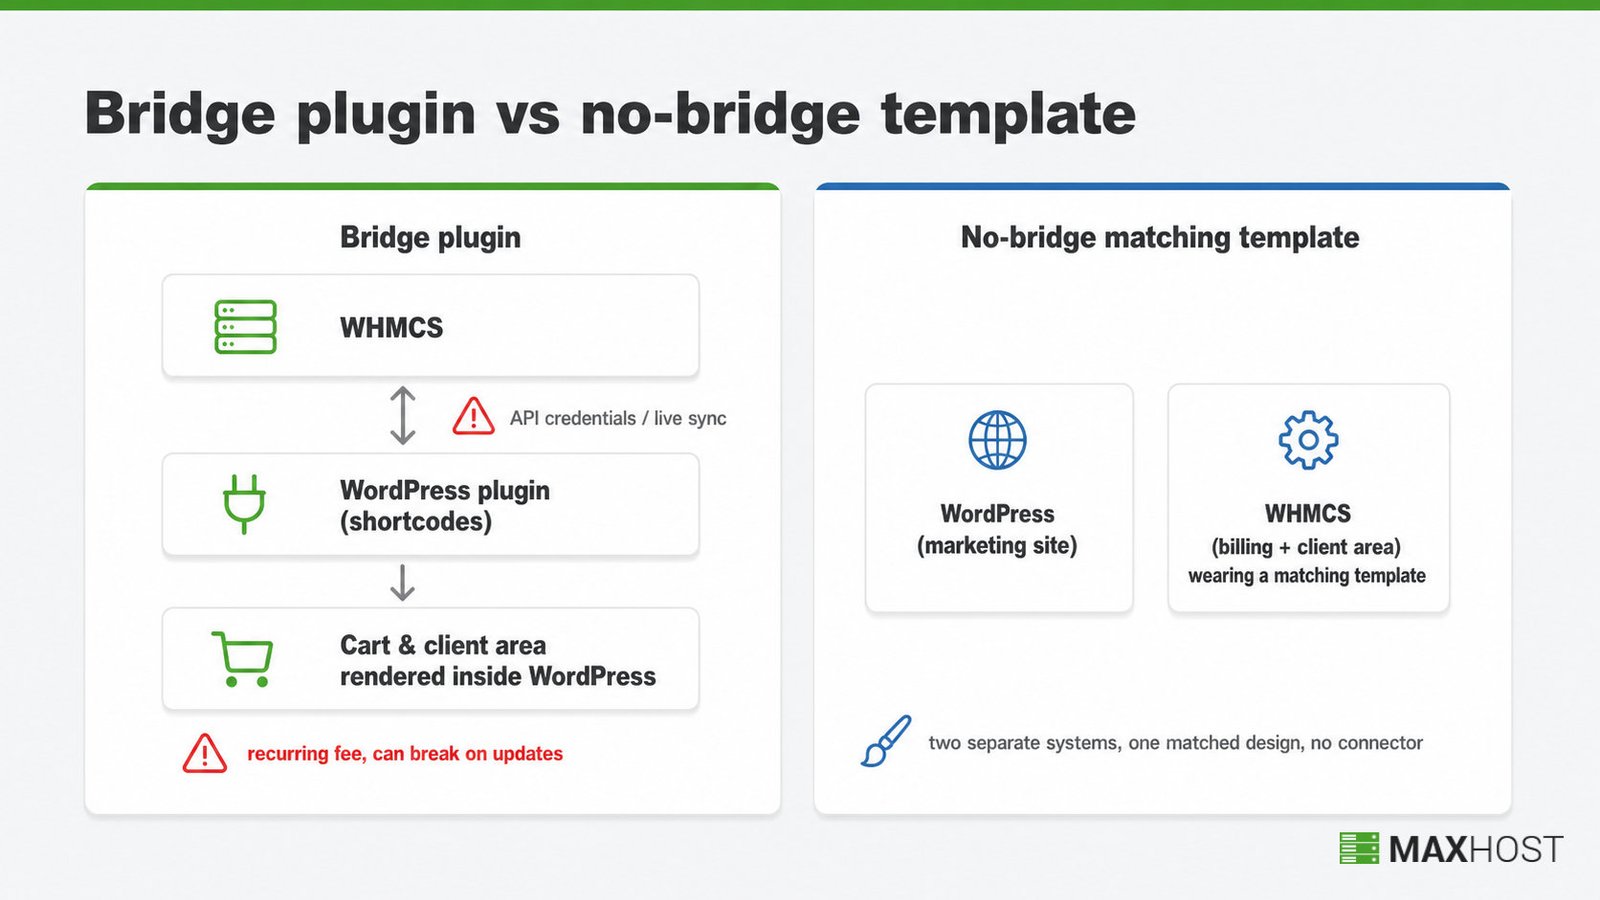
WordPress and WHMCS stay two separate systems under this method. They simply look unified, because the WHMCS side wears a template built to match. MaxHost's WHMCS integration works this way by default. Here is exactly how to set this up in MaxHost.
Before You Begin: What You Need for MaxHost's No-Bridge Method
MaxHost's Regular License, $49 one time, covers every step below if you run your own hosting business. You need WHMCS admin access, FTP or cPanel access to your WHMCS install, and the theme downloaded before you start.
That is the approach MaxHost ships with, out of the box: no bridge plugin, no shortcode, and no recurring connector fee. Confirm the following before Step 1:
- WHMCS admin access with permission to change System Settings
- FTP or cPanel access to your WHMCS install's file directory
- The MaxHost theme purchased and downloaded from ThemeForest
- Your exact WHMCS version identified, since the template folder depends on it
If you have not set up WHMCS itself yet, do that first. This guide assumes a running WHMCS install already connected to a hosting server.
The Extended License applies only if you resell or redistribute the finished site as a paid product. See the full MaxHost pricing and licensing breakdown if that applies to you.
See MaxHost's 20 WHMCS layouts and 8 hosting demos in the live MaxHost demo before you commit to one design.
How to Integrate WHMCS with WordPress Using MaxHost: Step-by-Step
Setting up MaxHost's no-bridge method runs in five steps, from importing a hosting demo to matching branding across both systems.
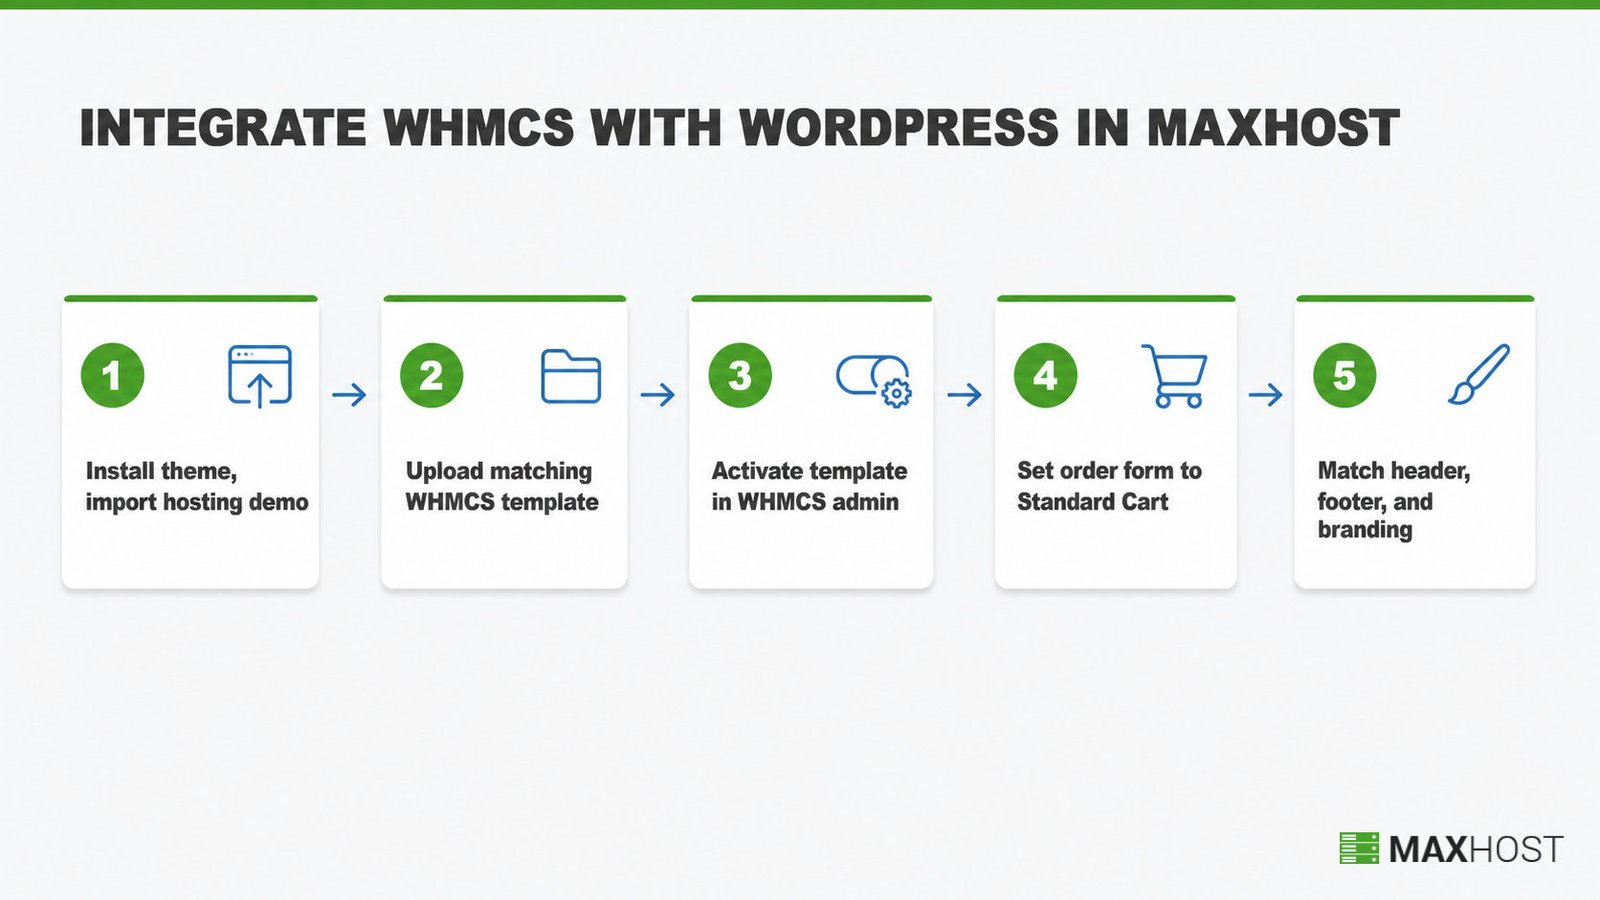
Step 1: Install the MaxHost Theme and Import a Hosting Demo
This step gets your public WordPress site live using one of MaxHost's hosting-specific homepage layouts.
In WordPress Admin, go to Appearance > Themes, upload the MaxHost theme zip file, then activate it. Open the theme's demo importer and pick one of the 8 hosting homepage demos.
- Web Hosting
- Hosting Plus
- Server Hosting
- CyberPanel Hosting
- HotCloud Hosting
- Agency Hosting
- Hosting Solutions
Done looks like a live WordPress site running one imported hosting demo. Choose the demo closest to your actual plan lineup. Starting from that demo takes far less editing than rebuilding sections from the Main Demo.
Step 2: Upload the Matching WHMCS Template to Your WHMCS Install
This step places the correct WHMCS client-area template inside your WHMCS installation, matched to your exact WHMCS version.
Identify your WHMCS version first, then connect by FTP or your host's cPanel File Manager into your WHMCS install's /templates directory. Upload the matching folder from the 13 version-specific folders MaxHost ships, for example maxhostaltv90-tw for WHMCS 9.0.0 or later, or maxhostaltv813-tw for WHMCS 8.13.x.
Done looks like the correct template folder sitting inside /templates. If a folder seems to be missing, check the bundled Read-me.txt file before assuming it is absent.
Step 3: Activate the Template in WHMCS Admin
This step switches your live WHMCS client area over to the MaxHost-matched design.
In WHMCS Admin, go to System Settings > General Settings > General tab, open the Template dropdown, select Maxhost-Alt-Style-2, then click Save Changes.
Done looks like the WHMCS client area rendering in the MaxHost skin the next time you log in or reload it.
Step 4: Set the Order Form to Standard Cart
This step points new orders at the cart template MaxHost's design was built for.
In WHMCS Admin, go to System Settings > General Settings > Ordering tab and select Standard Cart as your default order form.
Done looks like a new order rendering through the matched cart layout, not a generic template. Skipping this step is the most common reason a MaxHost-styled client area still shows a mismatched checkout.
Step 5: Match Header, Footer, and Branding Across Both Sites
This step gets the same logo, colors, and header and footer style showing on both the WordPress site and the WHMCS client area.
On the WordPress side, go to Appearance > Theme Options for logo, color, header, and footer settings. On the WHMCS side, open your template's header.tpl and footer.tpl files for anything Theme Options does not cover. Use the template's CSS and image folders for colors, logos, and the favicon.
Done looks like matching logo, color, and header and footer style on both sites. Edit only inside the section marked "CODES FROM MAXHOST THEME HEADER/FOOTER GOES BELOW" in header.tpl and footer.tpl. Content above that marker is what breaks the template on a future update.
Compare your finished client area against MaxHost's other 20 WHMCS layouts and 8 hosting demos to confirm you picked the closest visual match.
Tips for a Clean WHMCS and WordPress Match in MaxHost
The single most impactful tip is matching your template folder to your exact WHMCS version before you touch any branding. A version mismatch is the most common setup failure MaxHost buyers hit.
- Match the template to your WHMCS version first. Confirm your exact version, then upload the corresponding folder, before you edit colors, logos, or header text.
- Keep header.tpl and footer.tpl edits inside the marked section. Editing above the "CODES FROM MAXHOST THEME HEADER/FOOTER GOES BELOW" comment is what breaks the template on a future WHMCS update.
- Set Standard Cart before you test checkout, not after. Testing against the wrong order form hides real checkout issues until customers hit them.
- Know when you have outgrown the bundled layouts. If none of the 20 WHMCS layouts fit your brand, that is a signal to compare more options in our best WHMCS WordPress themes roundup, not to search for a hidden MaxHost setting.
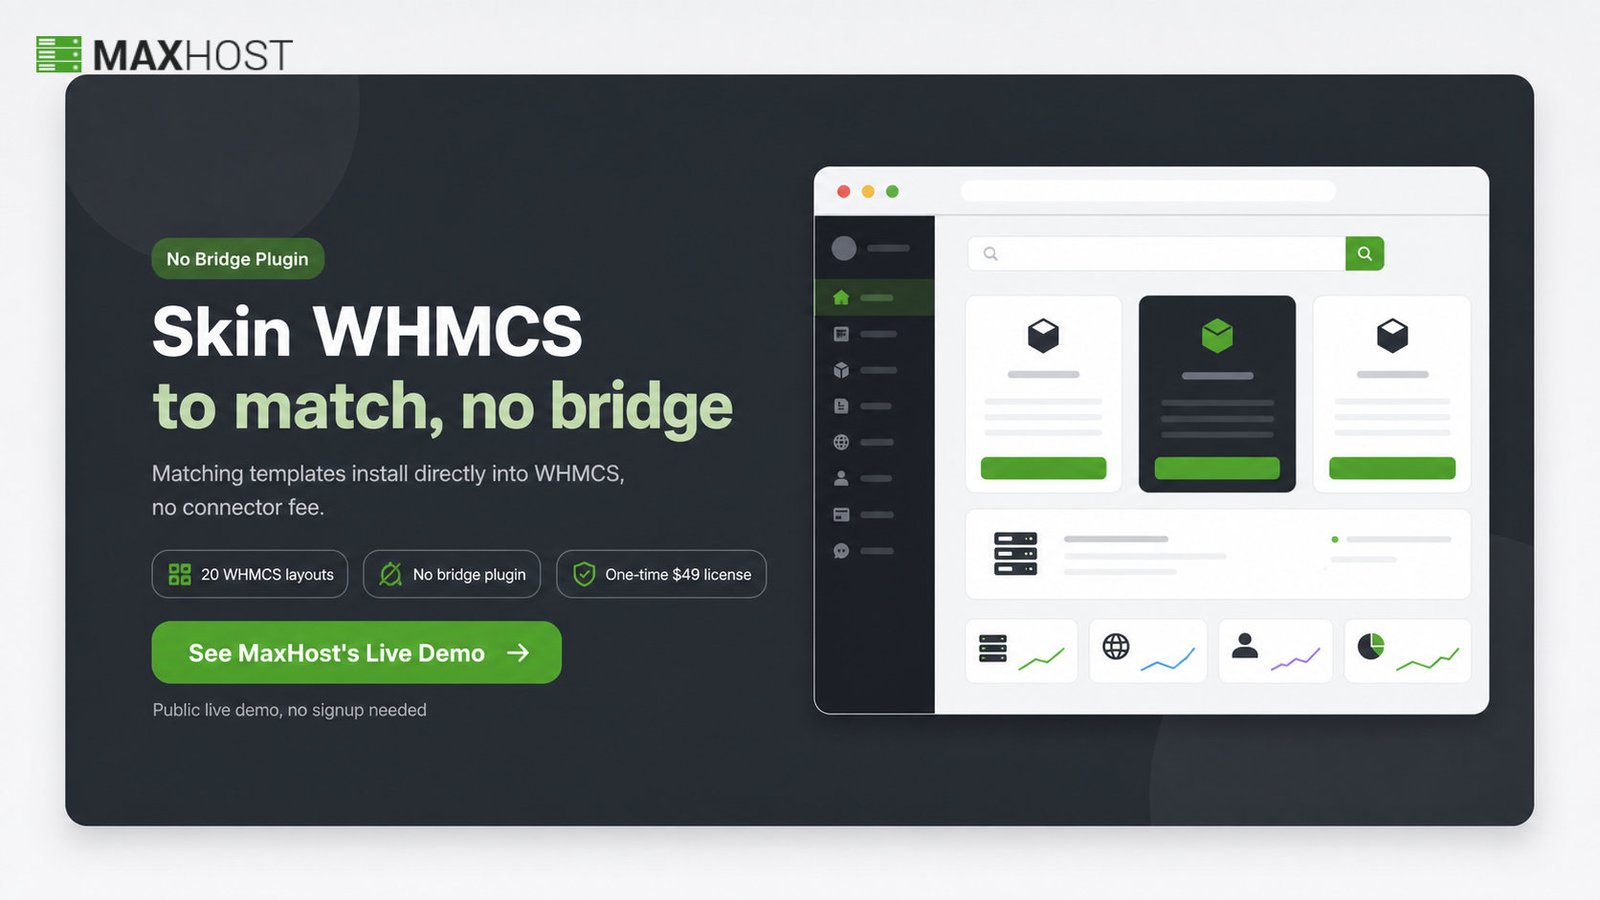
See every layout live in the MaxHost demo before you decide which one to build against.
FAQs
Do I need a bridge plugin to connect WHMCS and WordPress?
No. A separate install, a Bridge plugin, and a matching WHMCS template are the three real methods, and only the Bridge plugin route needs a connector. MaxHost's answer is Method 3: a matching template installed directly into WHMCS, no bridge required.
Is there a free WHMCS bridge plugin for WordPress?
The main free option, i-Plugins WHMCS Bridge, closed its WordPress.org listing in 2026 after years without updates. Recent user reports say its checkout also breaks. Paid connectors like WHMPress remain, but they bill per module every year. MaxHost's matching-template method needs no bridge at all.
Should WHMCS live in a subfolder or a subdomain?
Either works, but a subdomain is the safer default. It isolates billing from WordPress's larger plugin attack surface, though it needs its own SSL certificate. A subfolder shares one certificate across your site and WHMCS but ties billing to WordPress security, per WHMCS.Community.
Which WHMCS version does MaxHost's template support?
MaxHost's template supports WHMCS 8.0.x through 9.0.x across 13 version-specific template folders. maxhostaltv90-tw is the recommended folder for WHMCS 9.0.0 and later.
Do I need WHM or cPanel access to install this?
You need cPanel or FTP access to your WHMCS install's file directory, not WHM access. WHM manages the server itself, while cPanel and FTP reach the individual files this setup touches.
Do I need the Extended License to use MaxHost's WHMCS templates for my own hosting business?
No. The Regular License, $49 one time, covers running your own hosting business on the finished site. The Extended License, $2,950, is only required if you resell or redistribute the built site as a charged end product. If WHMCS itself is not the right fit for your business, see WHMCS alternatives like Blesta before you build any integration around it.
Can I still customize colors, logo, and header and footer after installing the WHMCS template?
Yes. Change colors, logo, header, and footer on the WordPress side through Appearance > Theme Options. On the WHMCS side, edit the template's header.tpl and footer.tpl files within the marked sections, plus the template's CSS and image folders.
What order form should I use with MaxHost's WHMCS template?
Use Standard Cart, set under System Settings > General Settings > Ordering in WHMCS Admin. MaxHost's template targets Standard Cart specifically, so a different order form produces a mismatched checkout.
Does MaxHost's WHMCS template break when WHMCS updates?
Not silently. The template is version-matched across 13 folders, so a major WHMCS upgrade may require switching to the matching folder rather than editing your live template. That is a real maintenance step, not a silent break, and not a set-and-forget claim either.
Can I use MaxHost's WHMCS template with only Elementor, or do I need WPBakery too?
Either page builder works on its own for the WordPress side. MaxHost bundles both Elementor and WPBakery, but the WHMCS template files are unrelated to which builder you choose for your WordPress pages.
This guide covers the billing integration only. For the full site build, see a WordPress theme built for a web hosting company.