Toggle Mobile Menu
Dominion is a WordPress plugin which allow you easily to check domain name availability from your WordPress site. You can search for or check any generic domains. Here you will find Documentation, Reference Materials, and Tutorials for Dominion Domain Checker Plugin.

The installation process of Dominion Pro – WP Domain Checker is quite simple and straightforward, and shouldn't cause you any troubles at all. Independent of you previous experience with WordPress plugins, you aren't likely to have any problems, just follow these simple steps:
If you are already using the Free version of Dominion plugin, you must Deactivate and Delete that plugin first. Otherwise the Pro version from CodeCanyon will not be installed correctly.
Download & install Envato Market plugin
This plugin can install WordPress themes and plugins purchased from ThemeForest & CodeCanyon by connecting with the Envato Market API using a secure OAuth personal
token. Once your themes & plugins are installed WordPress will periodically check for updates, so keeping your items up to date is as simple as a few clicks.
If you download new plugin version from CodeCanyon please follow these steps to upgrade from the existing version:
1. Go to your FTP and open WordPress plugins folder
2. Delete the old "the_dominion" folder
3. Upload the new version of Dominion plugin there
4. Go to WP-admin panel, open Plugins page.
5. Deactivate Dominion Pro, and then activate it again.
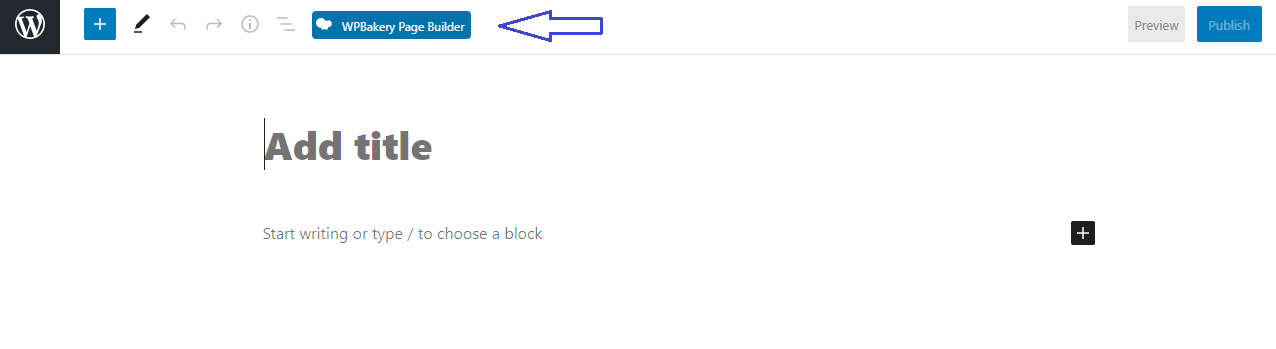
Navigate to WP-Admin > Pages > Add New and click on the WPBakery Page Builder button.
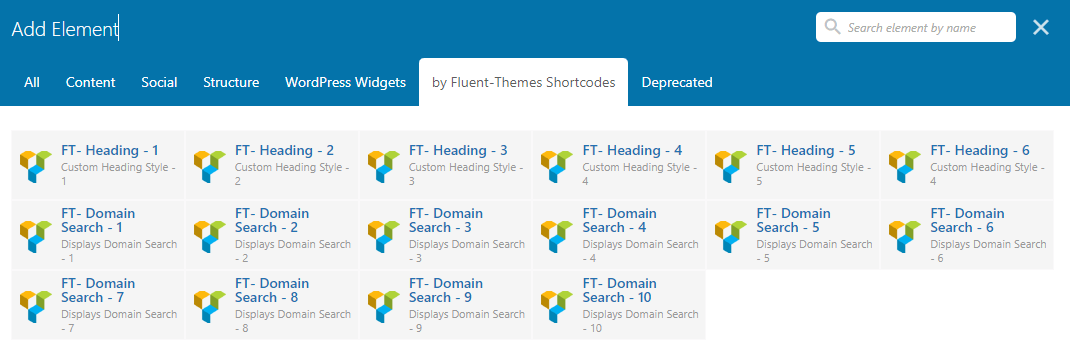
Click on the Backend Editor, then click on the Add Element button.
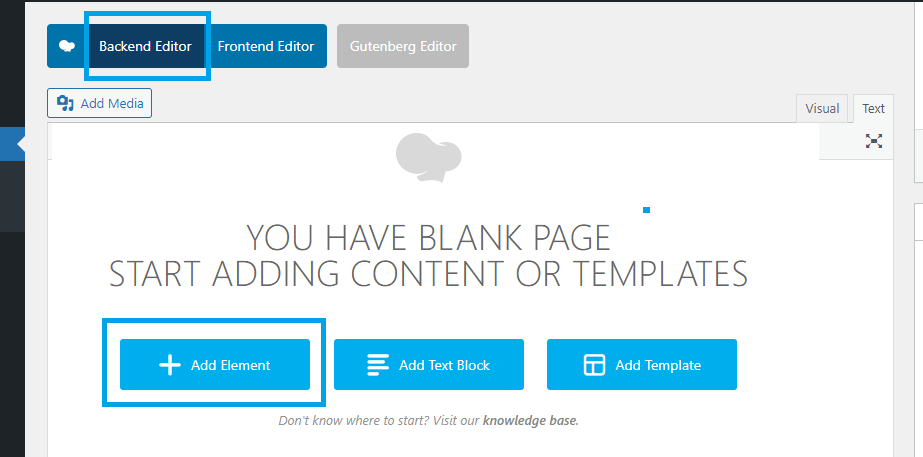
You will get an window with few tabs, from there click on the by Fluent-Themes Shortcodes tab.
In the by Fluent-Themes Shortcodes tab you will find all the elements/layouts there; just click on your chosen layout.
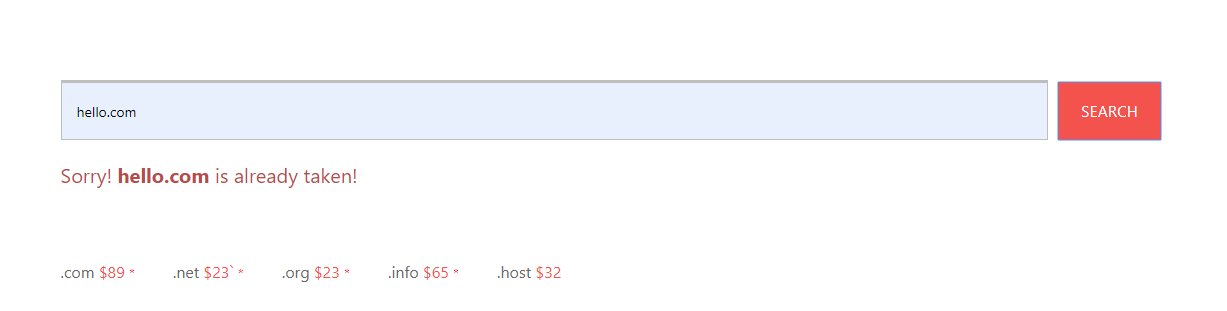
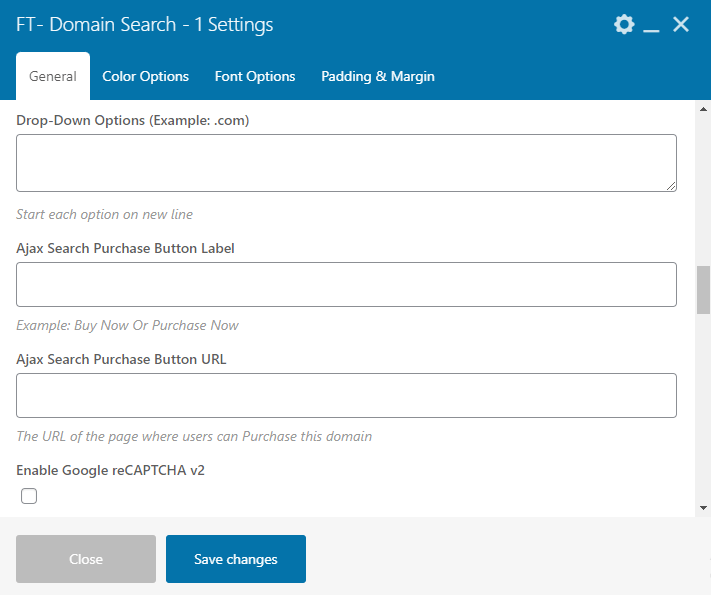
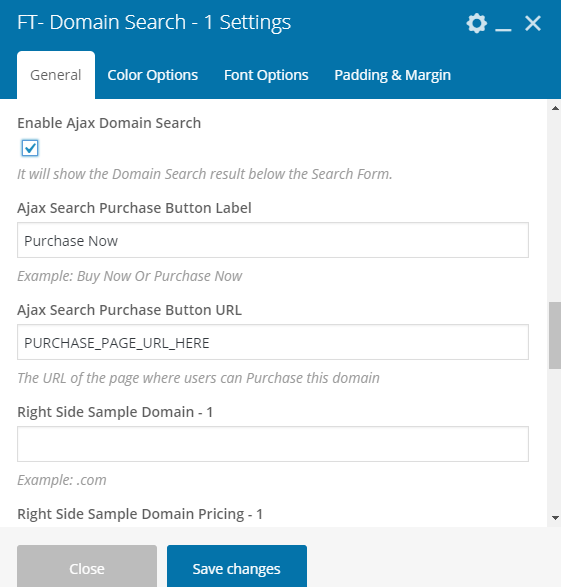
Now you will find the settings fields to design and setup your Domain Checker form as your needs. Fill in the fields with your text, choose background image/color, choose font-family, font-size etc.
After completing the settings click on Save Changes button and Publish the page.
You can make the section of the domain checker form Full-Width by clicking on the 'edit' icon of the row. Choose Stretch row and content (no paddings) from the Row Stretch drop-down.

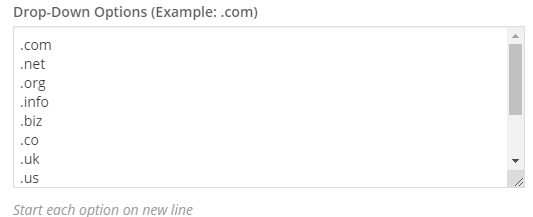
If you need to allow the users to search for only specific TLDs, you can do so by inputting only those TLDs in the drop-down field given in the element settings.
WHMCS integration is easy with Dominion. All you need to do is just put an URL in Purchase Button URL field. If you have your WHMCS installed in your server, you will have
a domain purchase url like this YOUR_SITES_WHMCS_PAGE/cart.php?a=add&domain=register&query=. You just need to put that url in the given field of the element settings.
If you do not want to use WHMCS to sell your domains, you can put your custom URL in Purchase Button URL field of the element settings. However, domain search result will not be automatically integrated with your custom URL. Dominion is ready to be directly integrated with WHMCS domain sales page only.
Navigate to WP-Admin > Pages > Add New and add the Shortcode block of your WordPress Gutenberg editor.
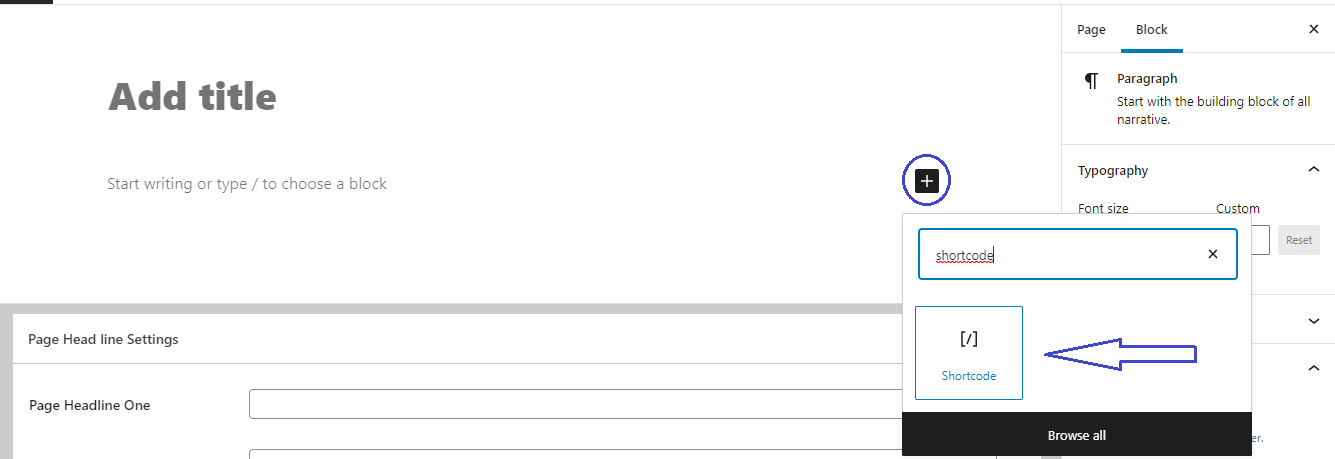
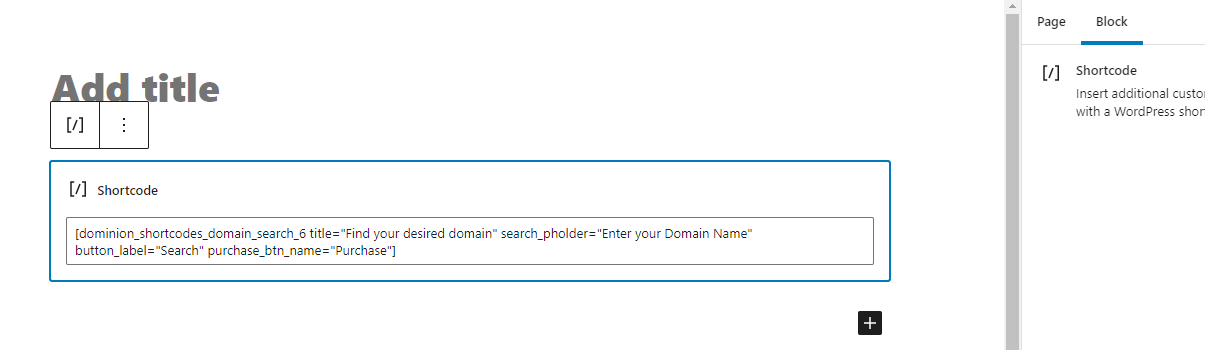
You will get a field to insert your shortcode in the Shortcode block. Input there your shortcode like the example given here and 'Publish' the page.
There are 10 Layouts of Dominion Domain Checker form. You can use any of the following 10 shortcodes to show domain checker form in your page or post:
[dominion_shortcodes_domain_search_1]
[dominion_shortcodes_domain_search_2]
[dominion_shortcodes_domain_search_3]
[dominion_shortcodes_domain_search_4]
[dominion_shortcodes_domain_search_5]
[dominion_shortcodes_domain_search_6]
[dominion_shortcodes_domain_search_7]
[dominion_shortcodes_domain_search_8]
[dominion_shortcodes_domain_search_9]
[dominion_shortcodes_domain_search_10]
Here is a simple example of a shortcode with a few parameters:
[dominion_shortcodes_domain_search_6 title="Find your desired domain" search_pholder="Enter your Domain Name" button_label="Search"]
In the above example we have used Domain Search Six layout in the shortcode. The title, search_pholder and button_label are parameters of the shortcode. You can change the values of the parameters as you need. There are many more parameters to use in the shortcode to take full control over the Domain search form. Find the full list of the parameters here.
Now lets take a look at another example to make it more clear. Lets say you want to use Domain Search Nine layout and you want to add another parameter in order to add a Purchase Button in your Domain search result. To do that, the above example shortcode will be changed like this:
[dominion_shortcodes_domain_search_9 title="Find your desired domain" search_pholder="Enter your Domain Name" button_label="Search" purchase_btn_name="Purchase"]
You see, we have changed the shortcode from dominion_shortcodes_domain_search_6 to dominion_shortcodes_domain_search_9 to get "Layout Nine" instead of "Layout Six"; and we have added a new parameter with the shortcode purchase_btn_name to add a Purchase button. Full list of the parameters given here, you can choose from the list and use in your shortcode.
| Parameter | Example |
|---|---|
| search_pholder | [dominion_shortcodes_domain_search_1 search_pholder="Enter your Domain Name"] |
| button_label | [dominion_shortcodes_domain_search_1 button_label="Search"] |
| purchase_btn_name | [dominion_shortcodes_domain_search_1 purchase_btn_name="Purchase"] |
| purchase_btn_url | [dominion_shortcodes_domain_search_1 purchase_btn_url="#"] |
| domain |
[dominion_shortcodes_domain_search_1 domain=".com
|
| title | [dominion_shortcodes_domain_search_1 title="Search Your Desired Domain Here"] |
| title_tag | [dominion_shortcodes_domain_search_1 title_tag="h1"] |
| button_bg_color | [dominion_shortcodes_domain_search_1 button_bg_color="#000"] |
| button_bg_hover_color | [dominion_shortcodes_domain_search_1 button_bg_hover_color="#fff"] |
Full list of the parameters can be found here.
Lets say you want to set the form button text with "Find", purchase domain text with "Buy Now" and input field place holder as "Domain Name Here". So, add
"purchase_btn_name", "button" and "search_pholder" parameters to the shortcode like this:
[dominion_shortcodes_domain_search_1 button_label="Find" purchase_btn_name="Buy Now" search_pholder="Domain Name Here"]

| Parameter | Usage |
|---|---|
image_one |
Use for Parallax Background Image. Value of this parameter can be any image url |
title |
Use for Title/Heading. Value of this parameter can be any text |
title_tag |
Use for title tag. Value of this parameter can be h1, h2, h3, h4, h5 or h6 |
sub_title |
Use for sub title. Value of this parameter can be any text |
text |
Use for text below the title/sub-title. Value of this parameter can be any text |
search_pholder |
Use for Search Field Place Holder Text. Value of this parameter can be any text |
button_label |
Use for Search Button Label. Value of this parameter can be any text |
search_action_url |
Use for Search Action URL, not required if you enable Ajax Search. Value of this parameter can be any url |
ajax_search |
Use to Enable/Disable Ajax Domain Search. Value of this parameter can be 'true' or 'false' |
domain |
Use for inputting Domain TLDs. Value of this parameter can be any domain tlds like .com, .net etc. And each should be separated by space |
purchase_btn_name |
Use for Ajax Search Purchase Button Label. Value of this parameter can be any text |
purchase_btn_url |
Use for Ajax Search Purchase Button URL. Value of this parameter can be any url |
recaptcha |
Use to Enable/Disable Google reCaptcha v2. Value of this parameter can be 'true' or 'false' |
recaptcha_sitekey |
Use for Google reCAPTCHA v2 Site Key. Value of this parameter can be any text |
recaptcha_serversidekey |
Use for Google reCAPTCHA v2 Server Side Key. Value of this parameter can be any text |
crossed_top |
Use to Enable/Disable Crossed shape top section. Value of this parameter can be 'true' or 'false' |
crossed_bottom |
Use to Enable/Disable Crossed shape bottom section. Value of this parameter can be 'true' or 'false' |
input_width |
Use to control width of the input area in desktop. Value of this parameter can be any pixel size. For example: 220px |
input_width_mobile |
Use to control width of the input area in mobile. Value of this parameter can be any pixel size. For example: 220px |
unique_class_name |
Use for controlling the class for styling varius parts of the section. Value of this parameter can be any unique text like unique_clss_1 |
title_font_family |
Use for Title Font Options. Value of this parameter should be google font family name with font-style. For example: font_family:Open%20Sans|font_style:normal |
title_font_size |
Use for Title Font Size. Value of this parameter can be any pixel size. For example: 22px |
title_font_weight |
Use for Title Font Weight. Value of this parameter can be 300, 400, 500, 600, 700, 800 OR 900 |
title_line_height |
Use for Title Line Height. Value of this parameter can be any pixel size. For example: 22px |
sub_title_font_family |
Use for Sub Title Font Options. Value of this parameter should be google font family name with font-style. For example: font_family:Open%20Sans|font_style:normal |
sub_title_font_size |
Use for Sub Title Font Size. Value of this parameter can be any pixel size. For example: 22px |
sub_title_font_weight |
Use for Sub Title Font Weight. Value of this parameter can be 300, 400, 500, 600, 700, 800 OR 900 |
sub_title_line_height |
Use for Sub Title Line Height. Value of this parameter can be any pixel size. For example: 22px |
text_font_size |
Use for Text Font Size. Value of this parameter can be any pixel size. For example: 22px |
text_font_weight |
Use for Text Font Weight. Value of this parameter can be 300, 400, 500, 600, 700, 800 OR 900 |
text_line_height |
Use for Text Line Height. Value of this parameter can be any pixel size. For example: 22px |
title_color |
Use for choosing Title color. Value of this parameter can be any color code. For example: #000 |
sub_title_color |
Use for choosing Sub-Title color. Value of this parameter can be any color code. For example: #000 |
text_color |
Use for choosing Text color. Value of this parameter can be any color code. For example: #000 |
text_hover_color |
Use for choosing Text hover color. Value of this parameter can be any color code. For example: #000 |
input_text_color |
Use for choosing Input Text color. Value of this parameter can be any color code. For example: #000 |
input_placeholder_color |
Use for choosing Input Placeholder color. Value of this parameter can be any color code. For example: #000 |
input_bg_color |
Use for choosing Input field background color. Value of this parameter can be any color code. For example: #000 |
button_text_color |
Use for choosing Button Text color. Value of this parameter can be any color code. For example: #000 |
button_text_hover_color |
Use for choosing Button Text hover color. Value of this parameter can be any color code. For example: #000 |
button_bg_color |
Use for choosing Button background color. Value of this parameter can be any color code. For example: #000 |
button_bg_hover_color |
Use for choosing Button background hover color. Value of this parameter can be any color code. For example: #000 |
result_negative_color |
Use for choosing negative search result color. Value of this parameter can be any color code. For example: #000 |
bg_color |
Use for choosing section Background color. Value of this parameter can be any color code. For example: #000 |
bg_hover_color |
Use for choosing section Background hover color. Value of this parameter can be any color code. For example: #000 |
padding |
Use for controlling section padding. Value of this parameter can be any pixel sizes. For example: 5px 8px 2px 10px |
margin |
Use for controlling section margin. Value of this parameter can be any pixel sizes. For example: 5px 8px 2px 10px |
If you need to allow the users to search for only specific TLDs, you can do so by inputting only those TLDs in the domain parameter of the shortcode.
Example of allowing .com, .net and .info to search: [dominion_shortcodes_domain_search_1 domain=".com .net .info"]
If you have your WHMCS installed in your server, you will have a domain purchase url like this YOUR_SITES_WHMCS_PAGE/cart.php?a=add&domain=register&query=. You just need to put that url in the purchase_btn_url parameter of your shortcode.
If you do not want to use WHMCS to sell your domains, you can put your domain sales page URL in the purchase_btn_url parameter of your shortcode.
".com"
".eu.com"
".uk.com"
".br.com"
".cn.com"
".gb.com"
".hu.com"
".no.com"
".qc.com"
".sa.com"
".se.com"
".us.com"
".uy.com"
".za.com"
".com.ar"
".com.ng"
".app"
".airforce"
".army"
".ac"
".academy"
".actor"
".ae"
".aero"
".af"
".ag"
".agency"
".ai"
".am"
".archi"
".arpa"
".as"
".asia"
".associates"
".at"
".au"
".aw"
".ax"
".az"
".bar"
".bargains"
".be"
".berlin"
".bg"
".bi"
".bike"
".biz"
".bj"
".black"
".blue"
".blackfriday"
".blog"
".bn"
".boutique"
".beer"
".br"
".build"
".builders"
".bw"
".by"
".ca"
".cab"
".camera"
".camp"
".captial"
".cards"
".career"
".careers"
".cat"
".catering"
".cc"
".center"
".ceo"
".cf"
".ch"
".cheap"
".christmas"
".ci"
".cl"
".cleaning"
".click"
".clothing"
".club"
".cn"
".co.uk"
".computer"
".codes"
".coffee"
".college"
".cologne"
".community"
".company"
".construction"
".contractors"
".cooking"
".cool"
".coop"
".country"
".cruises"
".cx"
".cz"
".dating"
".de"
".democrat"
".desi"
".diamonds"
".diet"
".direct"
".directory"
".dk"
".dm"
".domains"
".download"
".dz"
".ec"
".edu"
".edu.au"
".edu.cn"
".edu.es"
".education"
".ee"
".email"
".engineering"
".engineer"
".enterprises"
".equipment"
".estate"
".eu"
".eus"
".events"
".expert"
".exposed"
".express"
".fans"
".farm"
".feedback"
".fi"
".fish"
".fishing"
".fitness"
".fit"
".flights"
".florist"
".fo"
".football"
".foundation"
".fr"
".frogans"
".fund"
".furniture"
".futbol"
".ga"
".gal"
".gb.net"
".gd"
".gg"
".gi"
".gift"
".gl"
".glass"
".gmbh"
".gop"
".gov"
".gov.br"
".gov.cn"
".gov.ec"
".gov.il"
".gov.in"
".gov.mm"
".gov.mx"
".gov.sg"
".gov.tr"
".gov.za"
".graphics"
".gripe"
".gs"
".guitars"
".guru"
".gy"
".haus"
".healthcare"
".help"
".hk"
".hn"
".holiday"
".hosting"
".horse"
".house"
".how"
".hr"
".ht"
".hu"
".id"
".ie"
".il"
".im"
".immobilien"
".in"
".industries"
".info"
".institute"
".int"
".international"
".io"
".iq"
".ir"
".is"
".it"
".je"
".jobs"
".jp"
".kaufen"
".ke"
".kg"
".ki"
".kim"
".kitchen"
".kiwi"
".koeln"
".kr"
".kz"
".la"
".land"
".lease"
".li"
".lighting"
".limo"
".link"
".london"
".lt"
".lu"
".luxury"
".lv"
".ly"
".ma"
".management"
".mango"
".marketing"
".md"
".me"
".media"
".menu"
".mg"
".miami"
".mk"
".ml"
".mn"
".mo"
".mobi"
".moda"
".monash"
".mp"
".ms"
".mu"
".museum"
".mx"
".my"
".na"
".name"
".navy"
".nc"
".net"
".new"
".nf"
".ng"
".ninja"
".nl"
".no"
".nu"
".nz"
".om"
".onl"
".org"
".org.au"
".org.uk"
".page"
".paris"
".partners"
".parts"
".pe"
".pf"
".photo"
".photography"
".photos"
".pics"
".pictures"
".pink"
".pl"
".place"
".plumbing"
".pm"
".post"
".pr"
".pro"
".productions"
".property"
".properties"
".pt"
".pub"
".pw"
".qa"
".quebec"
".re"
".recipes"
".red"
".reisen"
".rentals"
".repair"
".report"
".rest"
".restaurant"
".reviews"
".rich"
".ro"
".rocks"
".rodeo"
".rs"
".ru"
".ruhr"
".ryukyu"
".sa"
".saarland"
".sarl"
".sb"
".sc"
".se"
".services"
".sexy"
".sg"
".sh"
".shiksha"
".shoes"
".scot"
".srl"
".si"
".singles"
".sk"
".sm"
".sn"
".so"
".social"
".solar"
".solutions"
".soy"
".st"
".su"
".supplies"
".supply"
".support"
".surf"
".sx"
".sy"
".systems"
".tattoo"
".tc"
".technology"
".tel"
".tf"
".th"
".tienda"
".tips"
".tk"
".tl"
".tm"
".tn"
".to"
".today"
".tools"
".town"
".toys"
".tr"
".trade"
".training"
".travel"
".tv"
".tw"
".tz"
".ua"
".ug"
".uk"
".uk.net"
".university"
".us"
".uy"
".uz"
".vacations"
".vc"
".ve"
".vegas"
".ventures"
".vet"
".vg"
".viajes"
".villas"
".vision"
".vodka"
".voting"
".voyage"
".vu"
".wang"
".watch"
".wed"
".wf"
".wien"
".wiki"
".works"
".ws"
".xxx"
".xyz"
".yoga"
".yt"
".zm"
".zone"
You need a free software to translate the plugin's all English text in your language. The software name is Poedit. The Poedit is a common program which you can use to translate the plugin. It's available for free on poedit.net.
After you have installed Poedit in your computer, you can open it and select File > Open. Then select the dominion.pot file from the plugin you wish to translate which you can find in the /languages/ folder of Dominion plugin.
Then go through every line of text and translate it to your native language. Afterwards go to "File > Save as" to save the catalog with your language code (for example "dominion-es_ES.po" for Spanish language). Poedit automatically creates a new file "dominion-es_ES.mo" and saves it, too.
After that upload those language files (.po and .mo files you just created) to wp-content/languages/plugins folder using FTP or Cpanel. That's it.
You may find your form section is not displayed in full section, that can happen when there are empty parameters in your shortcode and that's why you are finding only those
elements which are not empty (ie, button_label). The parameters you can use in the shortcode are given here. Some of them are important to get
the form's view like our demo. Those important parameters are:
title [Used for Title/Heading of the section. For example: title="Find Your Domain Name"]
sub_title [Used for sub heading of the section.]
text [Used for text below the title/sub-title.]
domain [Used for inputting Domain TLDs. Value of this parameter can be any domain tlds like .com, .net etc. And each should be placed in new line, like this:domain
= ".com .org .net"]
padding [Used for controlling section padding. For example: padding="5px 8px 2px 10px"]
margin [Used for controlling section margin. For example: margin="5px 8px 2px 10px"]
So, if you add the above parameters with values, your domain checker form should be displayed in full section like our live demo.